This post contains affiliate links. If you choose to purchase I will receive a small commission at no extra cost to you. I use the funds to buy yarn and make more free patterns! I greatly appreciate your support. For more info please see my Terms & Conditions. Thank You!
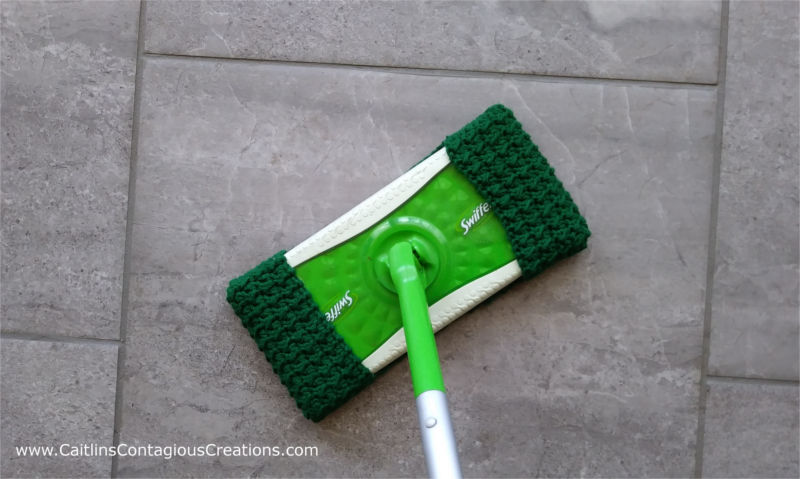
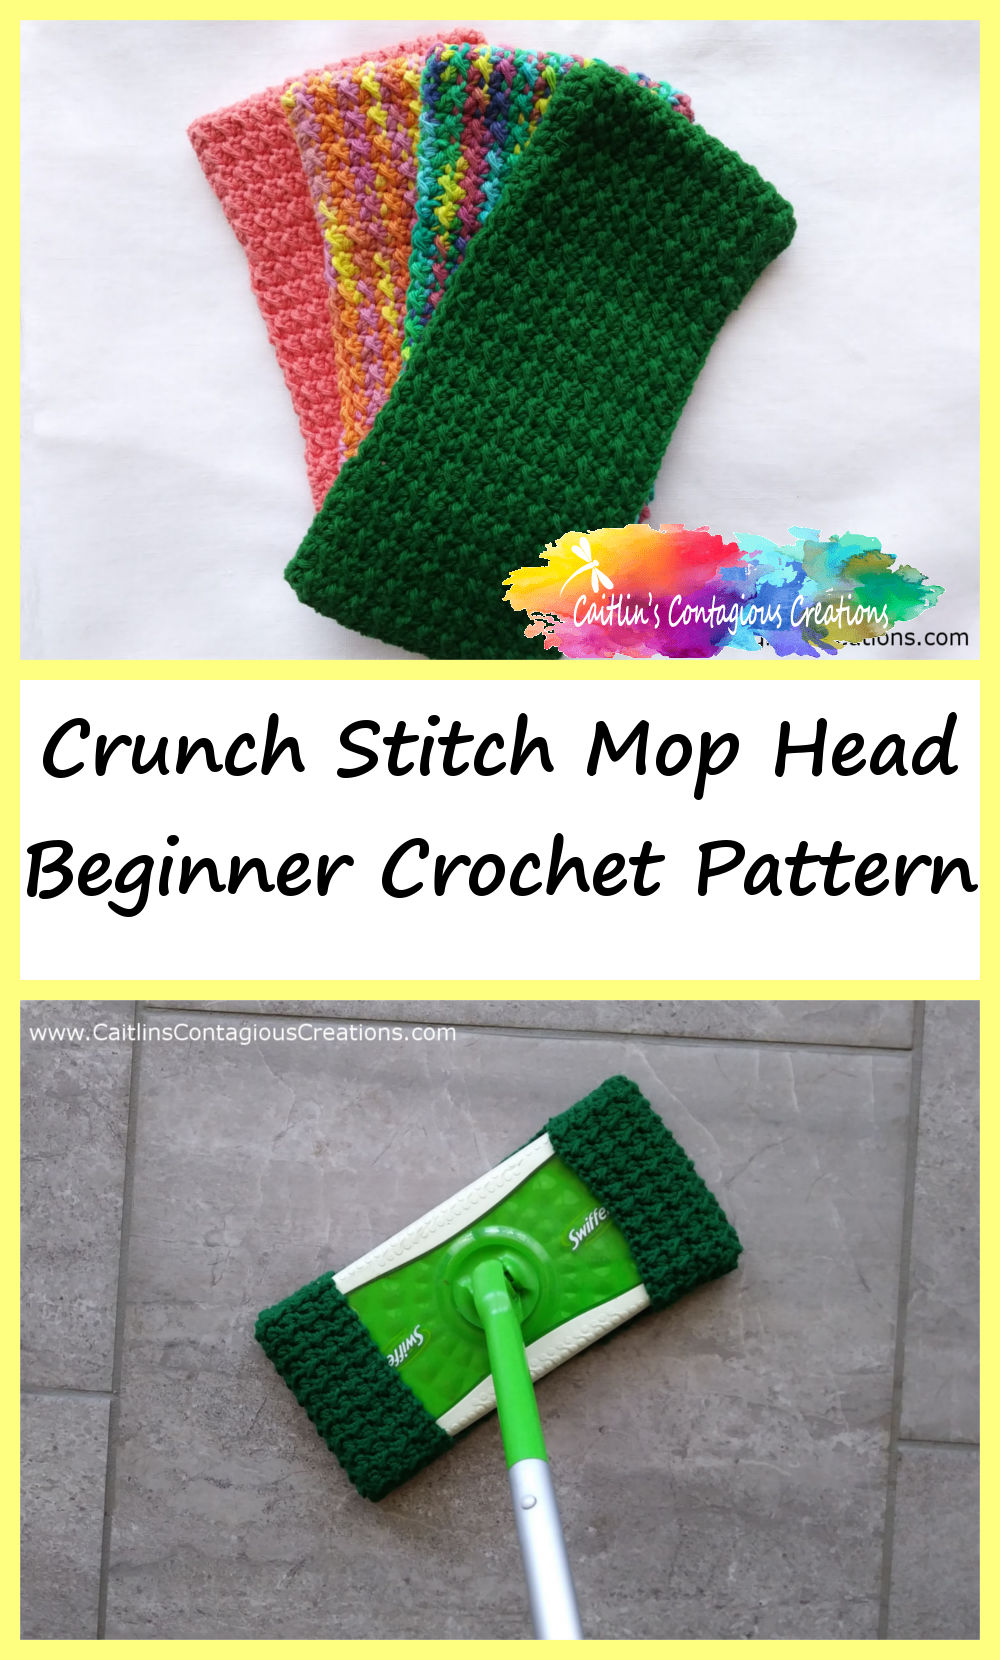
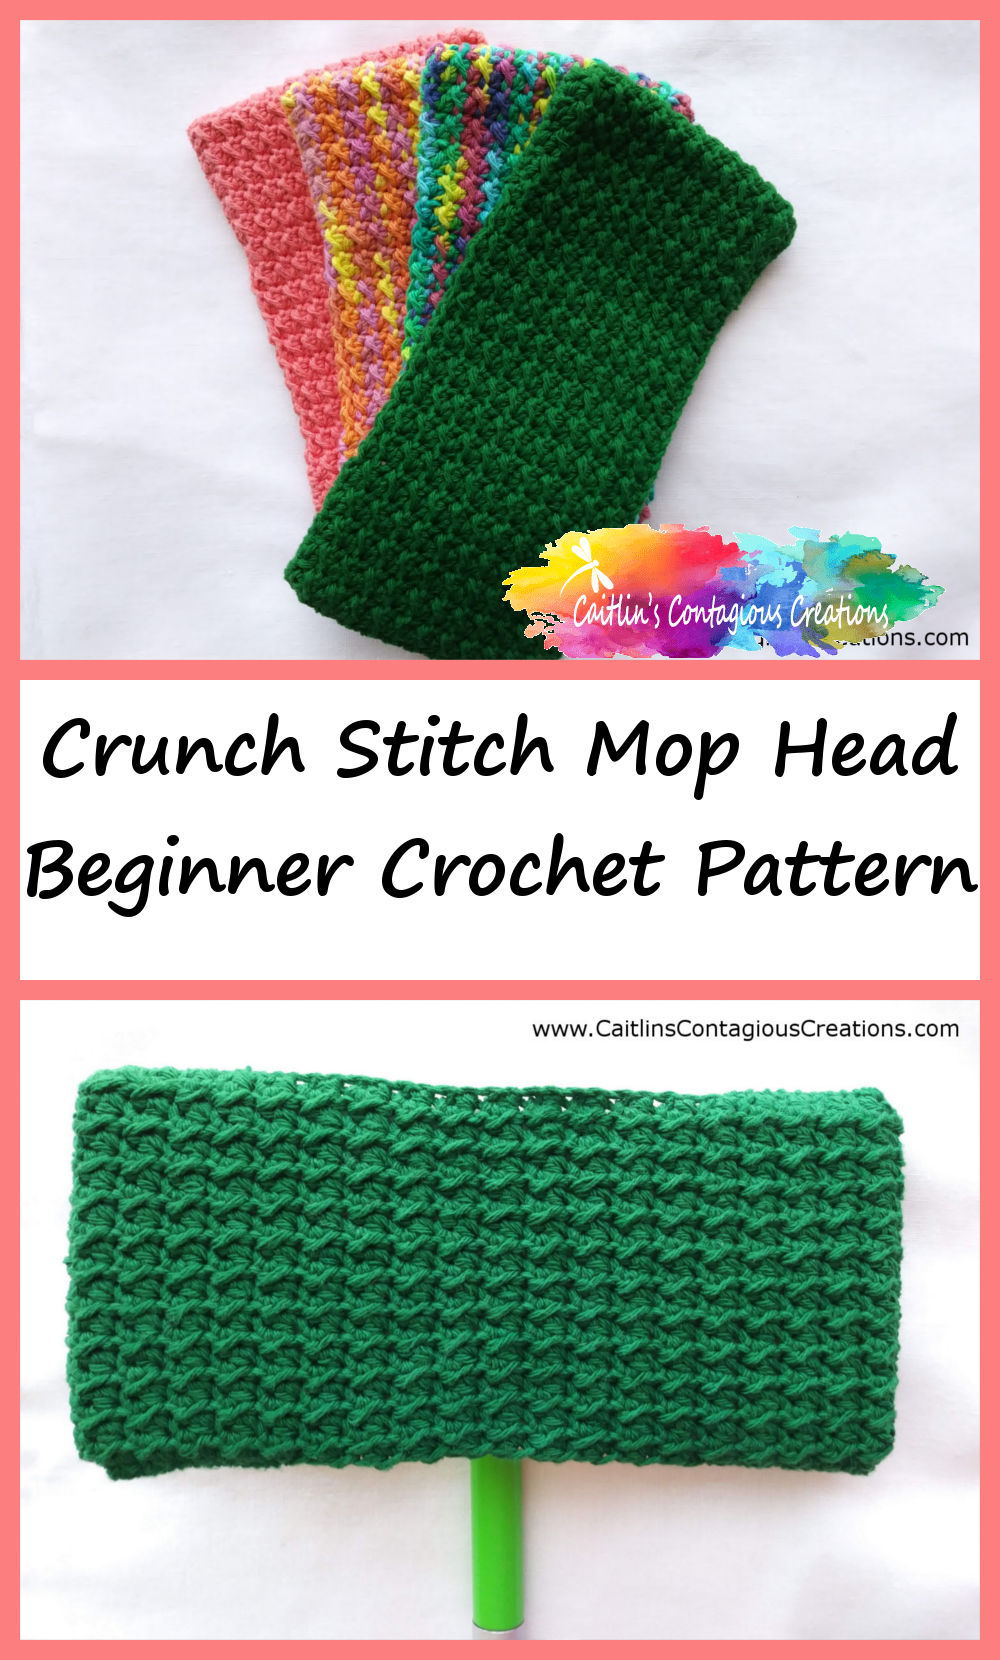
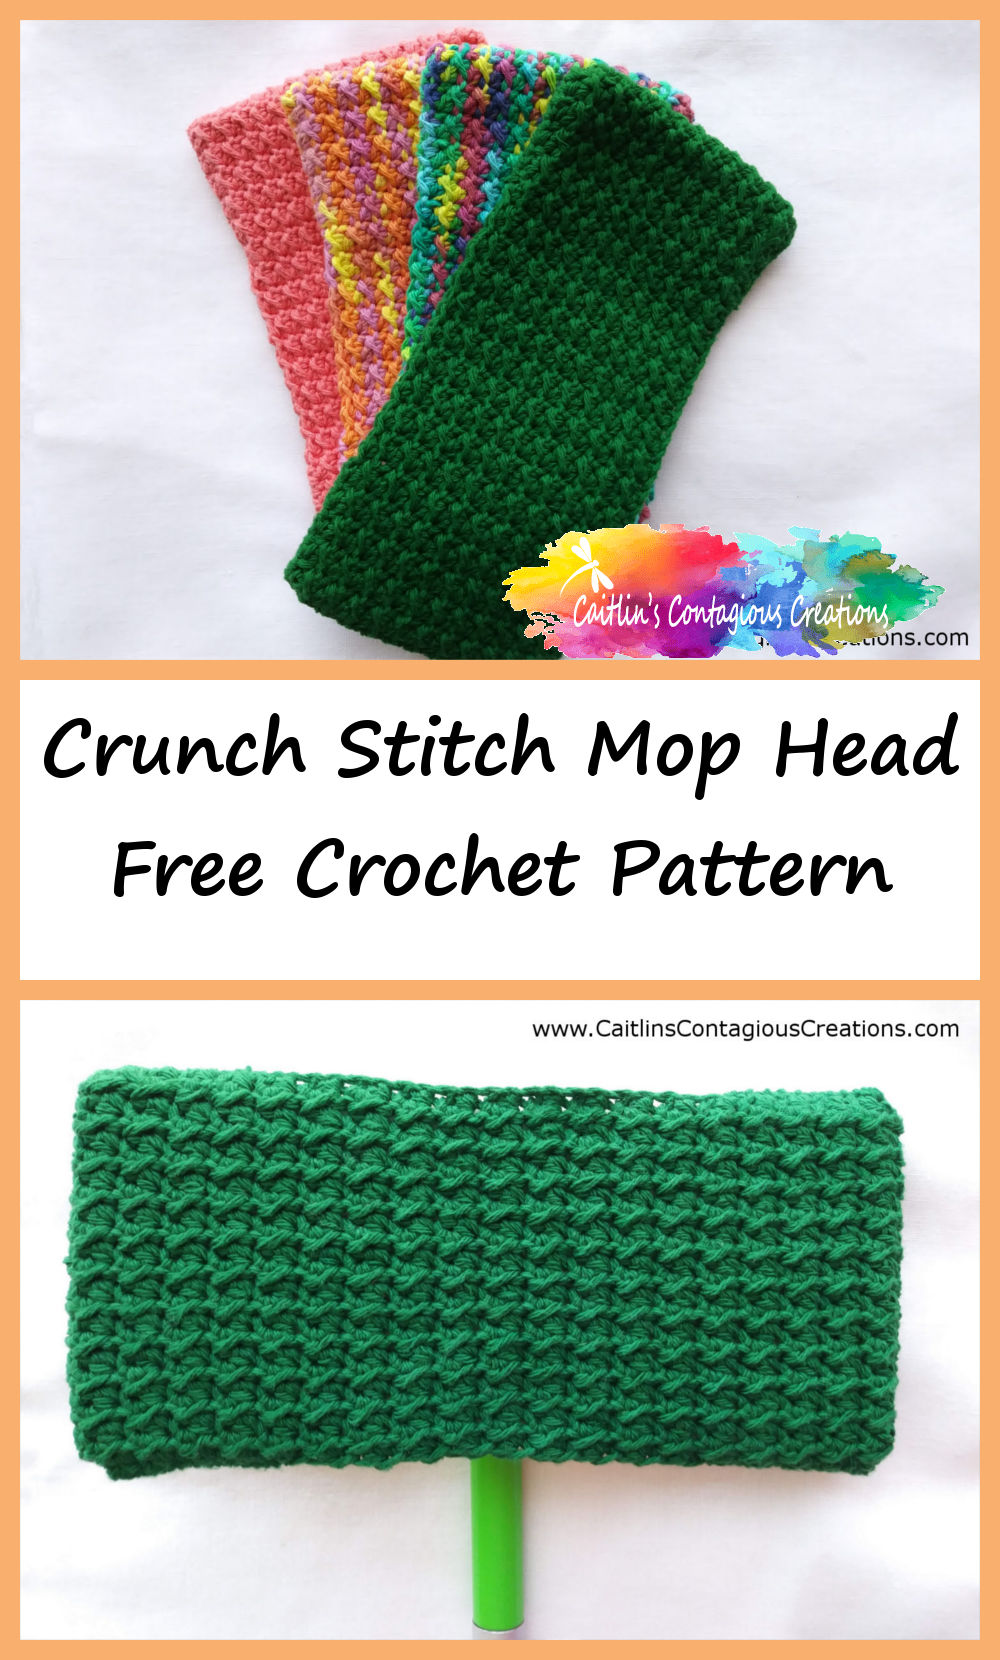
This crunch stitch mop head crochet pattern uses the greatly texturized crunch or moss stitch. This easy pattern is fun and quick to work up, and will save you tons of money buying disposable covers. The crunch stitch is perfect for this because it is a thick stitch that results in lots of texture (read: lots of nooks and crannies to pick up all that dirt!) I love this stitch and have used it as a dishcloth too!
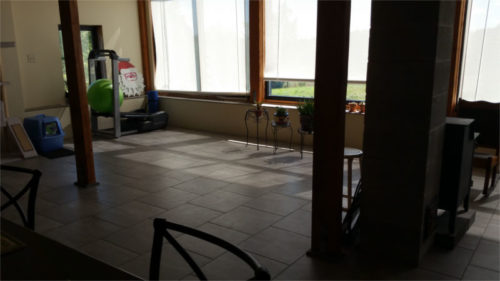
A Mile of Tile… so much to clean!
As a person who lives in an all tile house (yes, my ENTIRE bottom floor is tile, even the master bedroom) the swiffer sweeper is quite possibly the best invention ever!
I prefer the sweeper model (as opposed to the wet jet) because I can make my own floor cleaning liquid to spray on the floor and clean with.
In my opinion, homemade cleaners with vinegar in them because the de-odorizing power of vinegar is simply astounding; and lets face it with a husband in construction, a dog, and two cats I need all the help I can get!
BUT, the one thing I am not a fan of regarding swiffer sweepers is the constant need for clean pads. I mean, they can get so expensive!
And they do when you have over 1200 sq feet of tile floor to clean. So, as a solution I started making these swiffer pads. I’m sure I am not the only one who is tired of constantly needing to buy new pads (or rinsing and re-using old ones… oh yea, I did that too!)
Make Reusable Mop Head Covers!!
After I got tired of that (it didn’t take long) I started making them myself. I found a bunch of patterns online and choose a few to try. At first I used acrylic yarn (not something I recommend), but have since learned that there is no equal to cotton for this type of project. True, cotton stretches a little, but it is also more absorbent, and cleans better than acrylic. It also smells cleaner when it comes out of the washer… that acrylic yarn does have the tendency to hang on to the stink.
No matter what type of yarn you make swiffer pads from, don’t choose white! You will quickly learn just how dirty your floors are if you do, and it doesn’t always come out of the cloth as easily as one might hope…
Making your own swiffer pads is not only good for your wallet, but good for the environment too. Less garbage to throw away is always a win in my book. So grab your hook and some not white cotton yarn and lets get hookin’!
The Crunch Stitch Mop Head Crochet Pattern

Some Pattern Notes Before We Start
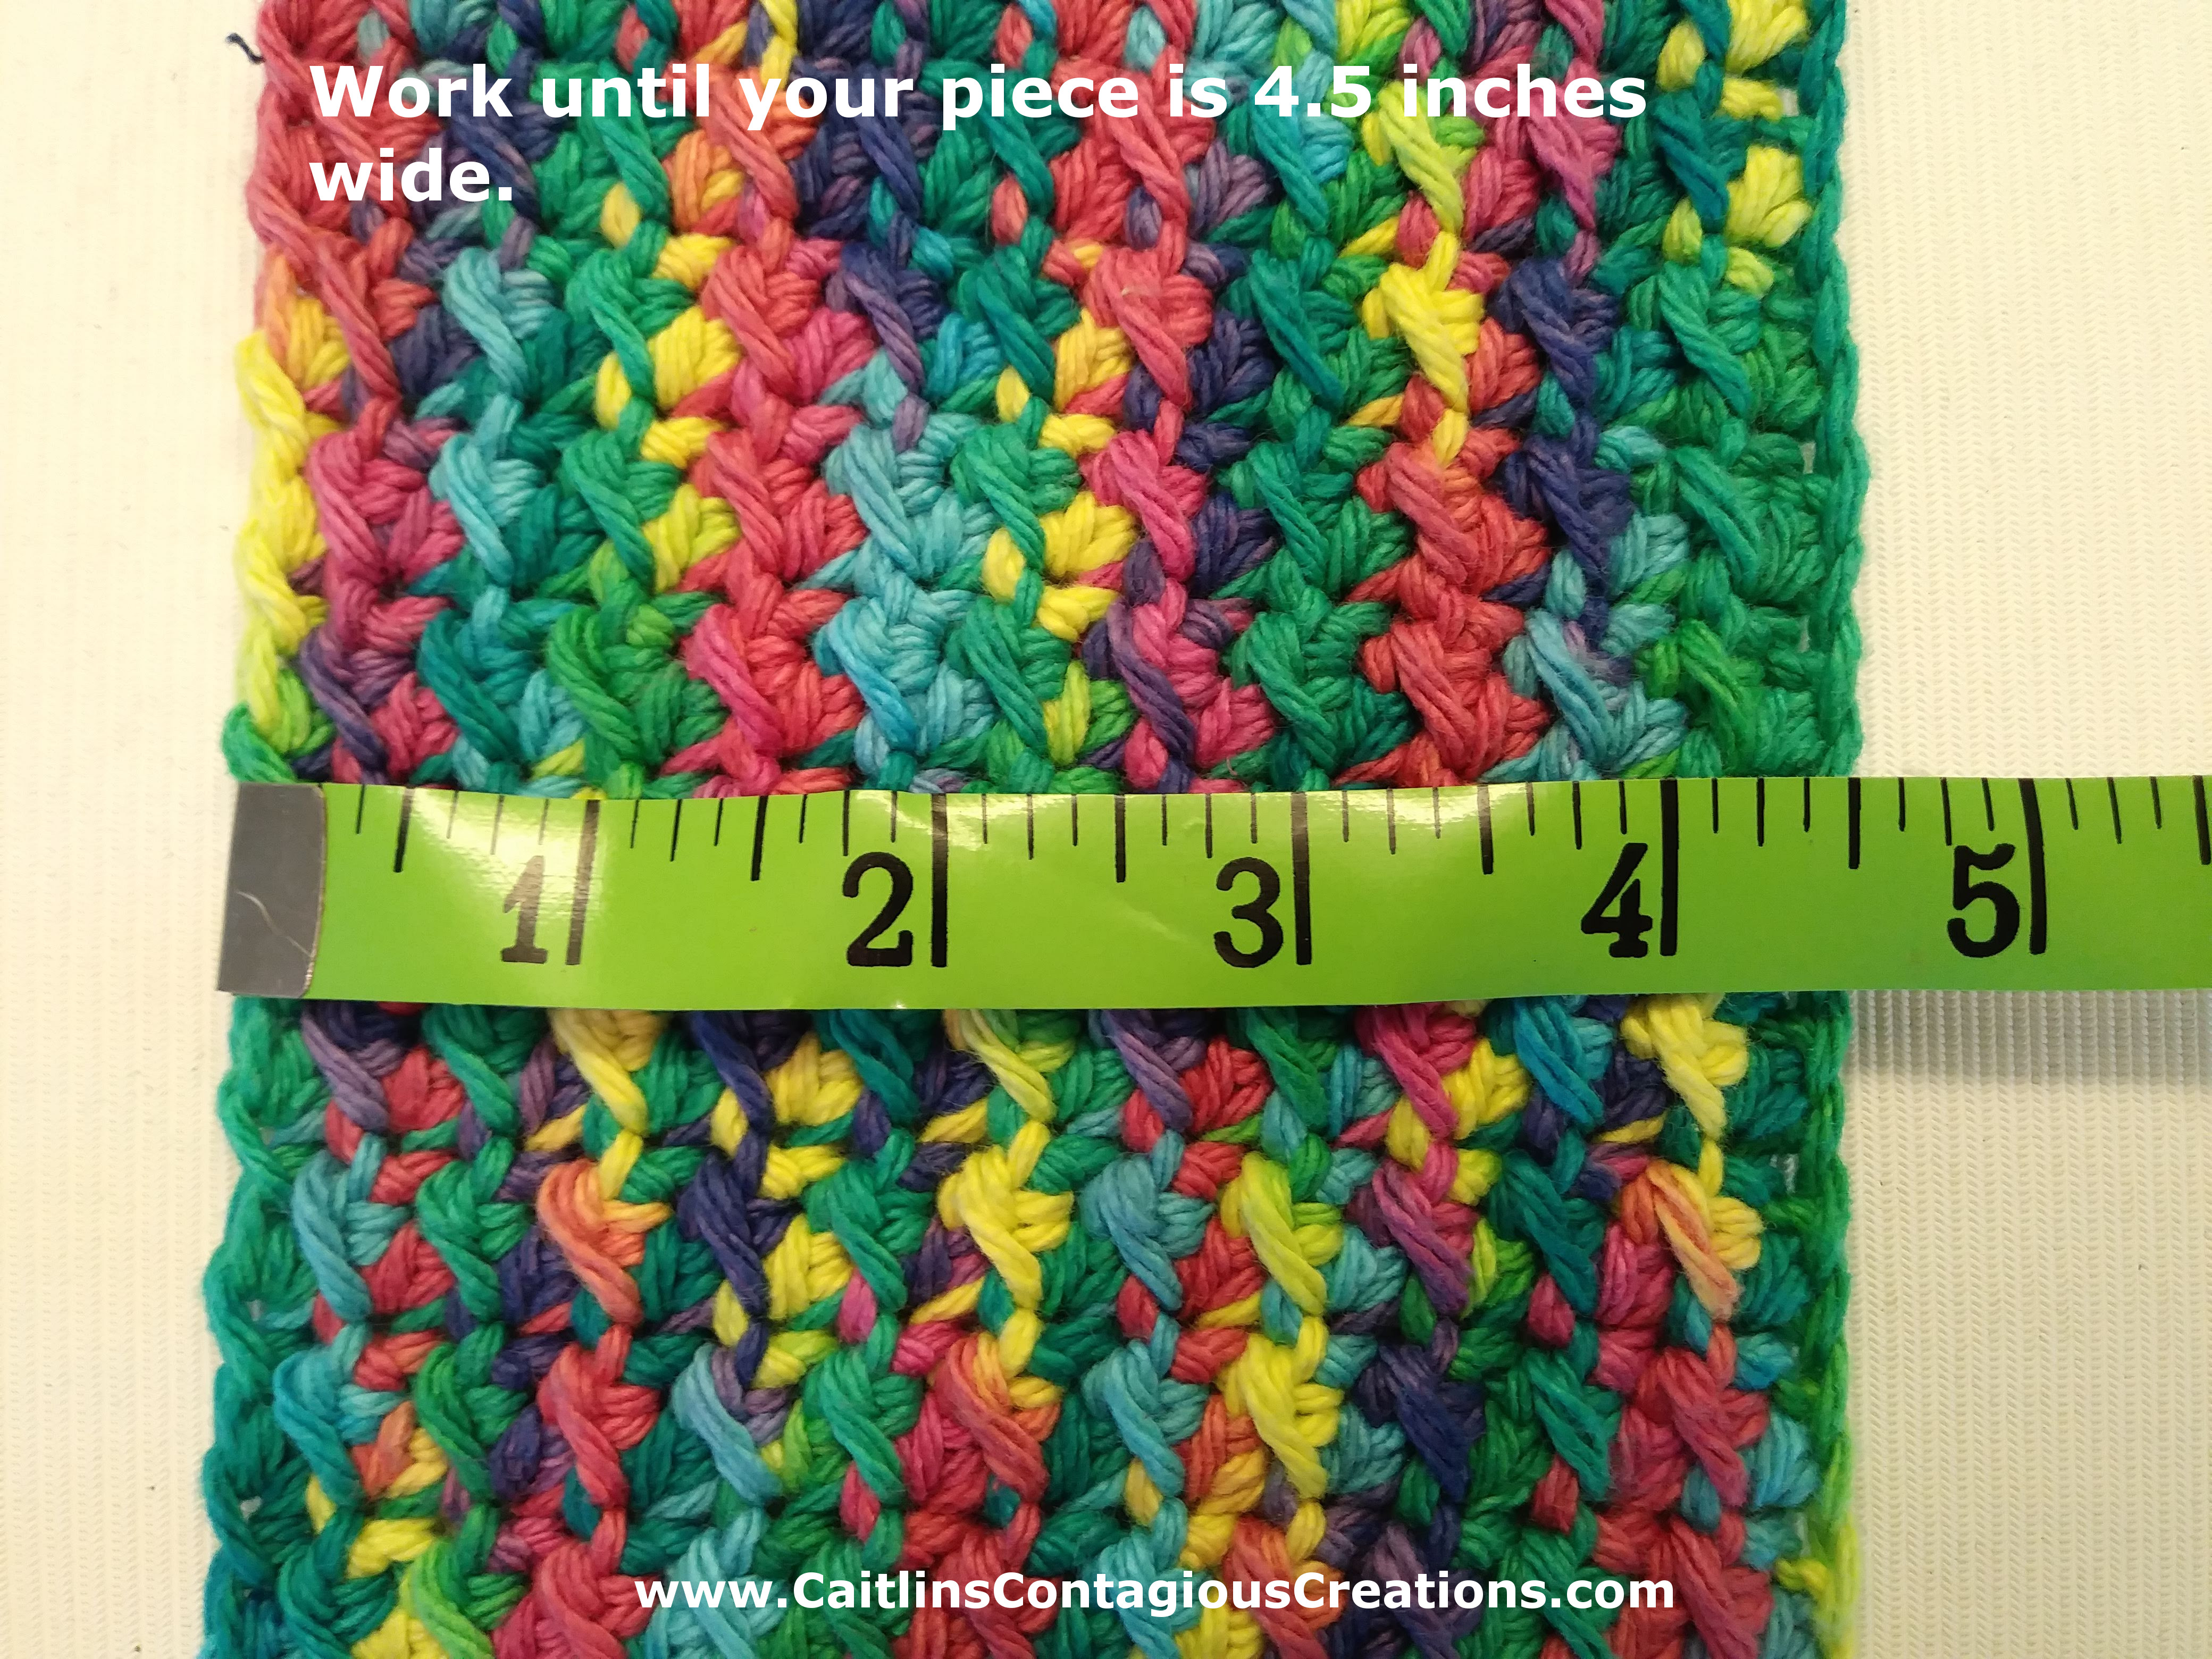
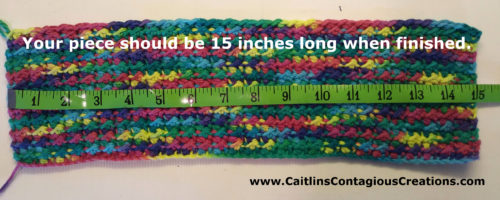
I will share the gauge that this pattern is written in, but more important than following the gauge for this swiffer pad is to be sure that once you have completed the crunch stitch portion your piece should measure 15 inches long and 4.5 inches wide. If your measurements of the final rectangle are off, your swiffer pad may not fit the head of your sweeper.
The gauge for this pattern is 5 rows by 2 crunch stitches (sl st, hdc, sl st, hdc, sl st) should be a 1 inch square. Feel free to work up a test piece and adjust your hook size accordingly if you’d like to achieve the same gauge. If you decide to follow my gauge I have added the number of stitches in parenthesis at the end of each row.
If you are planning to wing it and just see where your own gauge gets you; keep in mind that measuring the length of your work will be best done after a row or two of crunch stitches. If you try to measure just your chain row you will likely end up adding a few chains to the end to make the 15 inches and then wind up with more than that when you are done. This is because the chain row will likely stretch out slightly as you work the first row.
Whatever you decide to do with your gauge, keep in mind that you need an even number of chain stitches at the start, otherwise you’ll end up with an extra chain at the end of your row that doesn’t fit into the pattern.
Drumroll Please……. The Pattern!
Materials Needed:
- Crochet Hook Size: H-8
- Cotton Yarn (I used various colors of Peaches and Cream Cotton Yarn)
- Scissors
- Yarn Needle
- Tape Measure
Stitch Abbreviations:
SS – Slip Stitch

Attach the yarn to the hook, leaving a LONG tail , chain 60.
Row 1) SS into 2nd chain from hook. *Hdc into stitch. *SS into next stitch. Repeat from * across. You should SS into the last stitch. Ch 1 and turn. (30 sl st, 29 hdc).
Row 2) *SS into st. Hdc into next st. Repeat from * until there is 1 stitch left. SS in last stitch. (30 SS, 29 hdc).
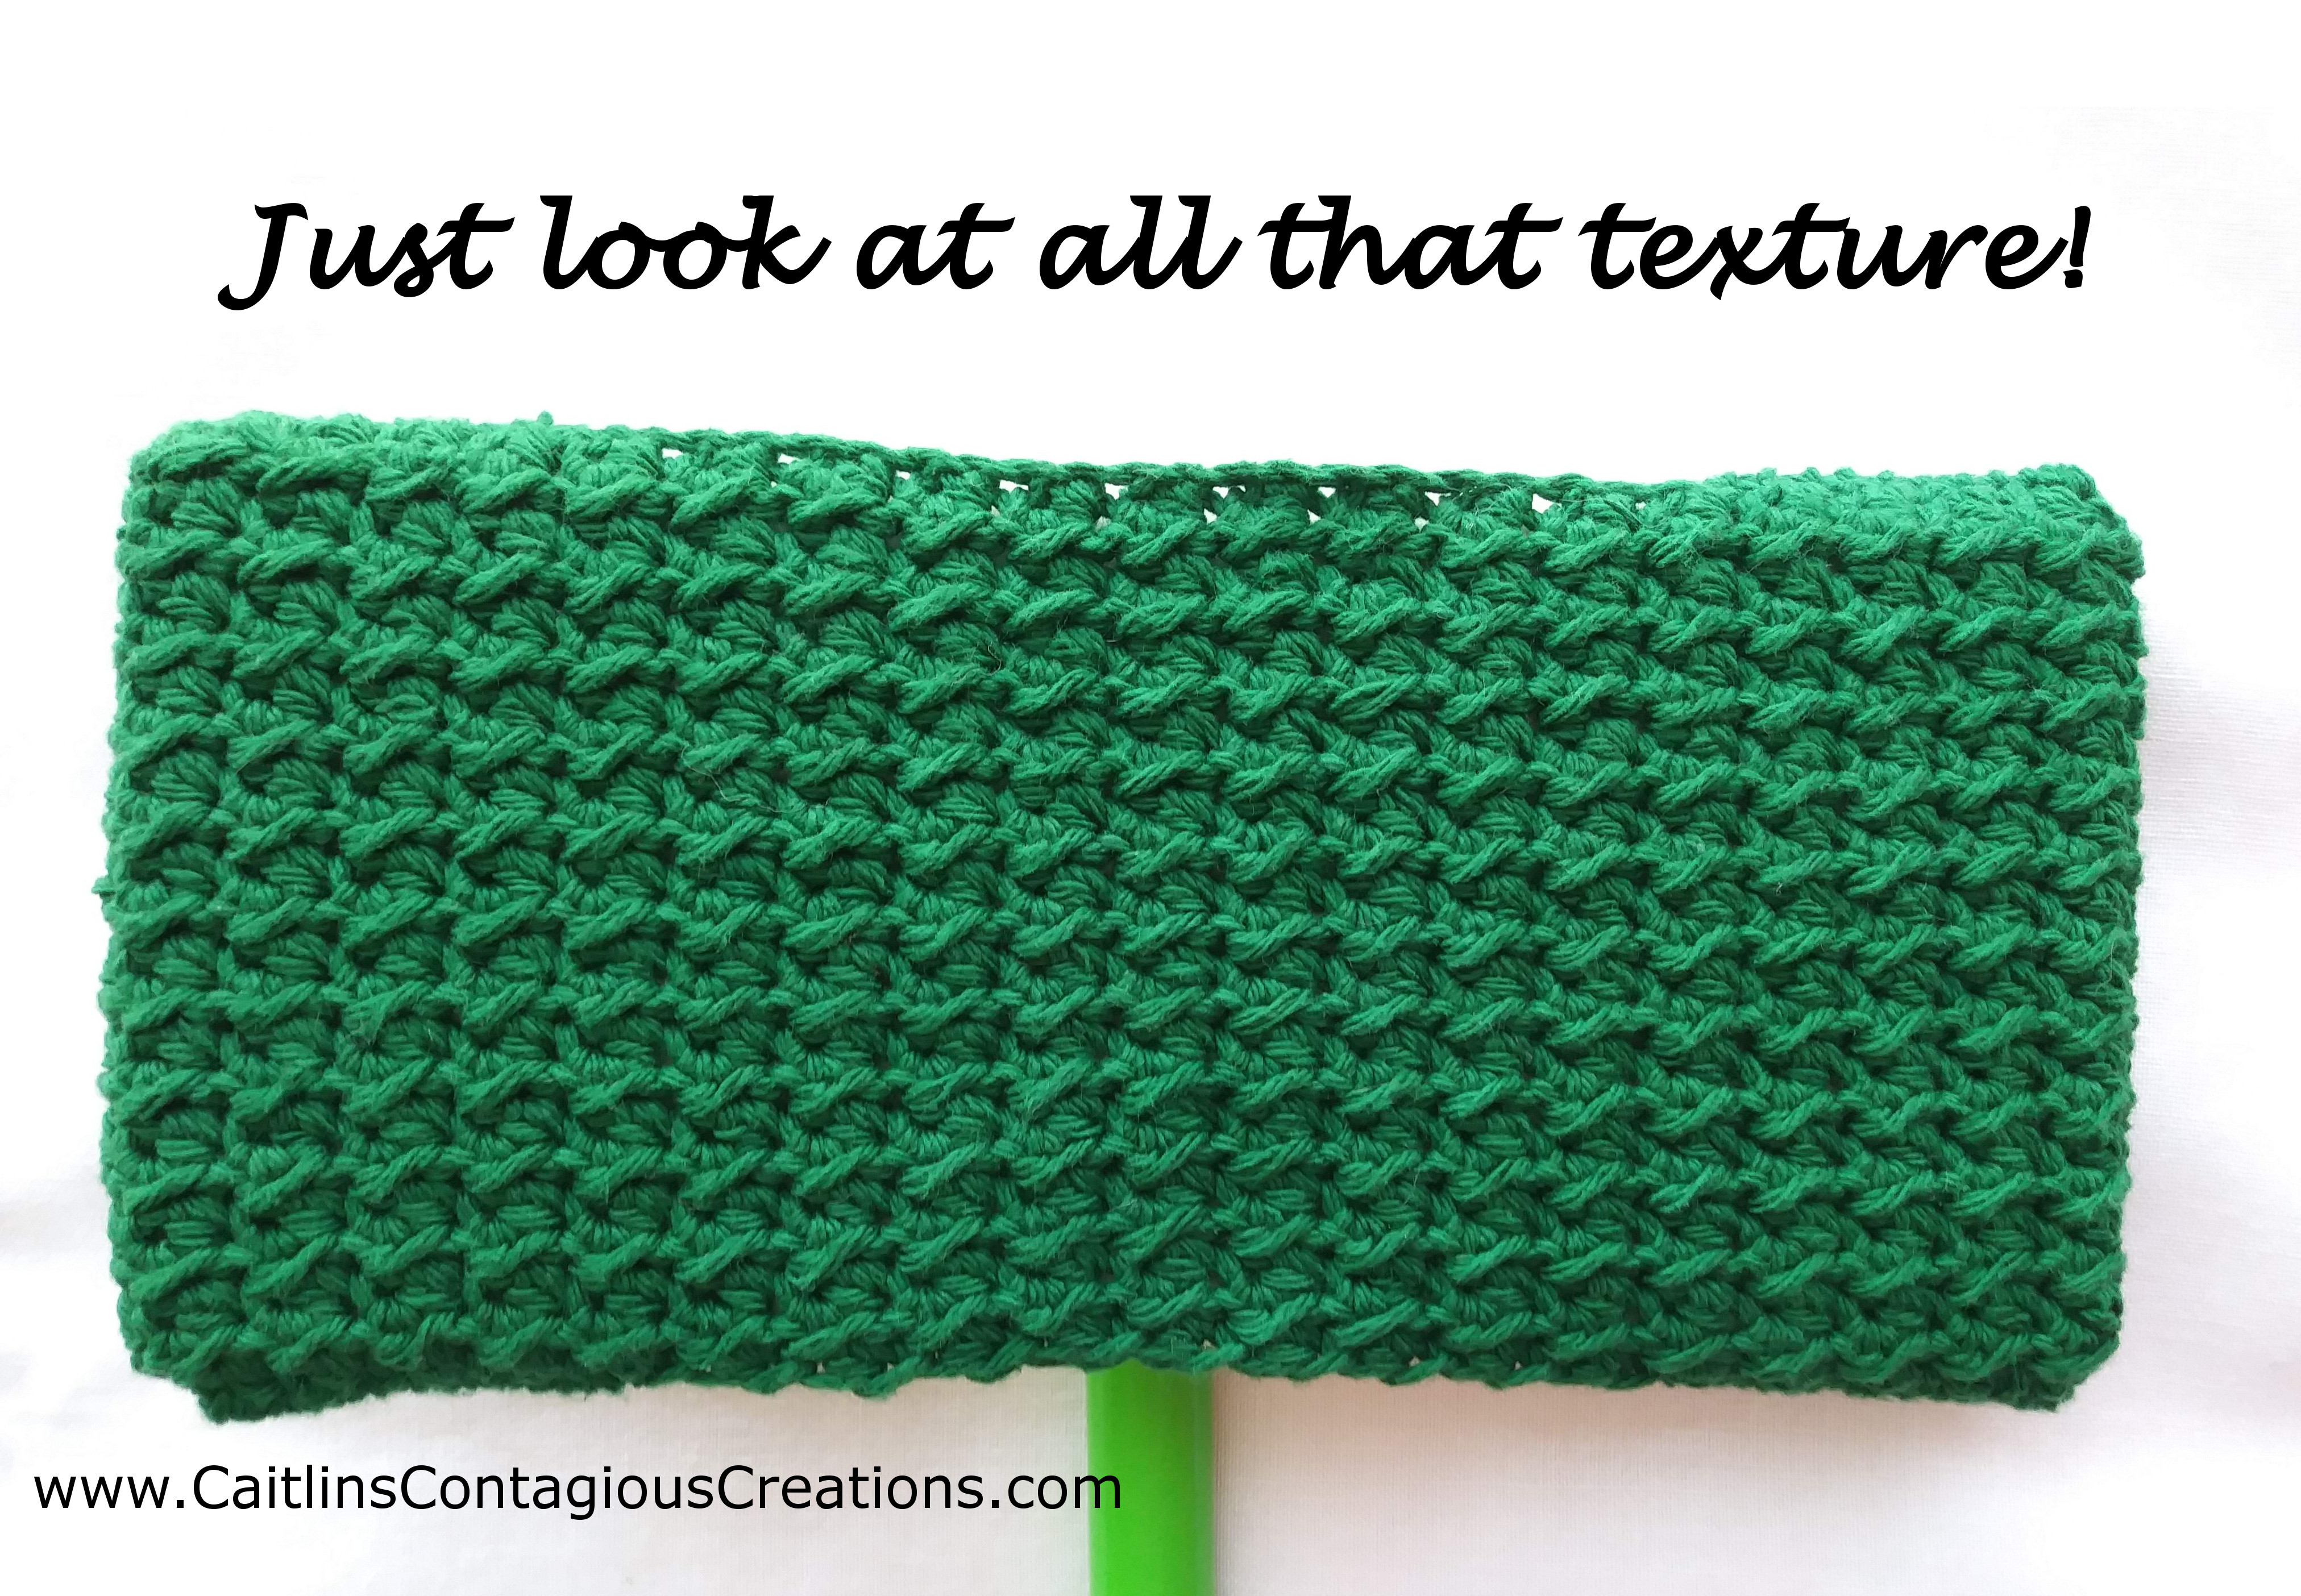
Repeat row 2 until your work is 4.5 inches wide. For my gauge I worked 23 rows (not including the starting chain row).
Once you have the finished piece it should look like this…
Figuring Out the Size for the Pockets
Now that you have a nice soft, long piece of crochet wonder, you are ready to sew it up and make the pockets to fit on the mop head!
The first thing is figure out how many stitches equal about 2.5 inches…. The bottom side of a swiffer sweeper is 10 inches long by 4.5 inches wide. Since our crocheted pad is 15 inches long we divide the amount over 10 by 2 to figure out how many inches we need to overlap on each side.
For a 15 inch piece… 15-10=5. And 5/2=2.5. So we know for a project 15 inches long we want our flap on each side to be 2.5 inches long.
I tell you this, not to confuse you but in case you somehow end up with a piece that is 14.5 inches long instead of the 15… Don’t go froggin’ all that work!
Just make your flaps 2.25 inches instead of 2.5. (14.5 – 10= 4.5 and since 4.5 /2= 2.25 you can easily figure out how deep to make the flaps).
You can also do this is you end up with something a bit longer than 15 inches. But keep in mind that making the flaps too big or too small are both not good because then you will have trouble getting the pad on and off the swiffer or keeping it from falling off.
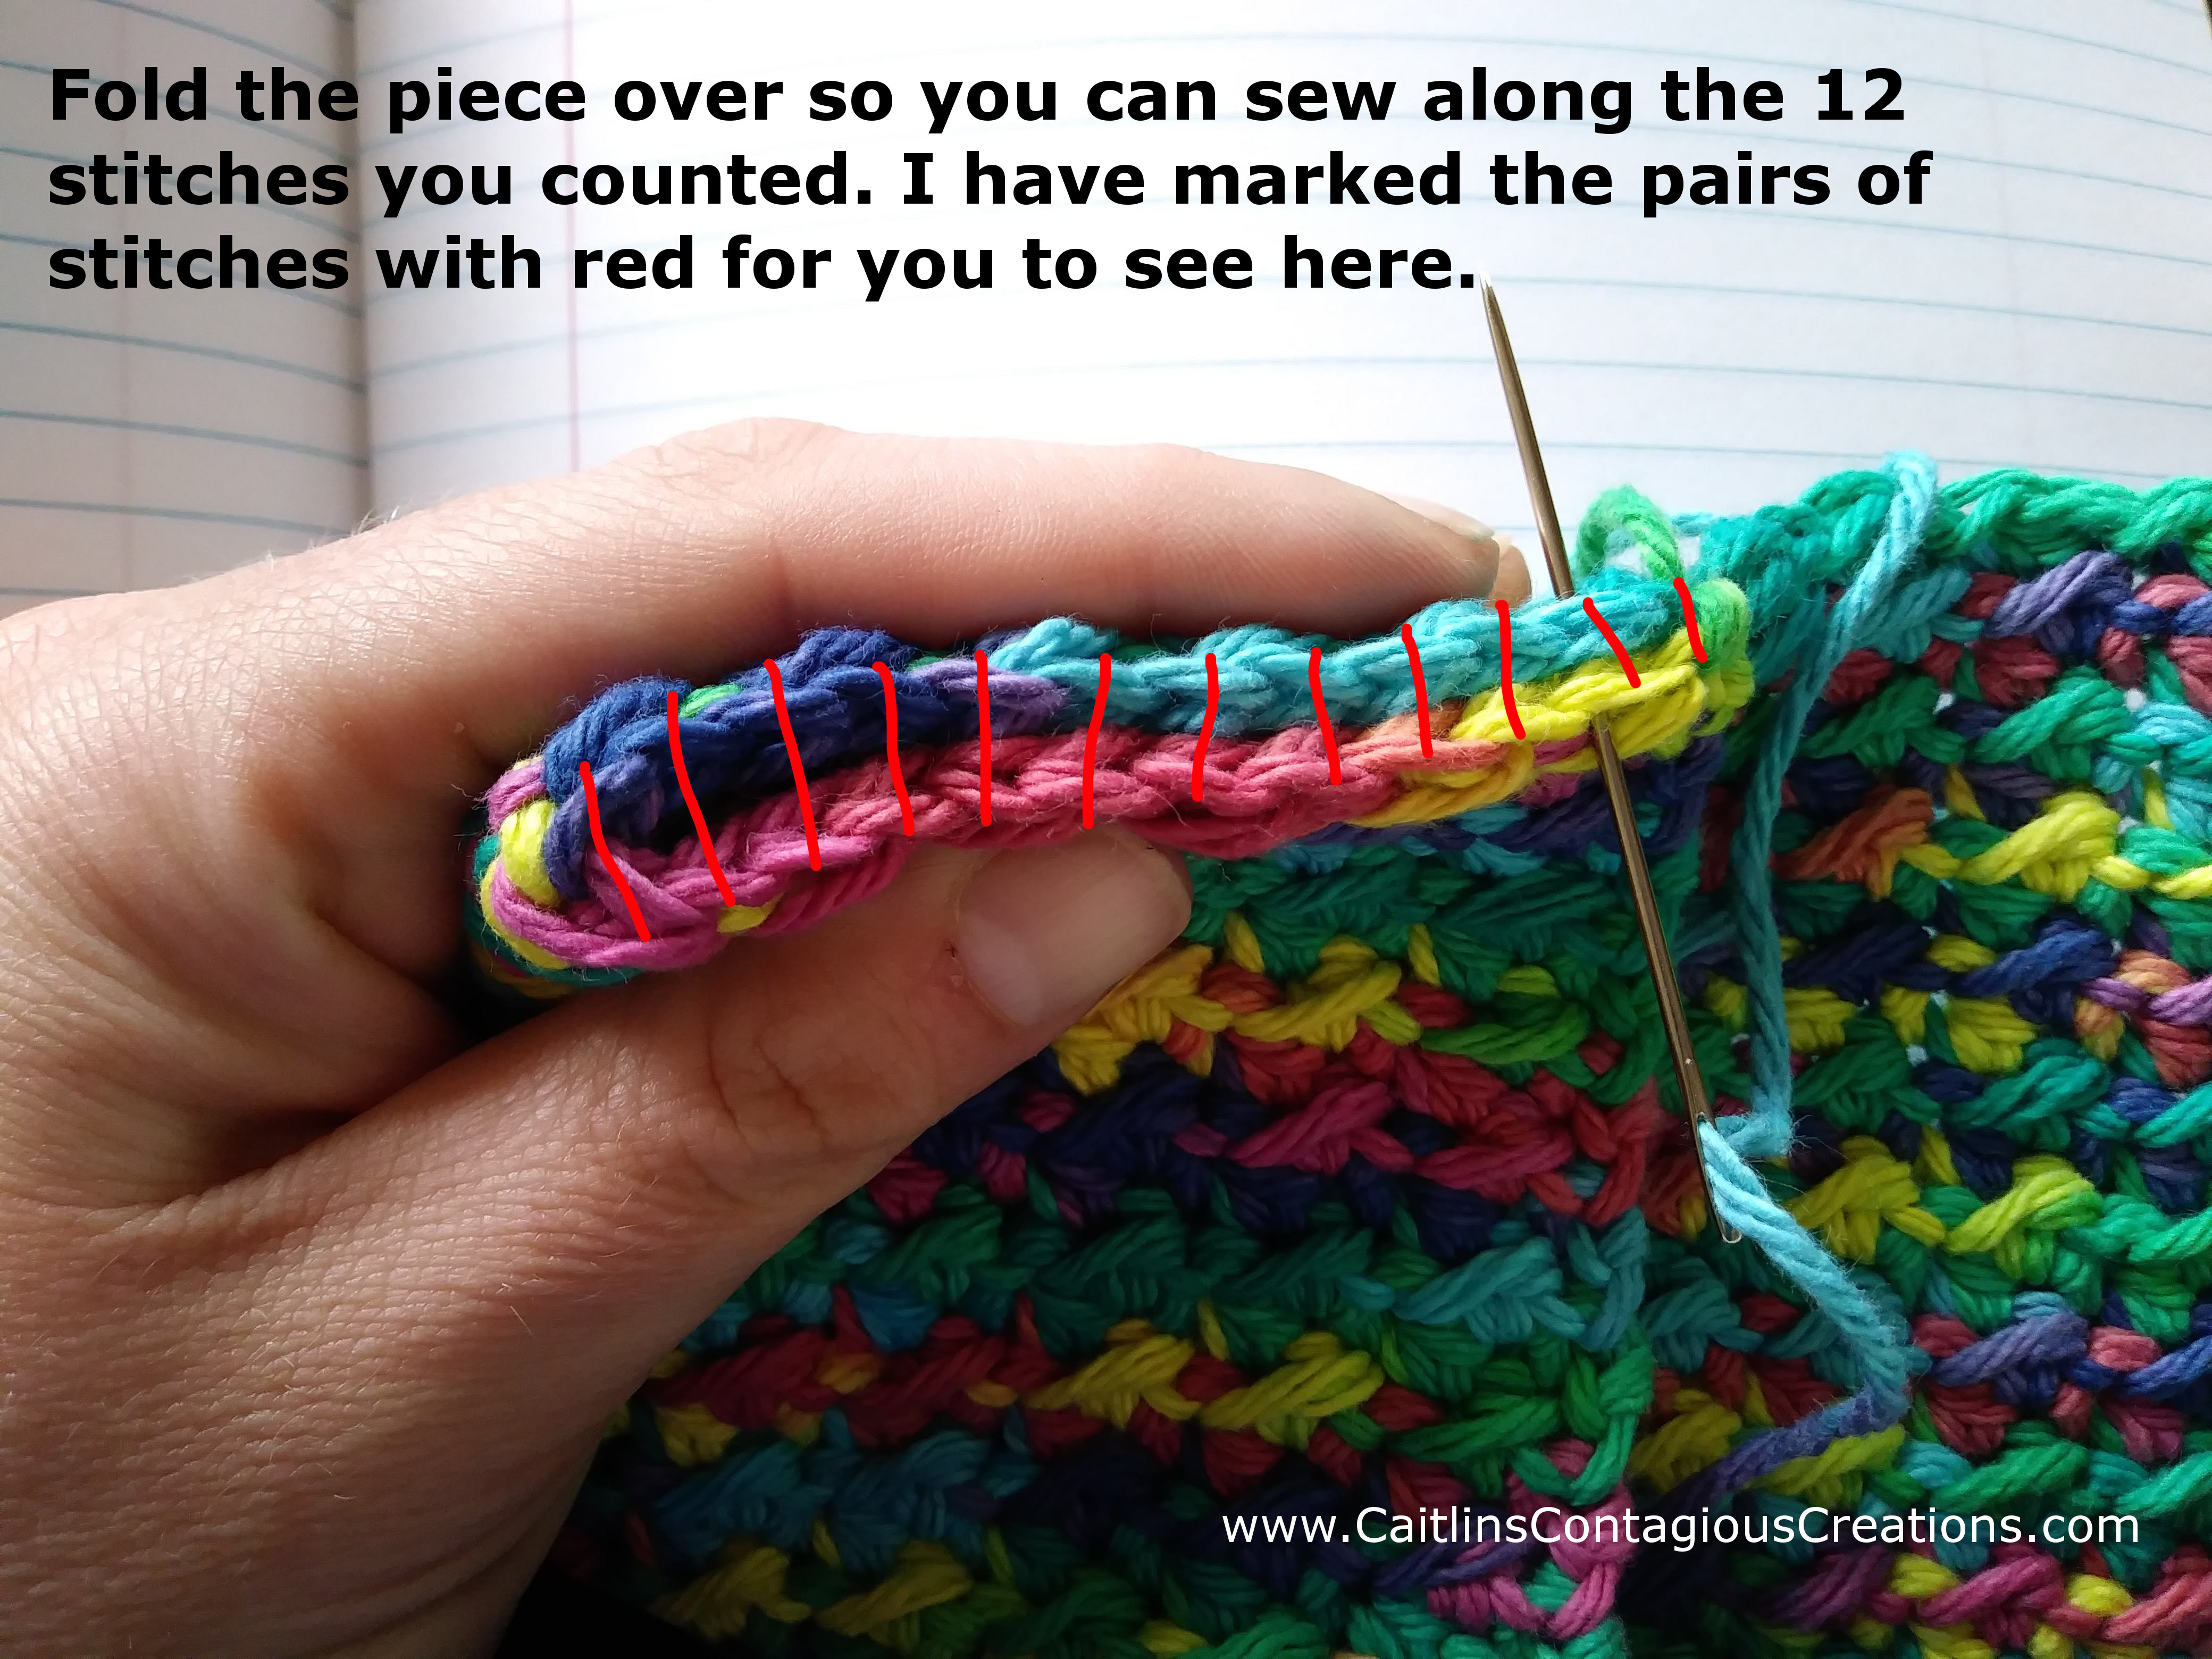
Then you just grab your tape measure and count how many stitches are in the needed 2.5 inches. For my gauge it worked out to be 12 stitches.

Sewing Your Pockets
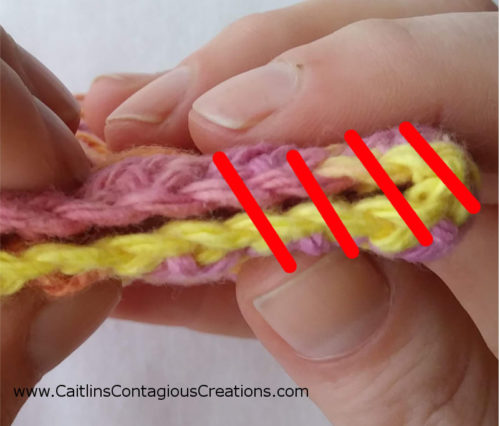
Once you know how many stitches your flap is you double that number and count along the edge. For the example below, I counted 24 stitches and folded the piece to create a sewable seam along the edge. The first 12 stitches I counted will be sewn together with the second 12 stitches.
In the picture below I have marked the stitches that will be sewn together in red so you can see what I mean. (A picture really is worth 1,000 words, don’t you think!?)
Once you have counted and identified how to sew it is time to break out that needle. Thread it with a tail end off your piece if you have one where you are working, or just weave one in before starting!
I like to sew twice into each hole not only because I feel it does a good job of keeping the work together, but also because I like the look of that seam. It isn’t too bulky or flashy but is easy to work. When you do this seam it looks like the picture below.
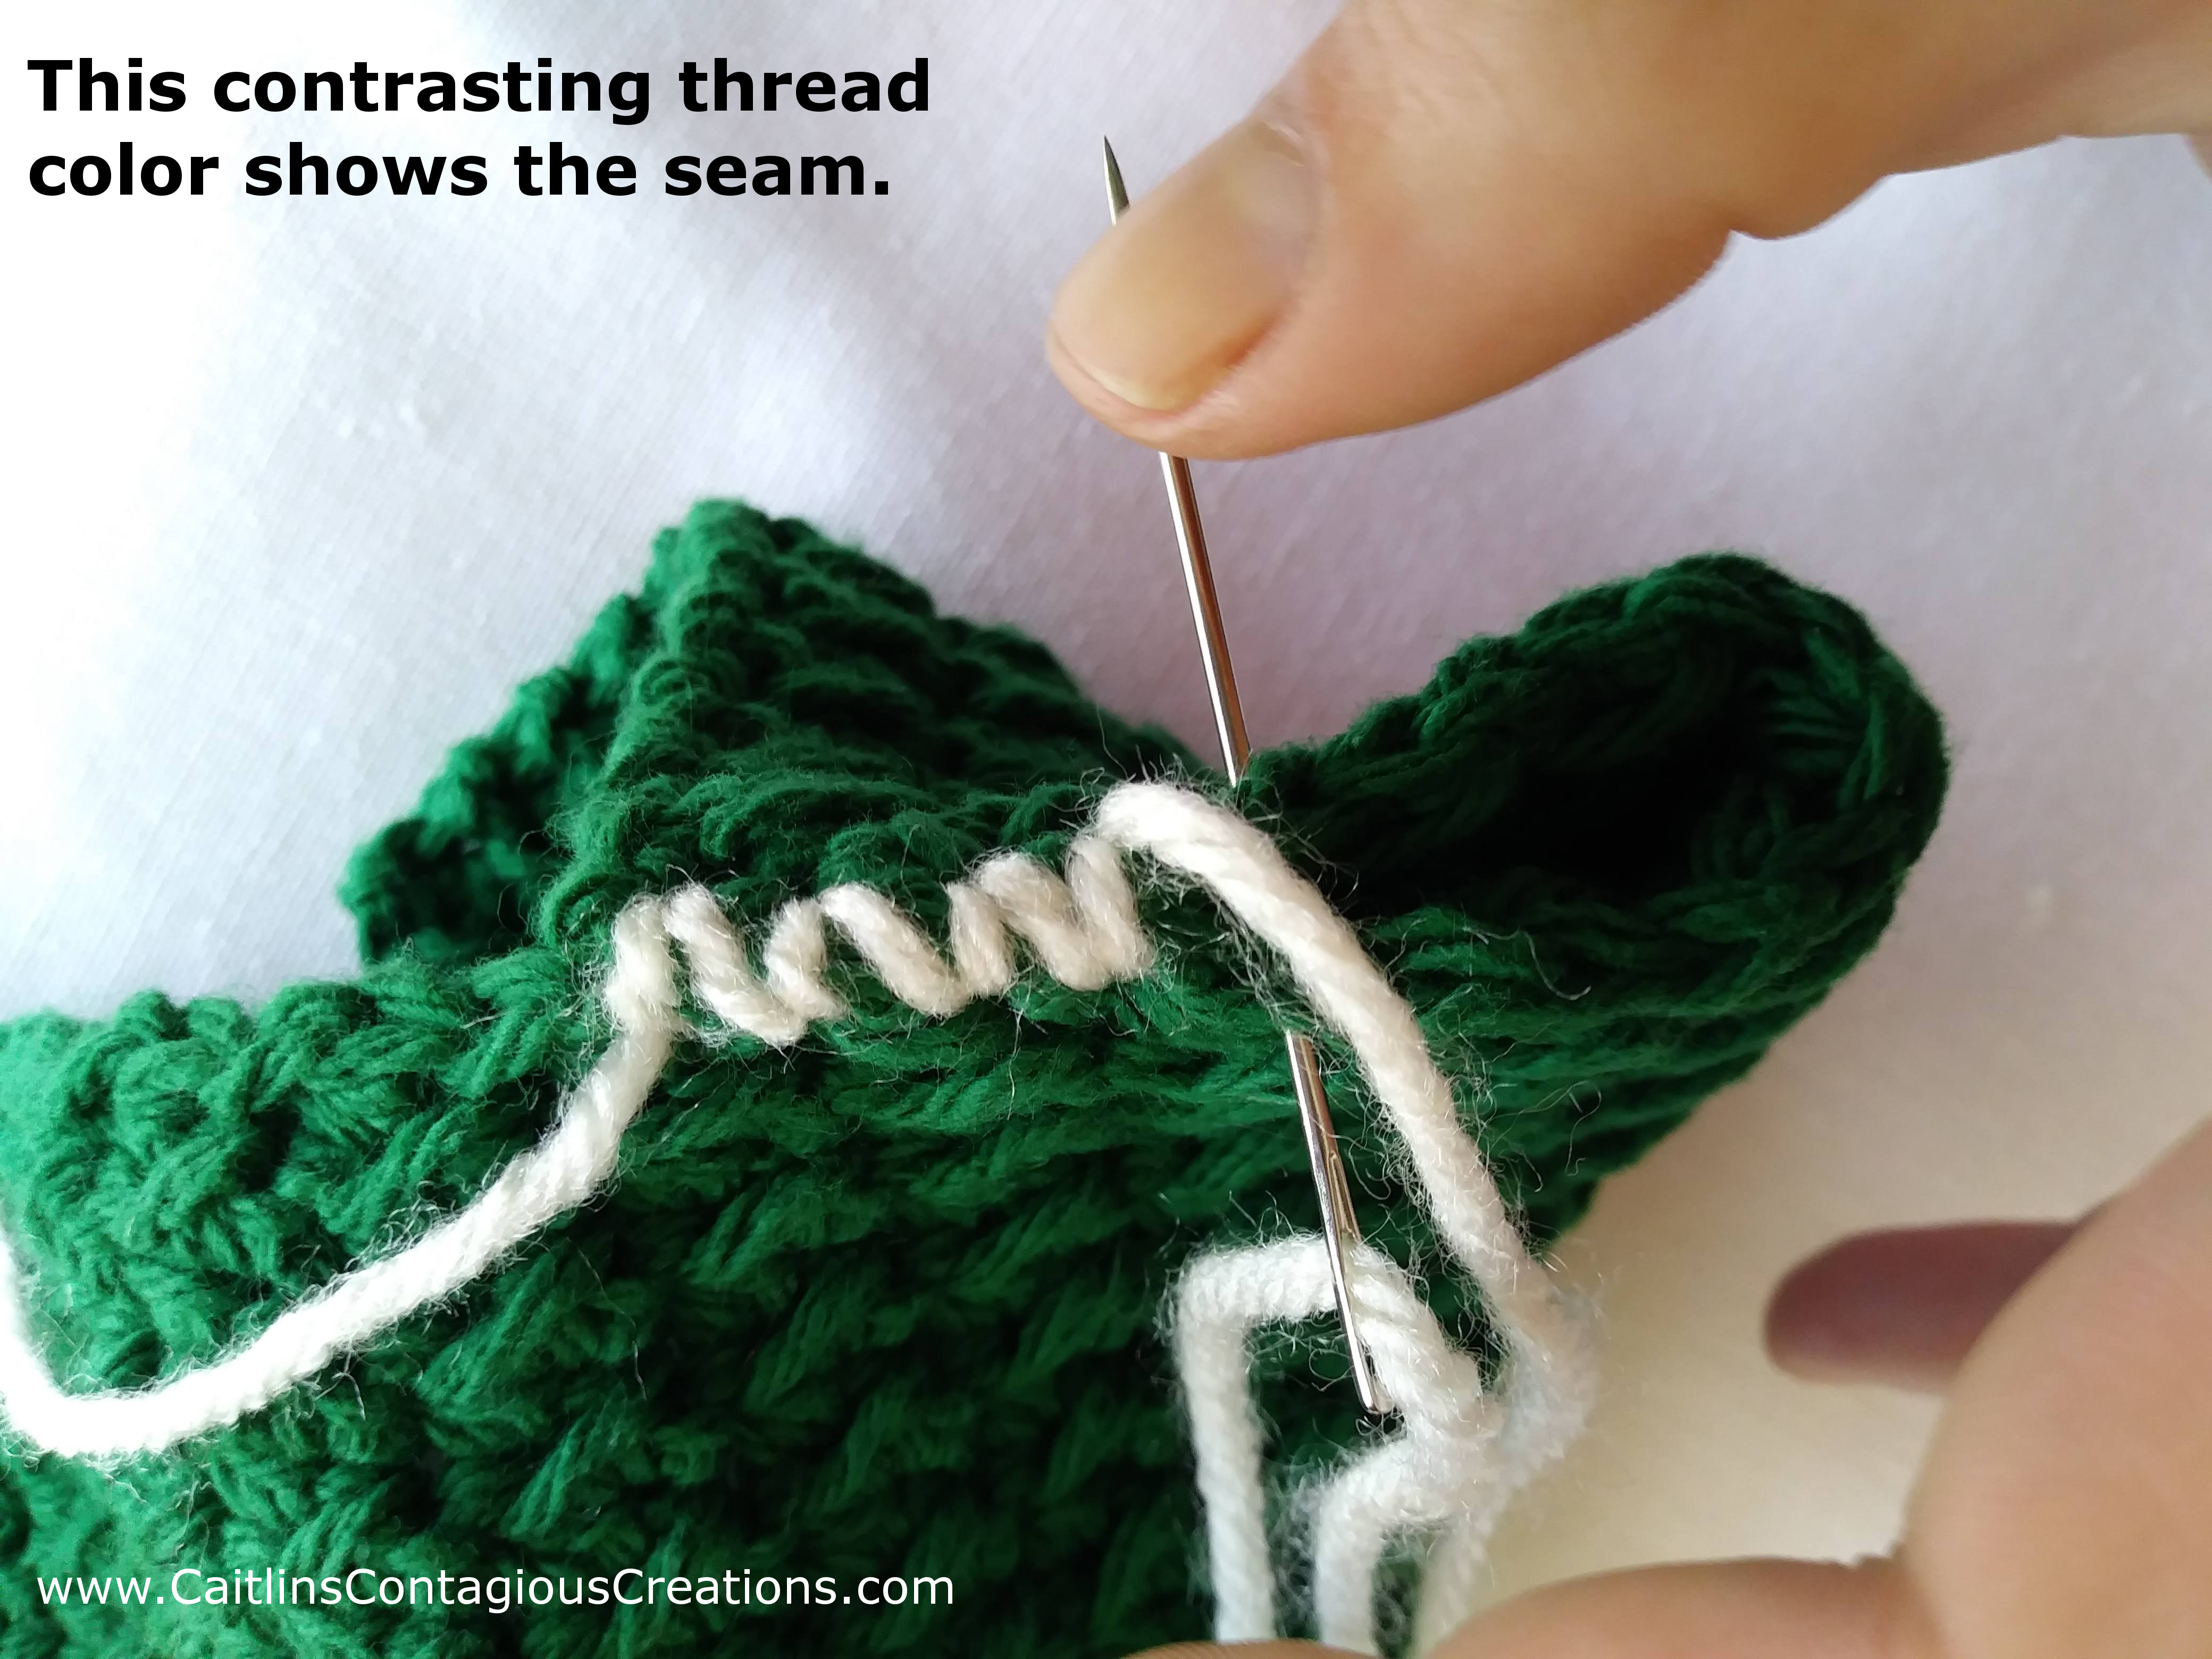
Don’t worry I pulled that acrylic yarn out after the picture was taken! lol
Another thing to remember when sewing your seams that is important is to make sure you are going through all the necessary loops. The top of your work will look like this…
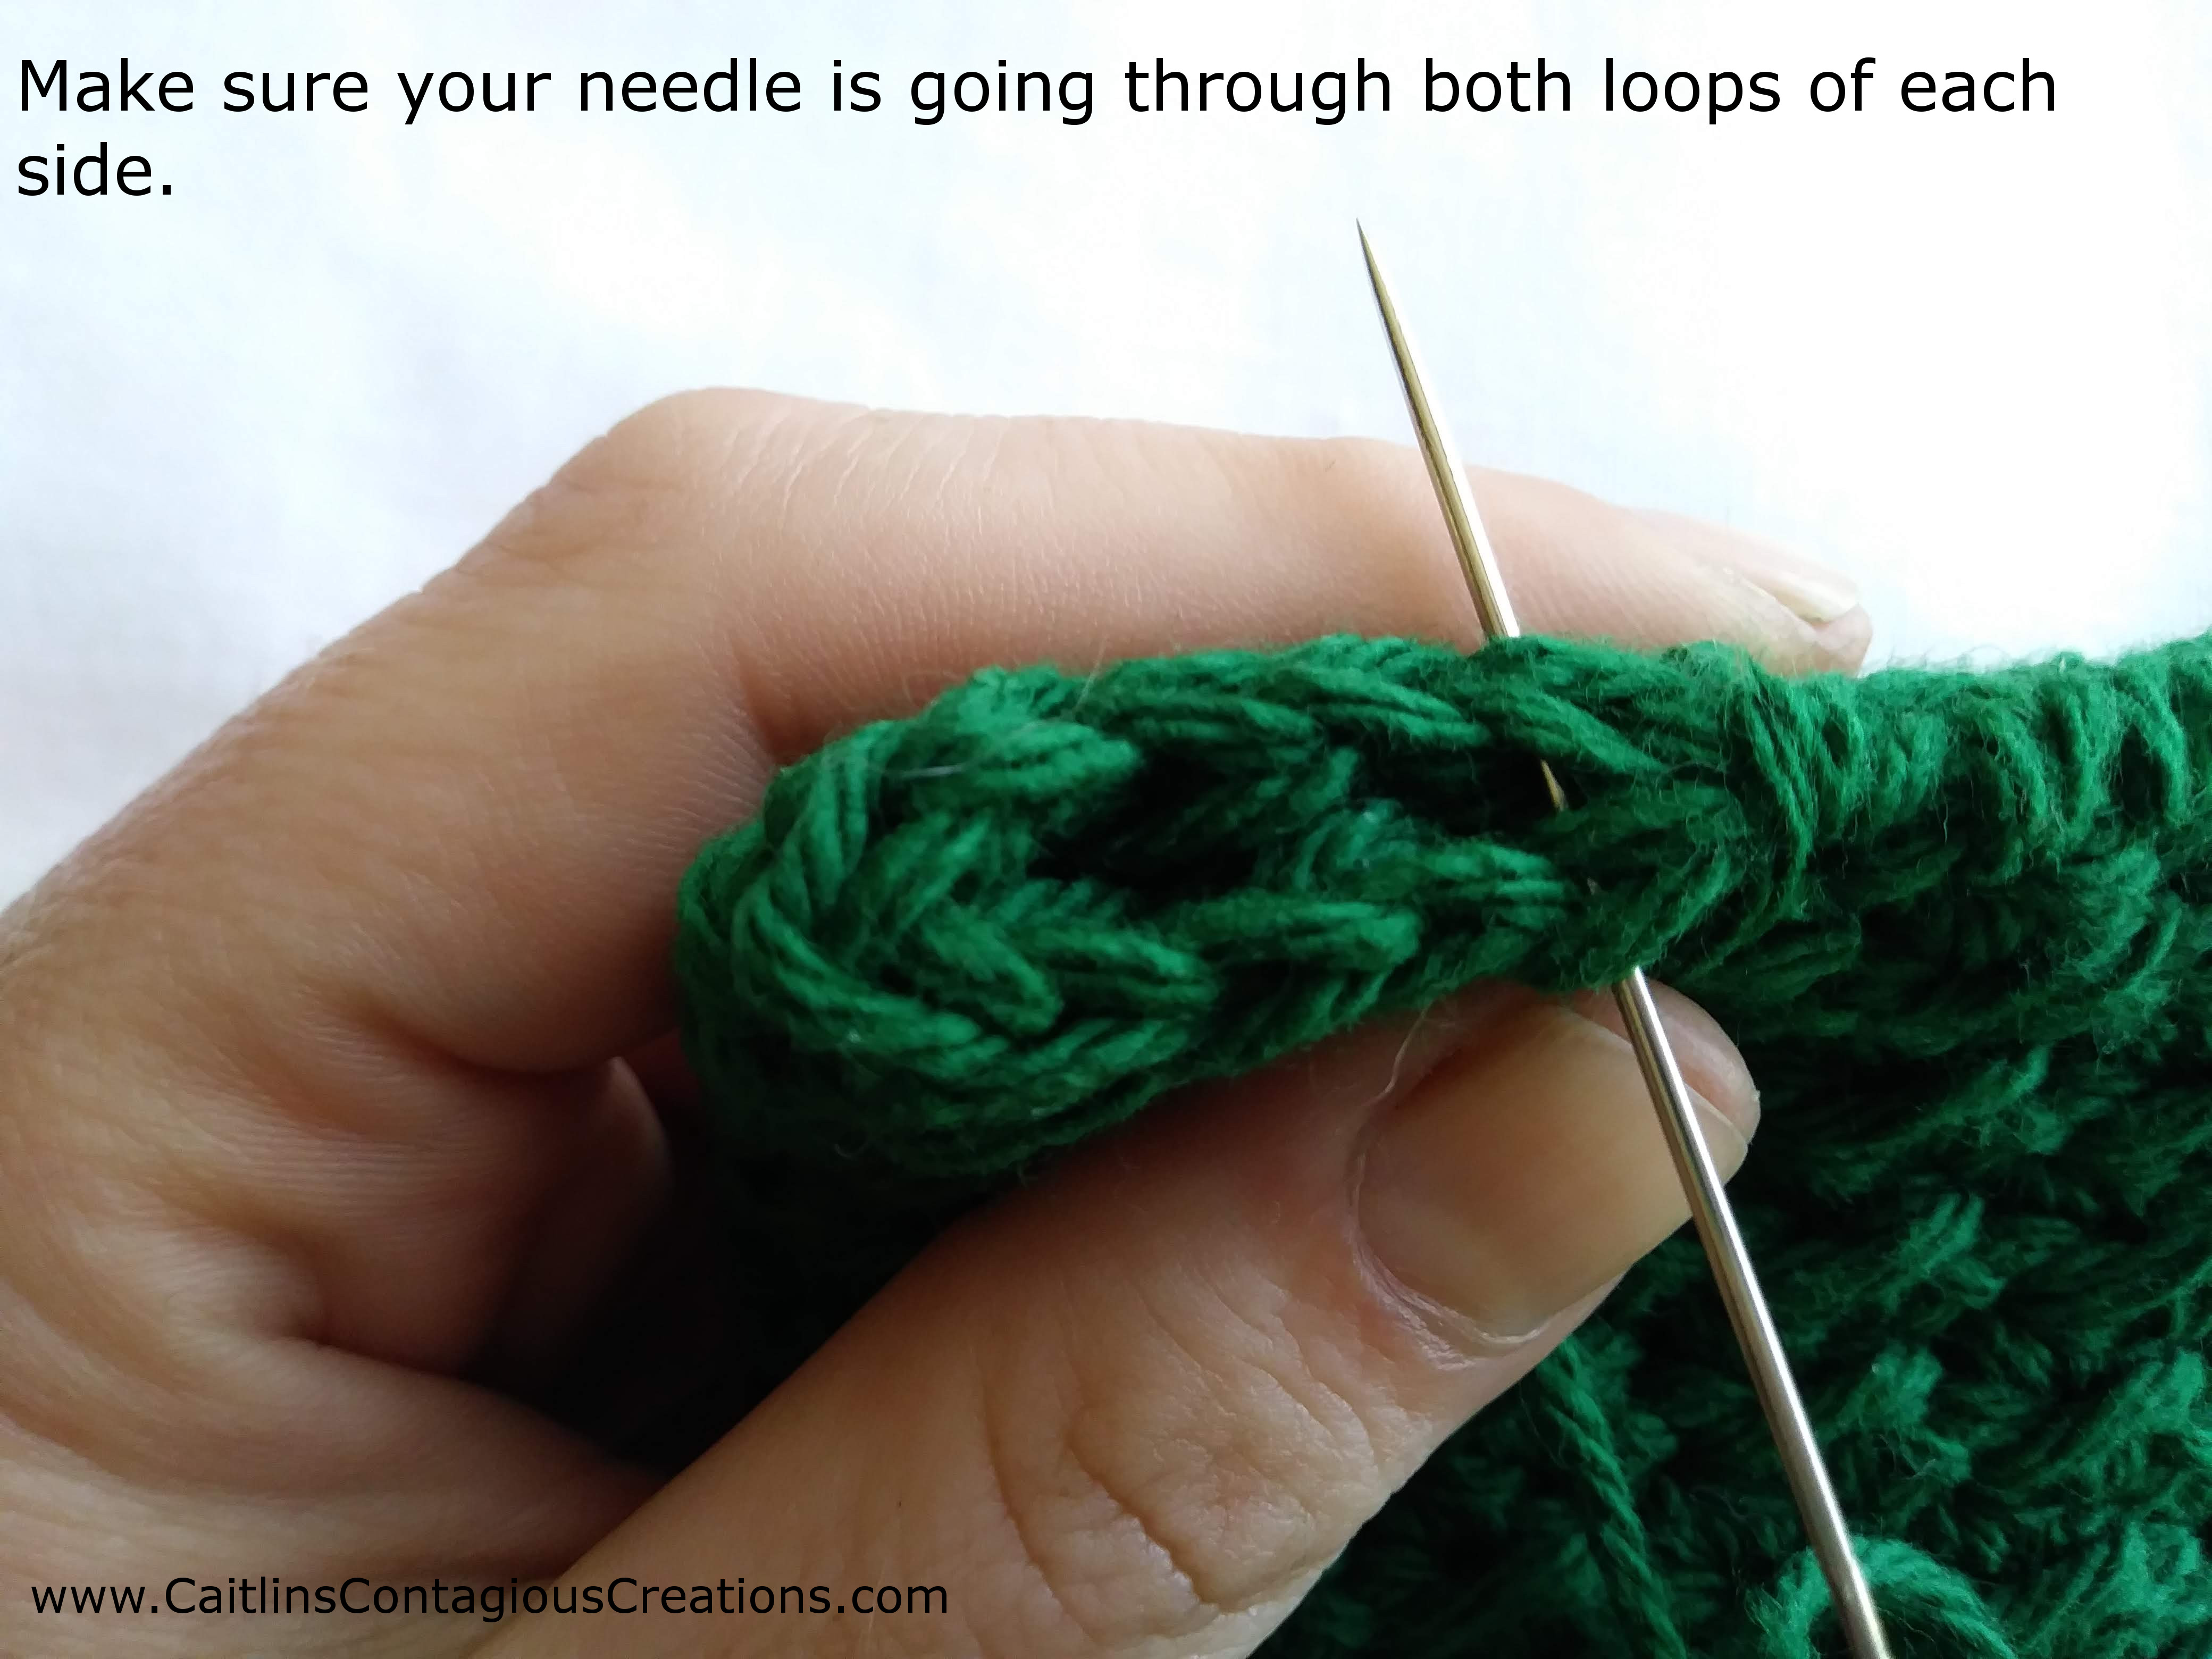
But the bottom of the work is going to be a single stitch on each side… like this…
Once you have all four seams sewn up you are ready to put your pad in place and get cleaning!!
Thanks for sticking with me all the way through this mop head crochet pattern. I hope I didn’t ramble too much 😉 Maybe you’ve made some mop head covers in the past… what are some of your favorite stitches to use? Please let me know in the comments! I hope to see you next time!!
Please share this post on Facebook or Pinterest so others can enjoy it too and so you can easily find it again 🙂
Happy Hooking!

I am interested in your newsletter
Bev, Please enter your name and email in either the top ribbon (where it’s orange at the top of every page on my site), and you will be signed up for my Newsletter. I regularly send gifts and free patterns and tips as well as other fun crochet stuff I think you’ll love. Don’t worry, I would never spam you or do anything unethical with your email address. My subscribers are my VIPs and I treat them as such <3 Thanks for your interest!!
Great looking pattern. Thanks for sharing and giving visuals. So easy to understand.
Thanks Sandy! I’m glad you find it helpful. I’m a visual learner, but I prefer photos to a video so it tends to be what I have on my own site… lots of photos. Enjoy! ~Caitlin
Would you be ok with me selling finished items from your patterns?
Maria, I would be fine with you selling finished items from my patterns as long as you provide appropriate credit for the pattern to me. I appreciate all link backs to my patterns and Etsy or Ravelry stores. Thank you for your interest, I’m flattered you think my patterns are good enough to sell finished items from 🙂 ~Caitlin
I am going to make a trial one from acrylic 1st I do not have cotton on hand at them moment,just to get my measurements & the feel of making it ,thank you .
A hutterite friend makes some like this & I see how well they work.
TY once again
Debbie, I made my very first mop head from acrylic also. It does work… kinda. It takes much longer to soak up the liquid, and it tends to drip back out after a bit. Thank you for your comment! I’m so glad to hear you are excited to make this! <3 Caitlin
Can’t wait to make this and I will send a pic when completed..mabey make a basket full☺
Nancy, I’m glad this will be helpful to you!! I can’t wait to see your picture <3 Caitlin
Great pattern Caitlin! I am wondering how this would work with one of the yarns that are specifically for ‘scrubbies’? There are spots on our entry floors that need every weapon in my cleaning arsenal!
Maryjohn
Maryjohn, Thank you for your comment. This pattern would likely work with that yarn, but you may find it difficult to work the pattern with such a yarn. The stitches can be odd looking with that yarn. If you would like to use that yarn, I would suggest checking out the pattern link below. The pattern was designed specifically for that scrubby yarn. I hope that helps! ~Caitlin
Scrubby Mop Head Free Crochet Pattern