This post contains affiliate links. If you choose to purchase I will receive a small commission at no extra cost to you. I use the funds to buy yarn and make more free patterns! I greatly appreciate your support. For more info please see my Terms & Conditions. Thank You!
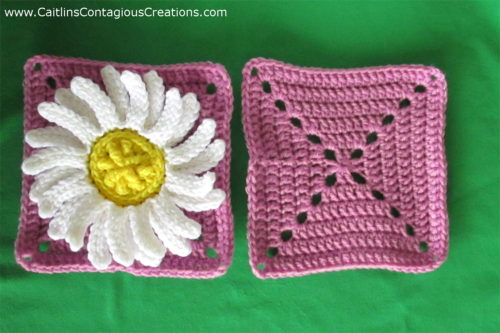
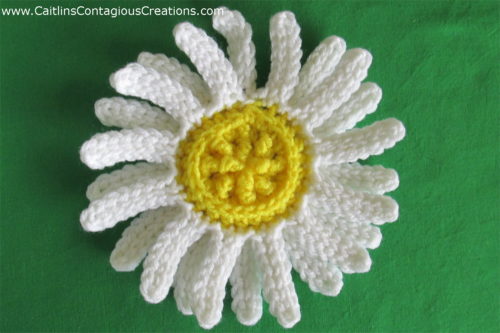
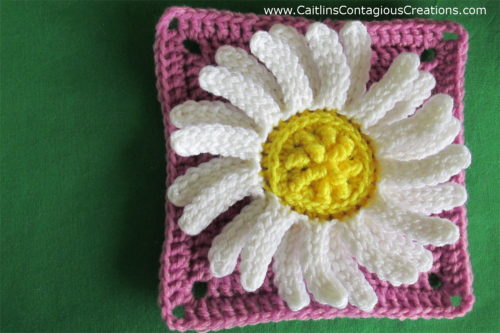
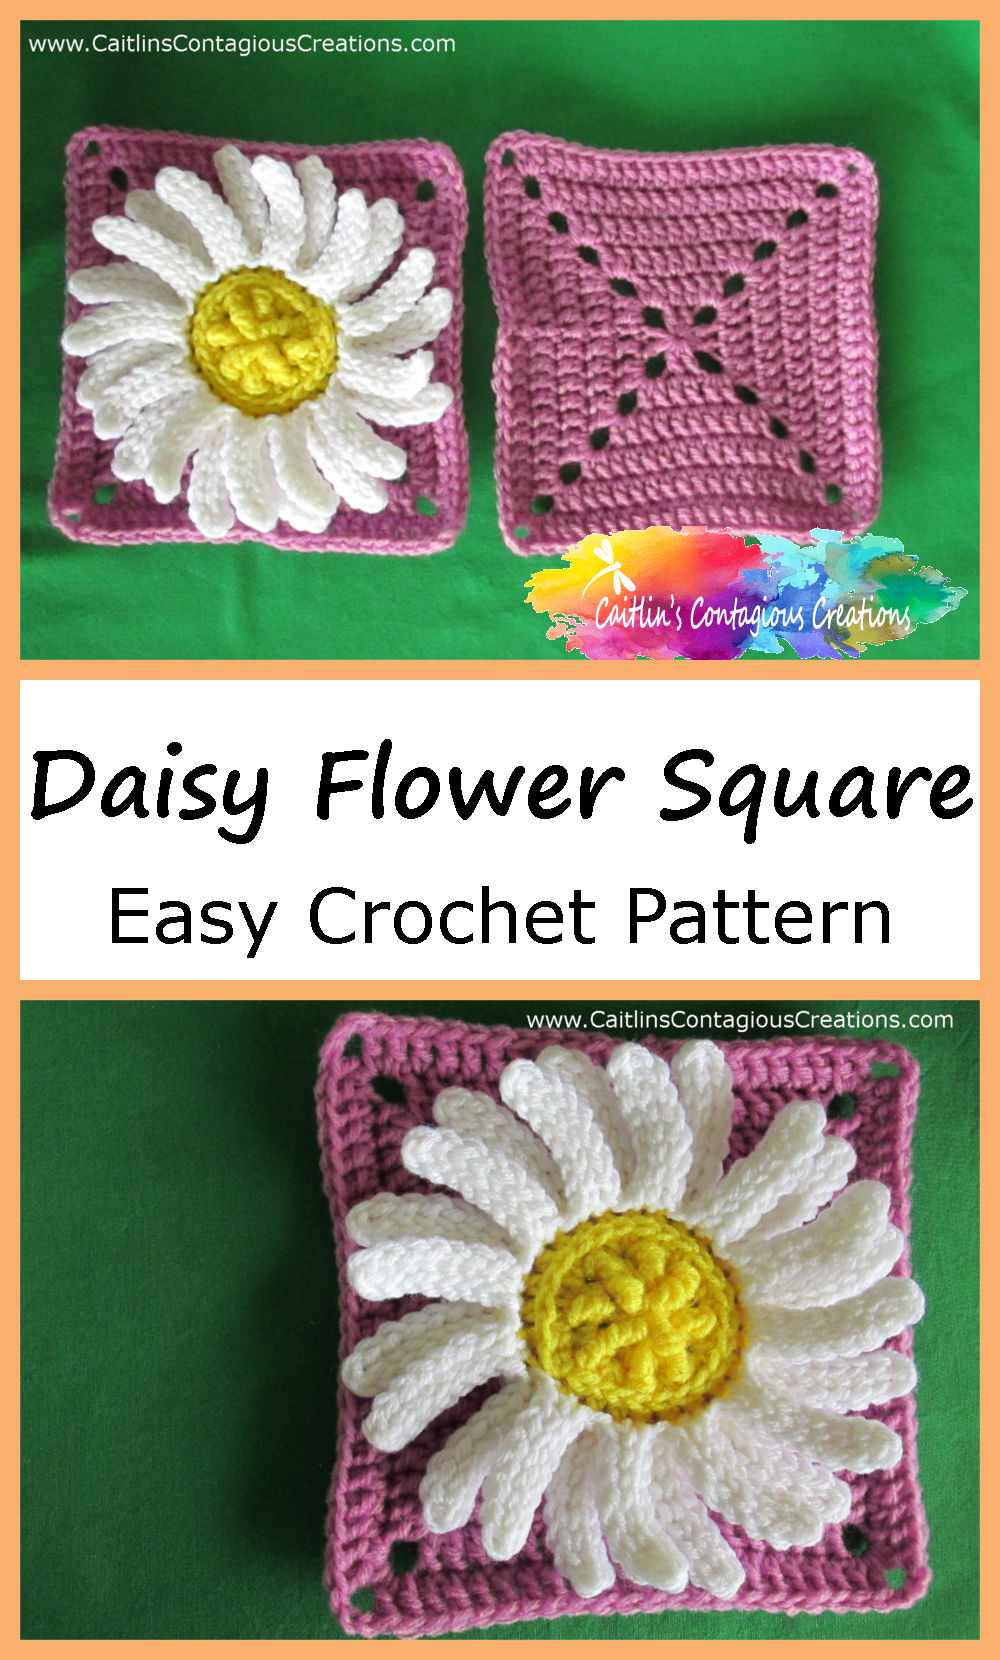
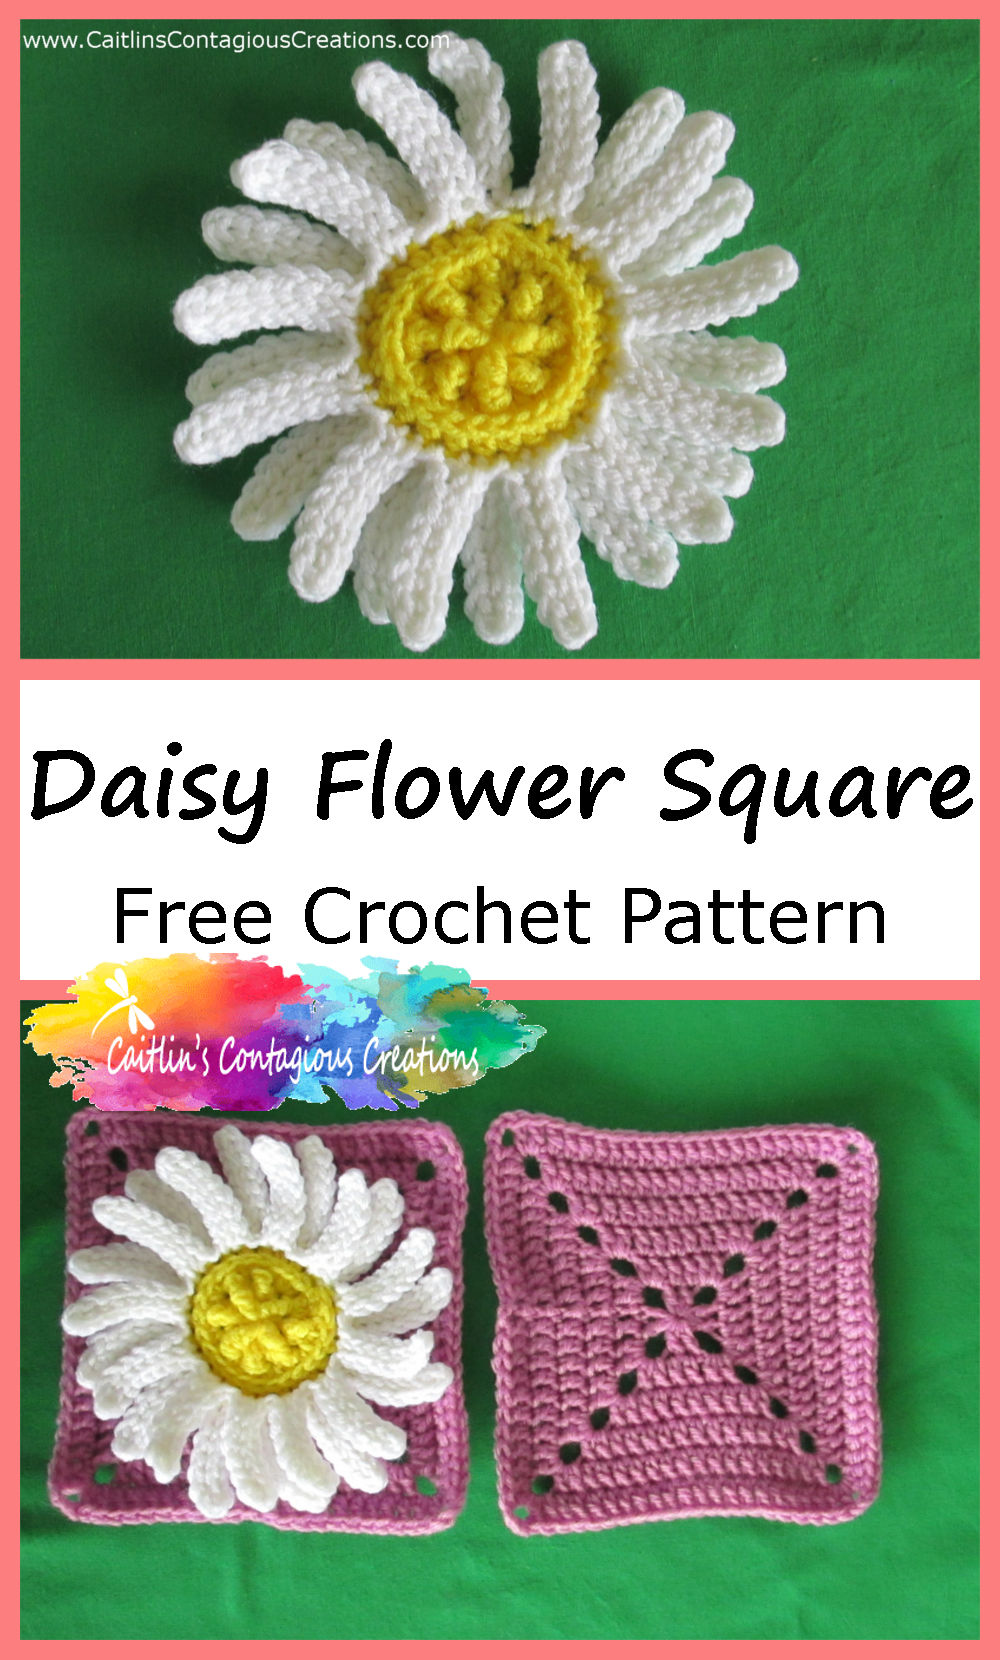
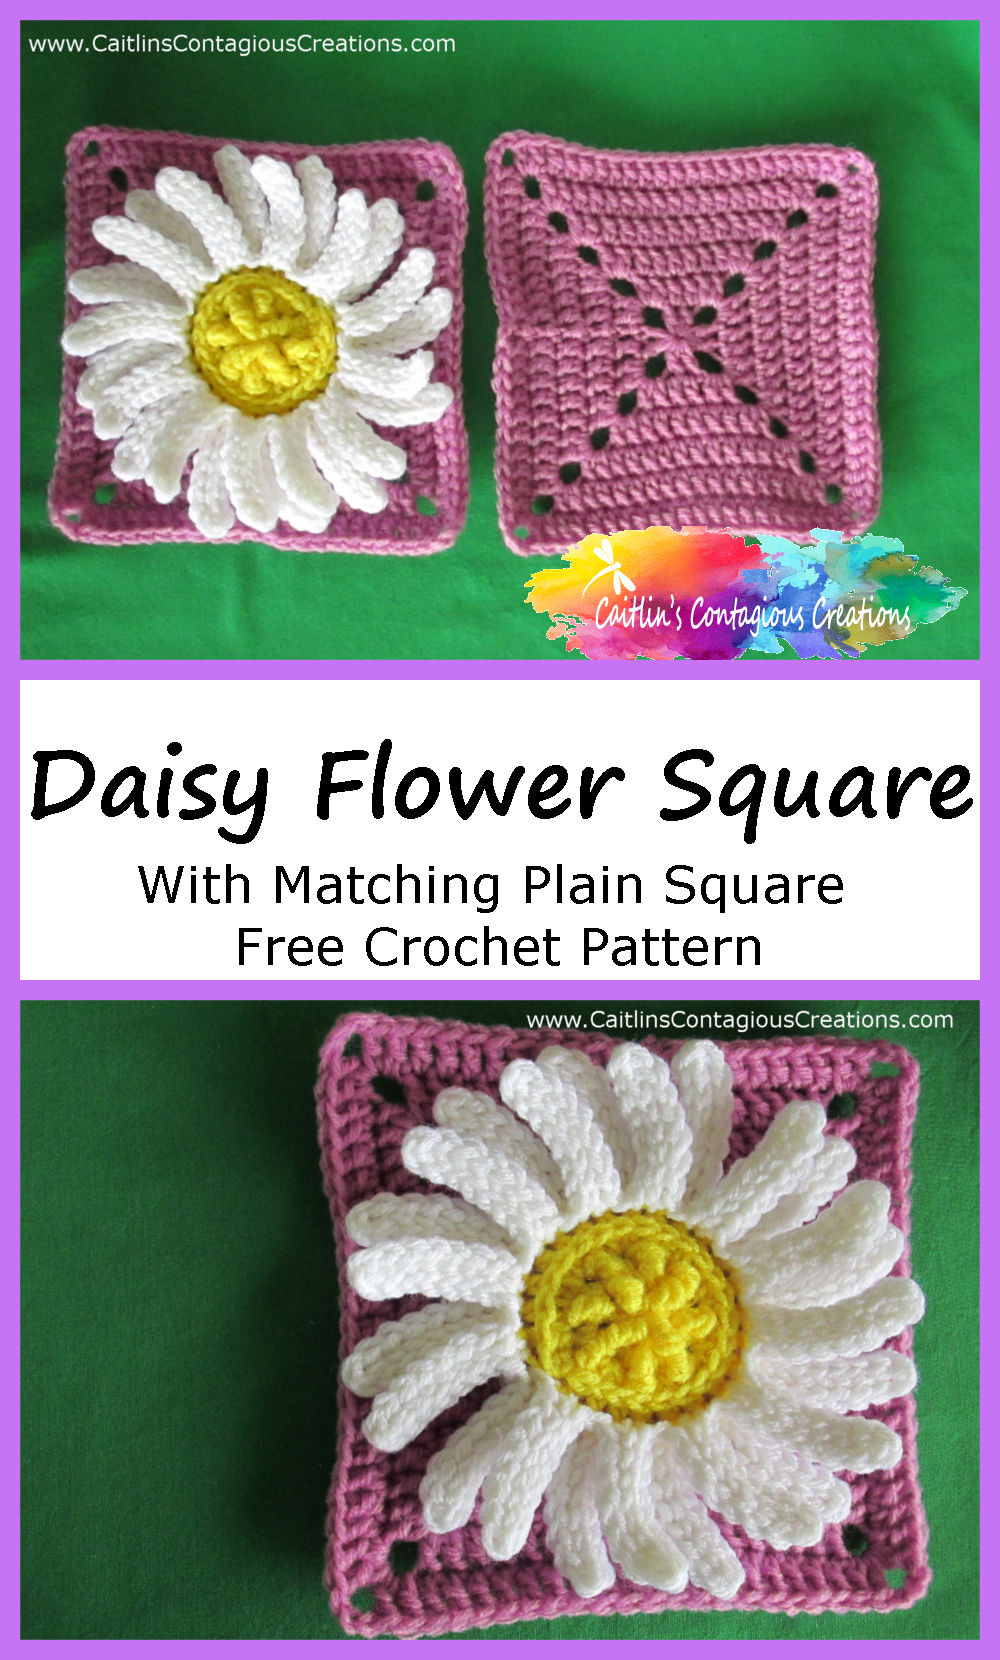
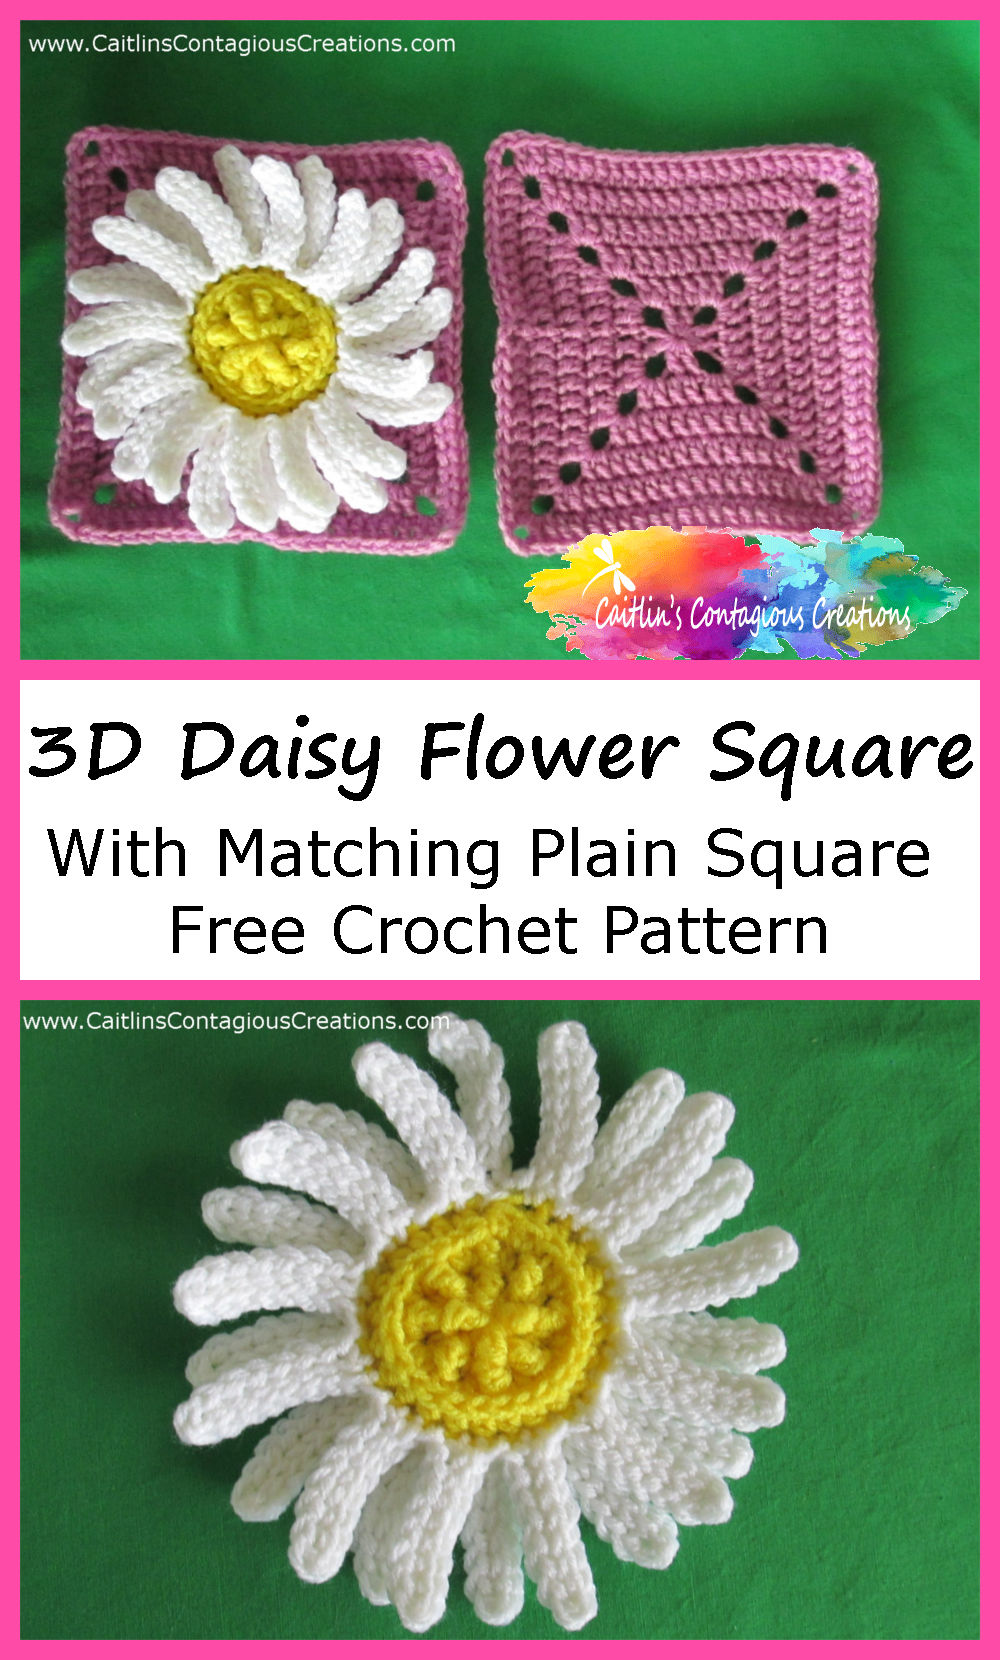
My newest creation is this Daisy Square Crochet Pattern! It is worked up using easy stitches and I’ve also included a solid square counterpart that is the same size. The petals have a fun 3D effect that pops off the background!
My Crocodile Stitch Sunflower Square Crochet Pattern is one of the most popular, especially with spring coming around (finally!). So I thought I’d make up a daisy counter part.
I love daisies. They were a huge part of the inspiration for my wedding decor! I called upon that inspiration again to came up with this fun daisy square!!
What I love most about it is how the petals pop out and give a real 3D effect that doesn’t come from many patterns I’ve seen. I used foundation single crochet stitches to create this effect. If you need some help with these useful stitches, I have a quick photo tutorial below, and a few video tutorial links here.
I hope you enjoy this daisy square crochet pattern as much as I enjoyed making it. Use it for blankets, purses, laptop covers, or anything else that needs a little floral boost 🙂
If you do enjoy this pattern, please share it with others on your Facebook or Pinterest accounts. Thank you for your support!

Daisy Square Crochet Pattern
Skill Level
Easy+ Knowledge of basic stitches, working in front, back and 3rd loop of half double crochet and foundation single crochet stitches
Finished Size
6.5” x 6.5” square
Gauge
13 DC x 8 rows =
4 in wide X 4 in tall
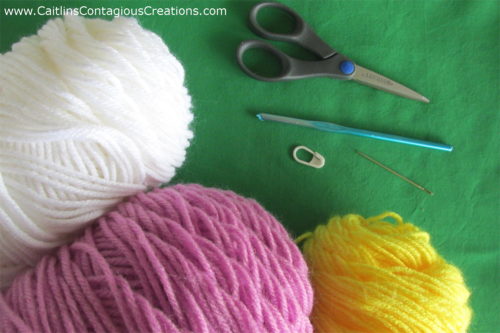
Materials Needed
- 8 yds of worsted weight yarn in center color (Bright Yellow)
- 25 yds of worsted weight yarn in petal color (White)
- 27 yds of worsted weight yarn in border color (Pink)
- 40 yds of worsted weight yarn for solid square (Pink)
- H 8/ 5 mm Hook
- Stitch Marker
- Measuring Tape
- Yarn Needle
- Scissors
Stitches & Abbreviations
- Magic Ring
- Foundation Single Crochet (FDC)
- Standing Single Crochet
- Chain (Ch)
- Stitch (St)
- Front Loop Only (FLO)
- Back Loop Only (BLO)
- 3rd Loop of Half Double Crochet
- Single Crochet (SC)
- Half Double Crochet (HDC)
- Double Crochet (DC)
- Treble Crochet (TC)
Special Stitches
Standing Single Crochet
With yarn on hook. Insert hook into stitch and pull up a loop (2 loops on hook). YO and pull through both loops on hook.
Foundation Single Crochet
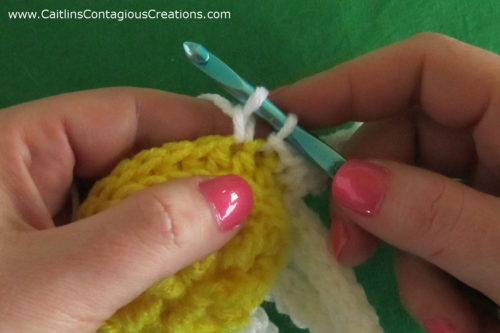
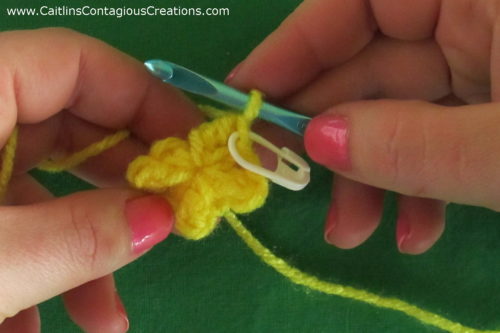
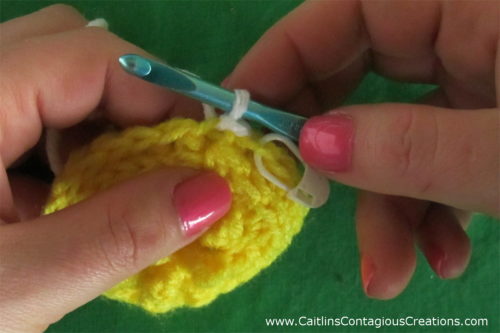
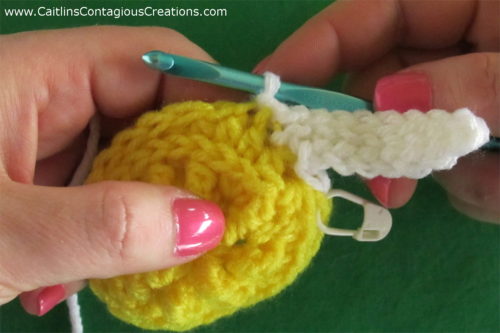
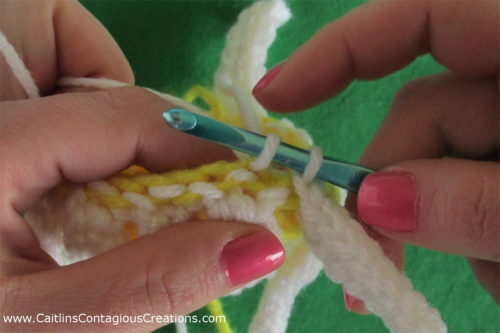
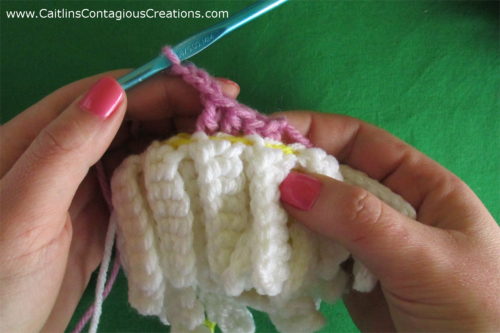
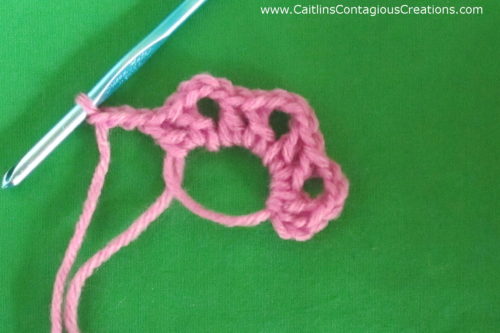
When working the foundation single crochets in the petal section, you can refer to the below photos for a quick guide. For more in-depth videos, please follow this link.
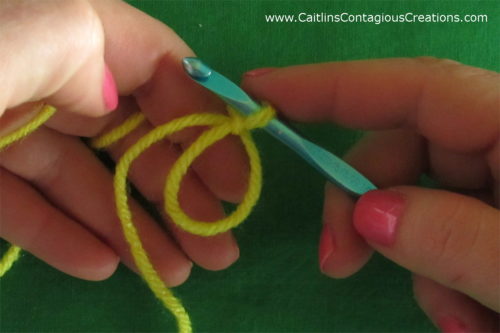
The first foundation single crochet starts with 2 loops pulled up from the center of the flower, the remaining FSC are made by inserting your hook in the base of the previous stitch.
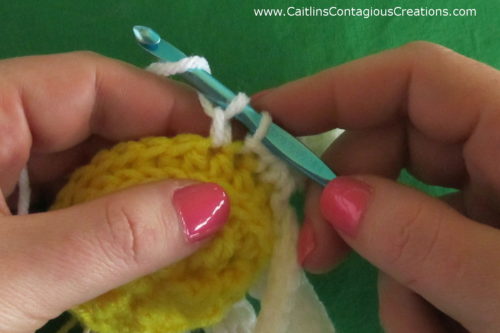
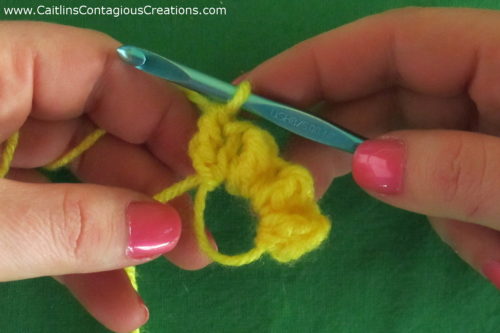
*With 2 loops on hook, YO and pull through first loop on hook.
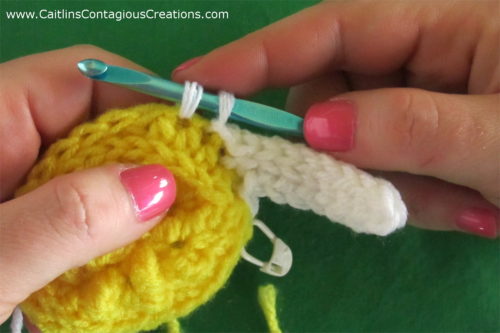
YO and pull through both loops on hook.
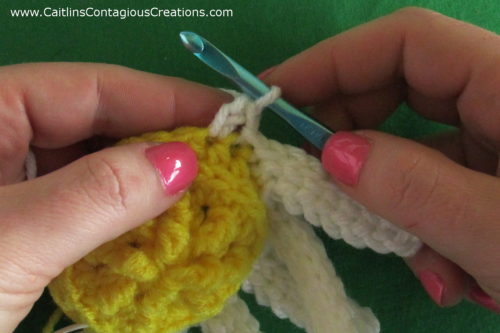
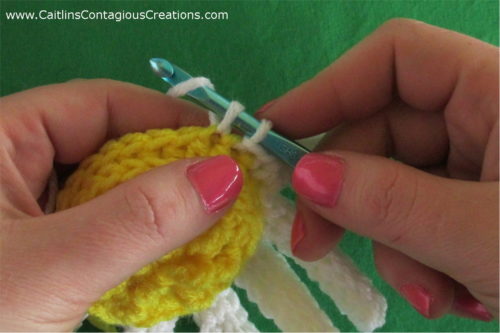
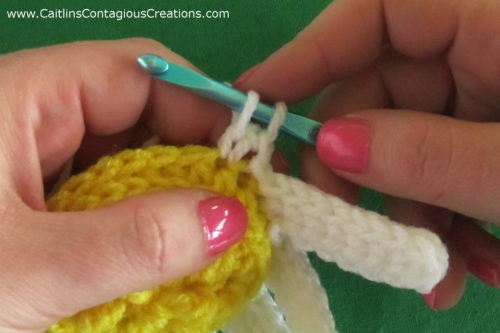
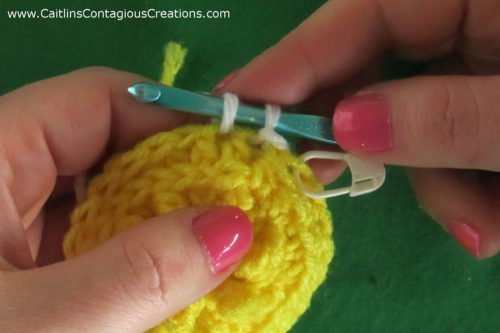
Insert hook in base of previous FSC. Noted by blue arrow in photo below.
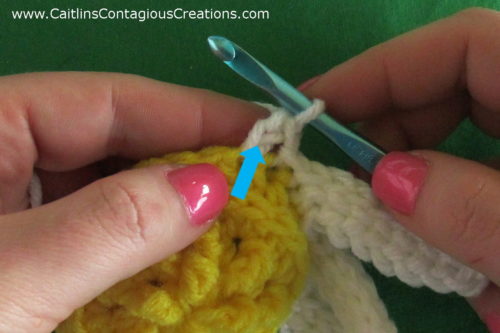
YO and pull up a loop.
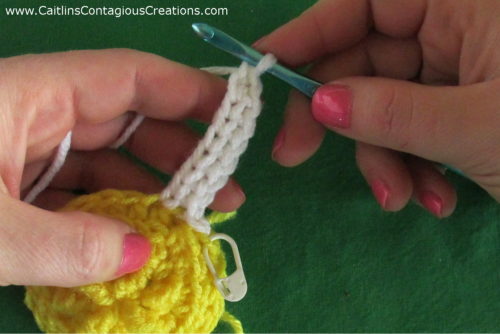
Repeat from * until desired number of FSC sts are achieved.
Pattern Notes
Gauge is only important for this pattern if you wish to achieve the same dimensions as I have given. You may use a smaller or larger yarn or hook to work the project but know that your finished product will be a different size that what has been provided.
The center of the flower and the petals are worked in the round. Do not join at the end of the row while working these sections. Use a stitch marker in the end of the round and move the marker up as you complete each row.
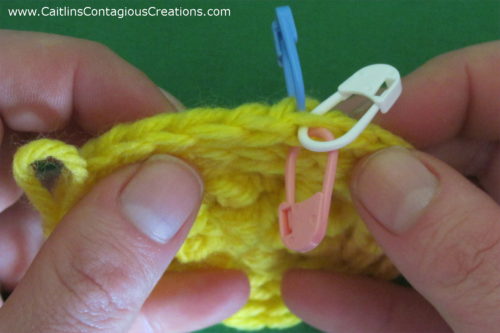
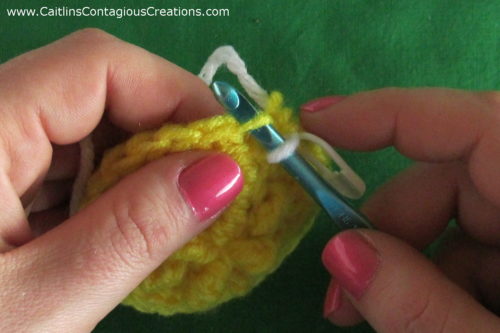
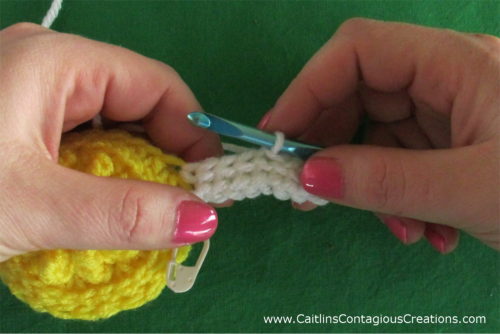
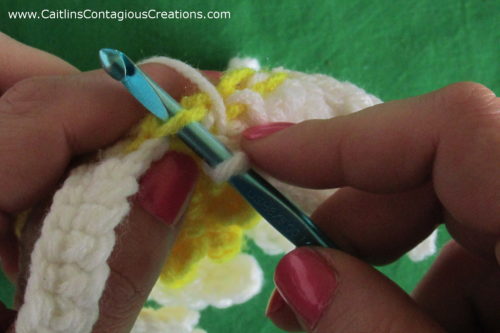
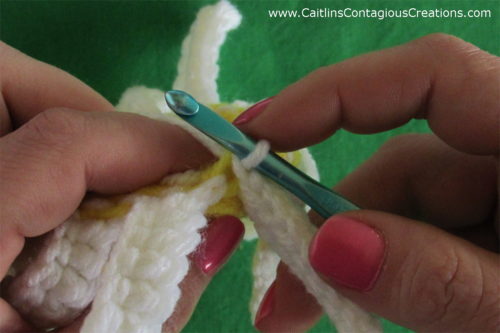
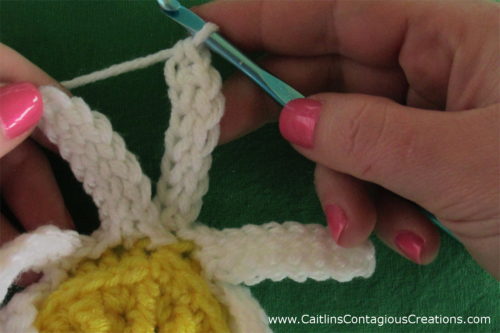
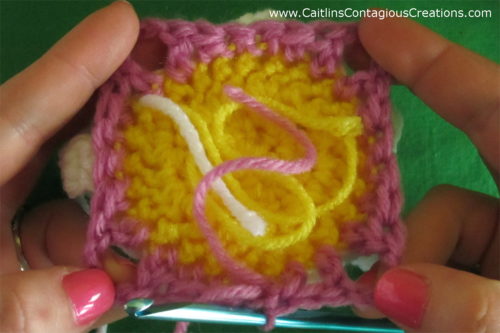
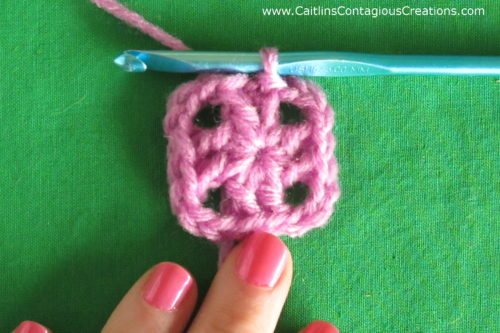
The first and second row of petals and the border is all worked from the final row of HDC completed in the center flower section. The first row of petals in worked in the front loops only. The second row of petals is worked in the back loops only. The border is worked into the 3rd loops. In the photo below, the pink marker is in the front loop, the white marker is in the back loop and the blue marker is in the 3rd loop.
The square border section of the daisy square and the entire plain square is joined with a SS at the end of each row. The ch 2 at the beginning of each row in this section counts as the first DC, you will be working the SS at the end to join the row into the 2nd chain at the row’s start.
At the start of each section, I tell you what color I used to make it easier for you to follow along, but feel free to change up the colors to whatever colors you’d like.

Daisy Square Crochet Pattern
Center of Flower – In Bright Yellow
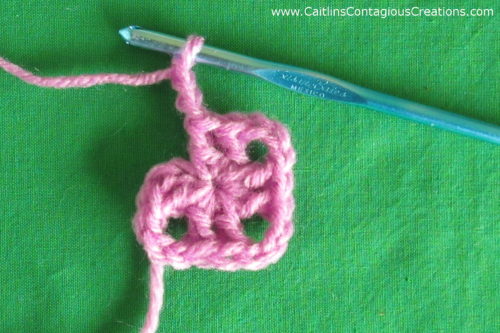
Start Magic Ring
Row 1. Ch 1. *SC. TC. Repeat from * 4 times total. Do Not Join. Tighten the magic ring. (8sts) Place stitch marker in last TC.
Row 2. (SC. TC) in each st around. (16 sts)

Row 3. *2 HDC in st. HDC in next st. Repeat from * around. (24 sts)
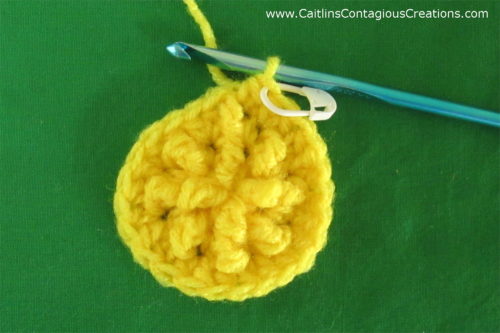
Row 4. HDC in the 3rd loop of each st from previous row. Do not join. Complete the final YO of last HDC with white (or petal color of your choice). (24 sts)
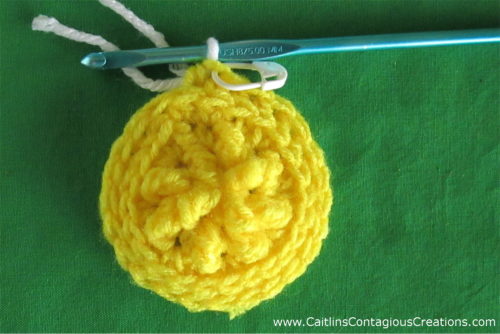
Note: STOP and look at the last row of stitches. Identify which loops are the front loop, the back loop, and the 3rd loop. You will be working in each loop for the first and second petal row and the border, respectively.
Petals – In White
Row 5. Work each petal of this row in Front Loops Only. With white (from last YO of previous row) *SS into front loop of next st. Keep that loop on your hook while you insert your hook into the next st and draw up a loop (2 loops on hook). Use the 2 loops on the hook to complete 8 FSC. SS down the foundation stitches. Repeat from * around all the front loops. (24 front loops make 12 front loop petals – each petal is formed using 2 of the front loops from the previous row).
Row 6. Work each petal of this row in Back Loops Only. *SS into back loop of the SAME st as the last petal from row 5. Keep that loop on your hook while you insert your hook into the next st and draw up a loop (2 loops on hook). Use the 2 loops on the hook to complete 8 FSC. SS down the foundation stitches. Repeat from * around all the back loops. (12 back loop petals – each petal is formed using 2 of the back loops from the previous row). SS into first back loop used in this row. Tie off.
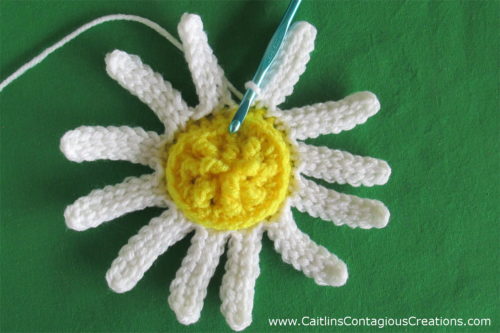
Square Border – In Pink
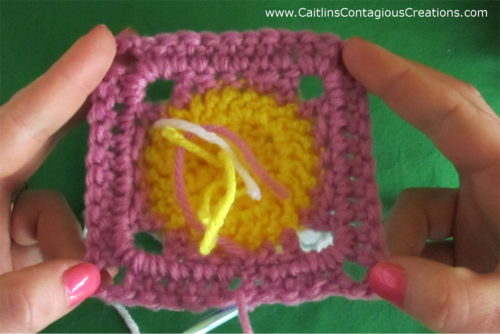
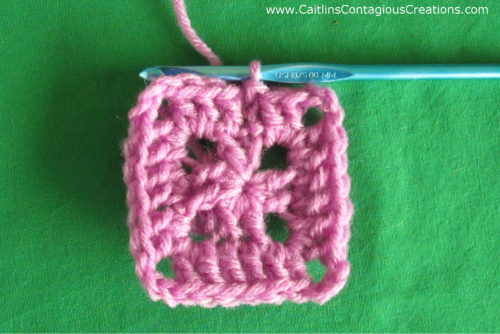
Row 7. Work in 3rd loop of HDC from row 5. Join with standing SC. (You could also join and chain 1). *SC. HDC. DC. Ch 3. DC. HDC. SC. Repeat from * around 4 times total. While completing last repeat, instead of final SC, SS to top of standing SC (or ch). (24 sts)
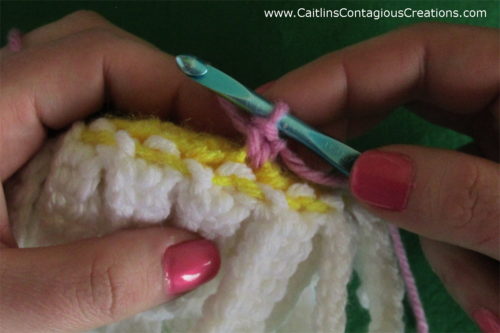
The above picture is taken from the back to give maximum view of the border. (The rest of the border photos are also taken from the back.)
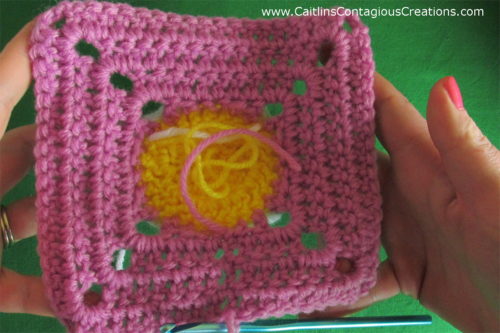
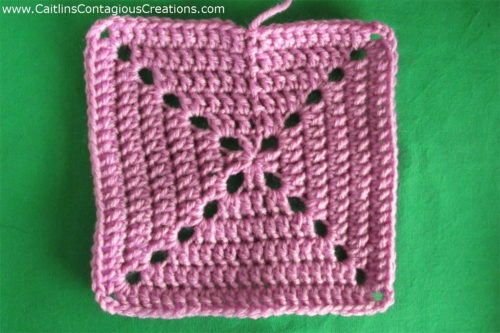
Row 8. Ch 2 (counts as “first DC”). *DC in each st across to ch 3 space. (2 DC, Ch 3, 2 DC) in chain space. Repeat from * around. SS to top chain of “first DC”. (40 DC)
Row 9. Repeat row 8. (56 DC)
Row 10. Repeat row 8. (72 DC)
Row 11. Repeat row 8 (88 DC). Tie off.
Yay! Your Daisy Square is done! I hope the directions weren’t too complicated… some of the instructions are a little hard to write out, which is why I included lots of photos. Keep going to make a matching size plain square 🙂
Plain Square Crochet Pattern
You are going to join at the end of each row for this square.
With desired color on hook – Pink
Magic Circle. Do not tighten until instructed.
Row 1. Ch 2 (Counts as “first DC”). DC. Ch 3. *2 DC. Ch 3. Repeat from * 2 more times. Close magic circle. Join with SS to top of “first DC”. (8 sts)
Row 2. Ch 2 (Counts as “first DC”). *DC in each st to chain space. (2 DC, Ch 3, 2 DC) in chain space. Repeat from * around. SS to top of “first DC”. (24 sts)
Row 3. Repeat row 2. (40 sts)
Row 4. Repeat row 2. (56 sts)
Row 5. Repeat row 2. (72 sts)
Row 6. Repeat row 2. (88 sts). Tie off and weave in ends.
Aren’t They Lovely?
The petals are definitely my favorite part of this fun pattern. Please comment to let me know what you thought of it and what your favorite part is!
I hope you enjoyed following my pattern. Come back to see it again. Share this post to your Facebook or Pinterest account so you can find it easily and so others can find and enjoy it too!
Happy Hooking!

Beautiful flowers, don’t know which one is the prettiest, Daisy or Sunflower. I chose both. Thank you so much for sharing.
Lindy, Thank you so much for your kind words! Daisies are my personal favorite, but I adore both of these designs… now to figure out which flower should be next! 🙂 ~Caitlin
I love your bright, sunshiny daisies! I will definitely make this one. Thank you so much!
Martha, Thank you so much for the comment and your kind words! I’m glad you like my pattern enough to give them a try <3 ~Caitlin
These daisy squares are very pretty!
Rhondda, Thank you so much! I appreciate you taking the time to comment 🙂 I love your blog too!! ~Caitlin