This post contains affiliate links. If you choose to purchase I will receive a small commission at no extra cost to you. I use the funds to buy yarn and make more free patterns! I greatly appreciate your support. For more info please see my Terms & Conditions. Thank You!
How to join a strand of yarn to the crochet hook and start a crochet project: This beginner crochet tutorial is the very first thing you need to learn when starting your crochet adventure! If you do not have this basic skill you will not be able to begin a new crochet project. This is the first lesson I recommend to anyone who is new to crochet.
Starting At The Beginning (We’ve All Been There)
The ability to attach yarn to a hook is the very first thing you need to learn as a new crocheter. After all, you can’t crochet anything on any level if you don’t know how to get the yarn on the hook properly.
That being said, try not to get frustrated or feel rushed when learning. Like any new thing you’ve ever attempted it will be hard at first, maybe you won’t quite understand what I mean when I say to yarn over, maybe you’ll get all messed up with how to hold the hook…
You might even find your shoulders tight and up by your ears, just take a deep breath and let it out and relax your shoulders down. I promise it gets more relaxing once you create the muscle memory and learn the stitches.
Those are all normal struggles when learning to crochet. Keep at it and you’ll figure it out. The terms will start to make more sense, and your hands will develop a way to hold the hook and keep tension as you get more familiar with the movements of crochet.
I think just about anything can be achieved if you have enough patience and persistence. Have patience with the task and with yourself, nothing worth doing is done well quickly. Be persistent, never give up. The best way to ensure you will never succeed is to quit trying. Be patient and be persistent, it’s kinda my mantra right now.
Before you grab your yarn and hook…there are a few things you should know
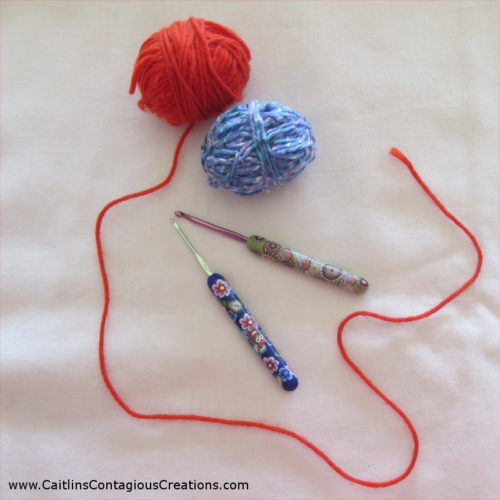
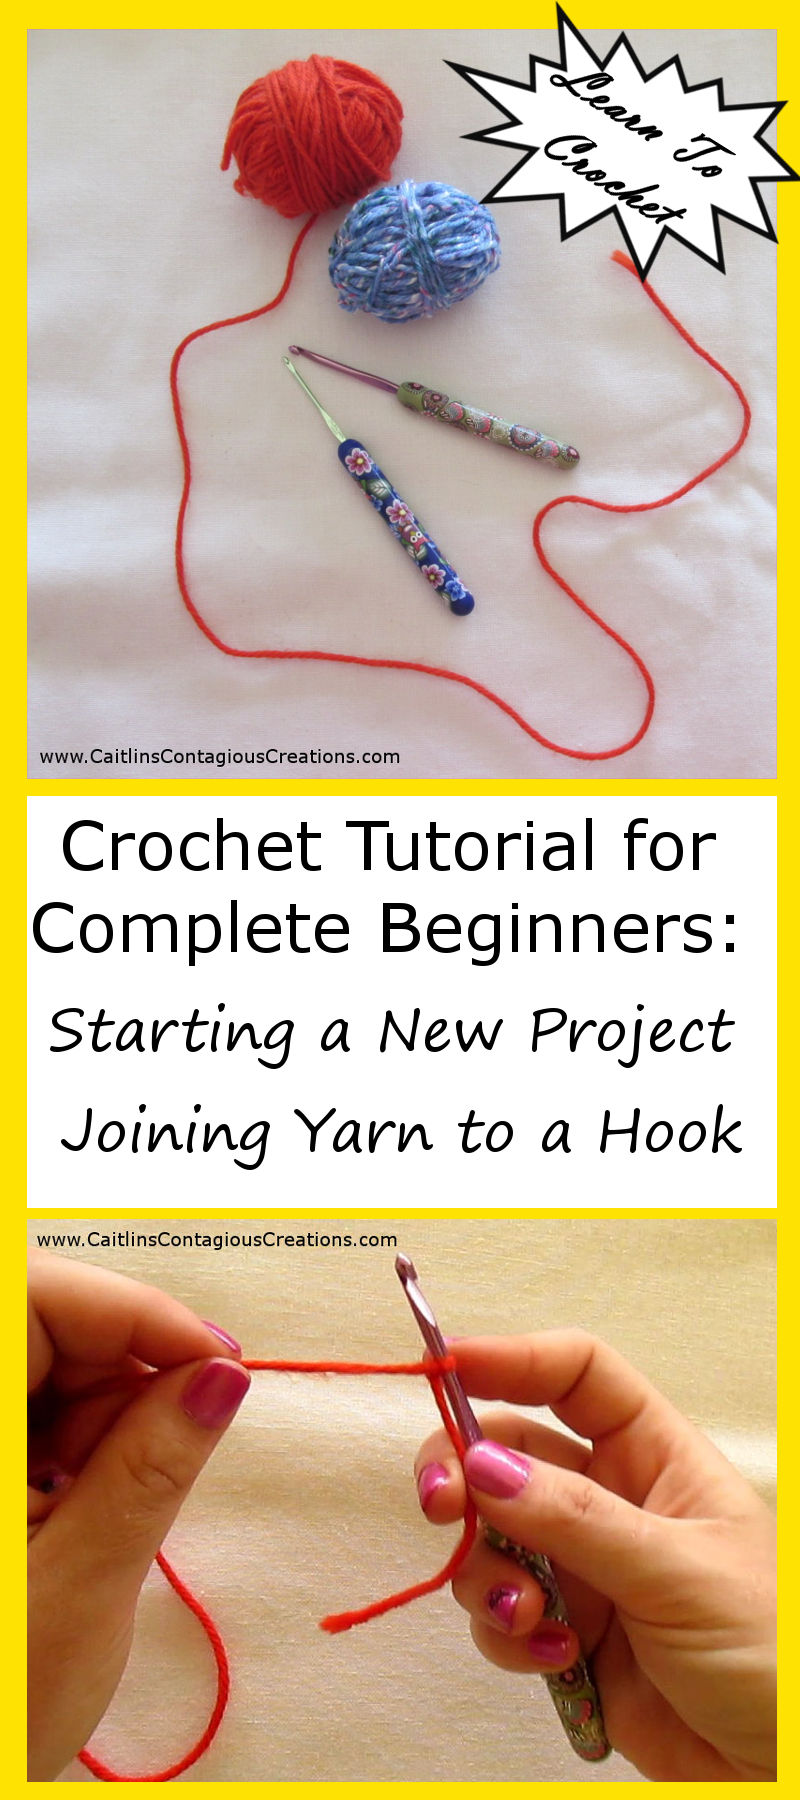
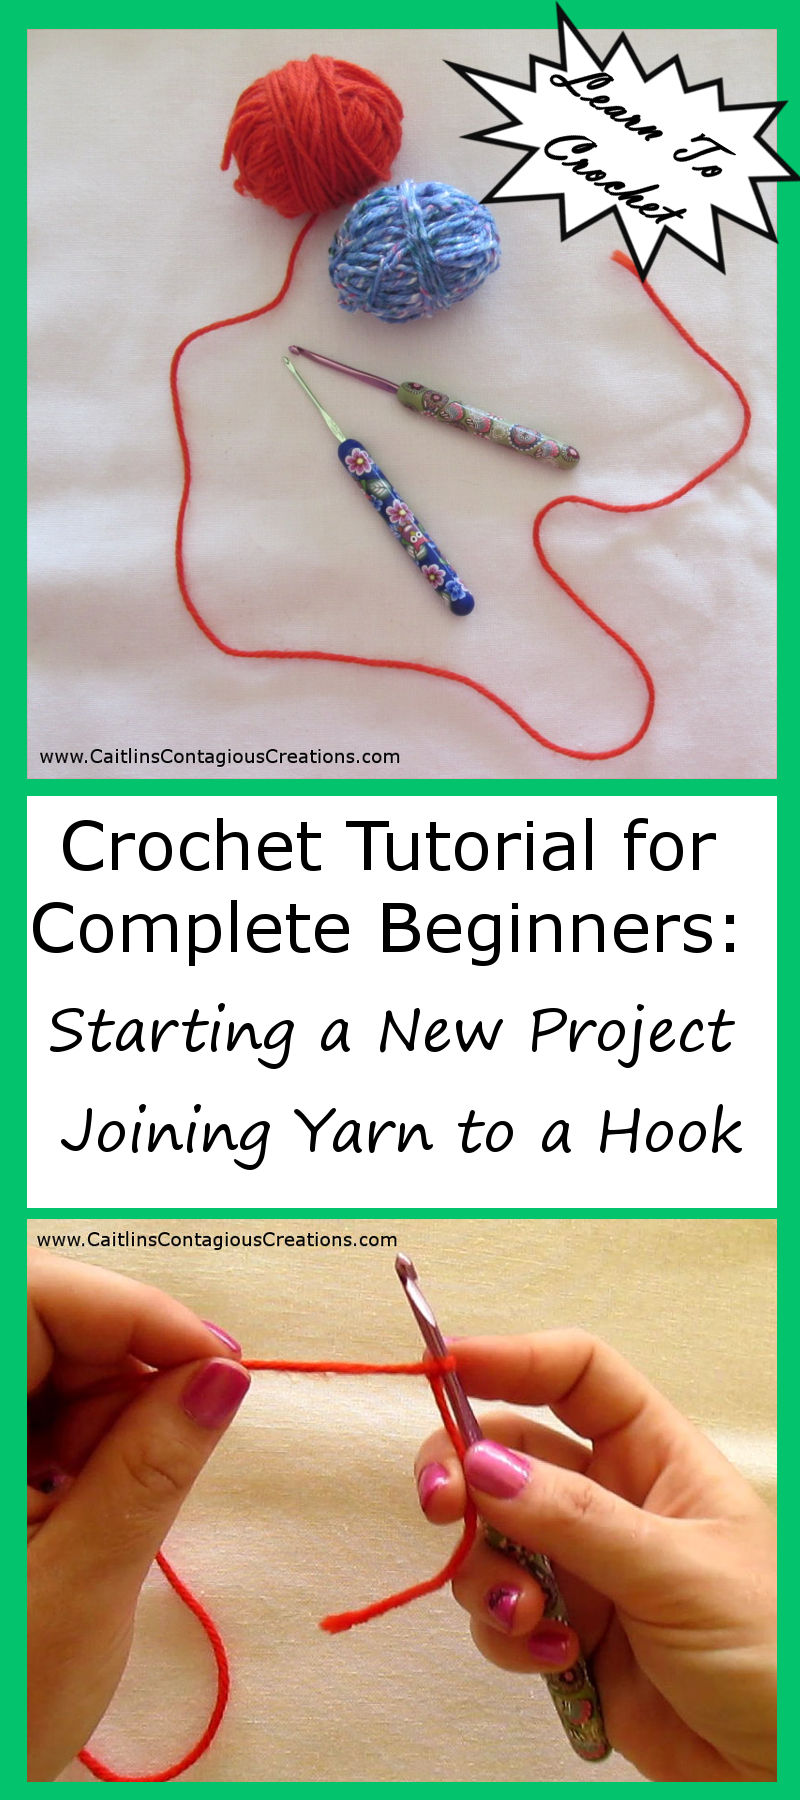
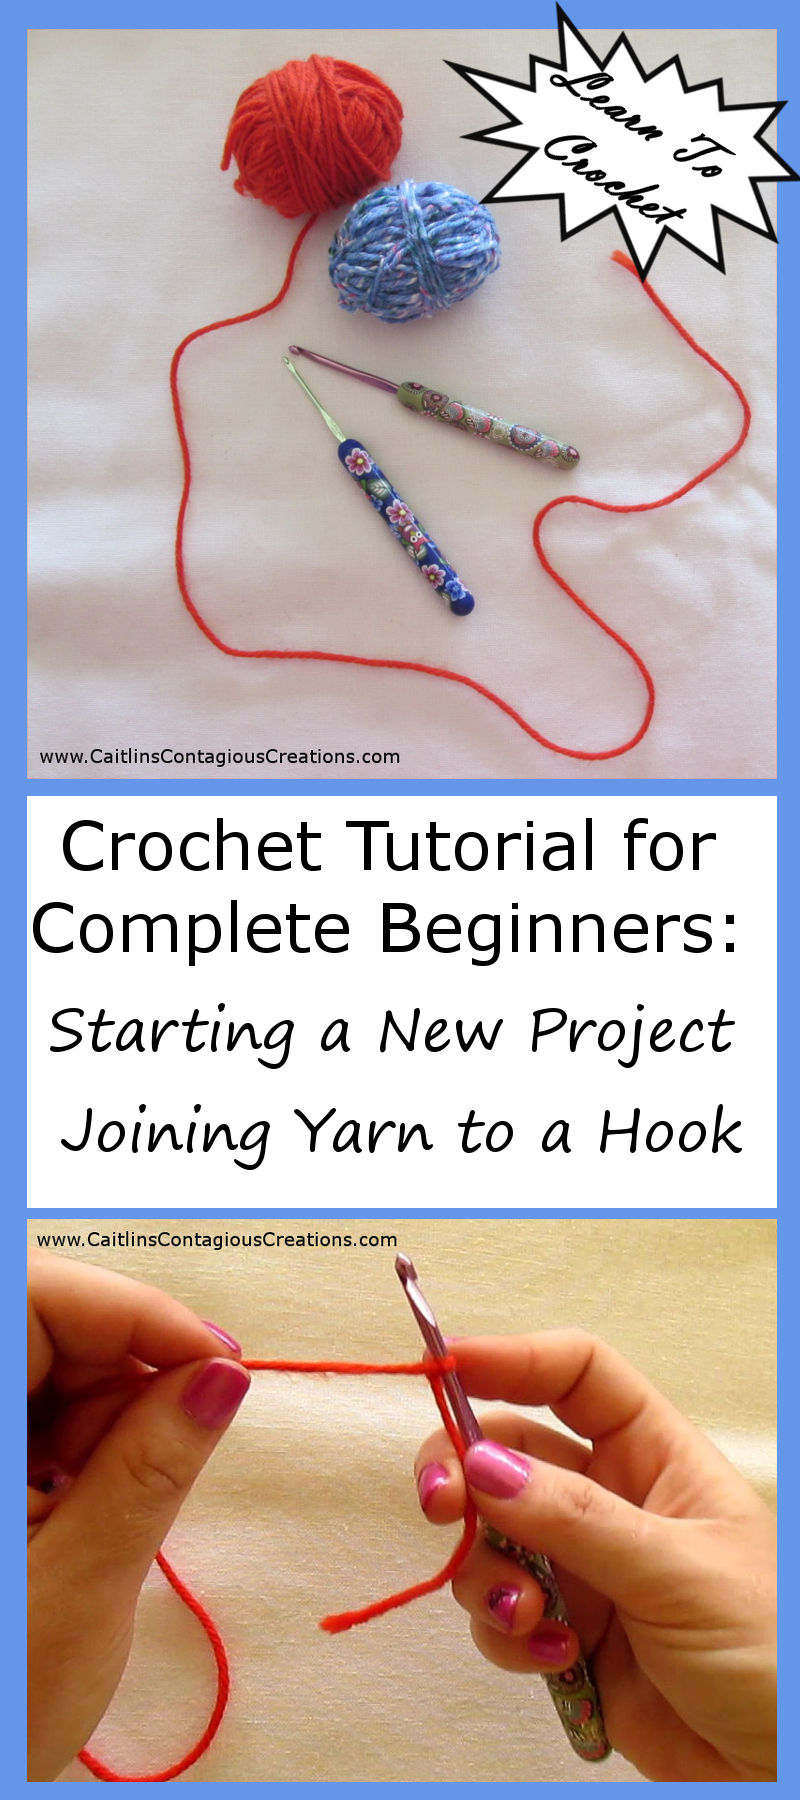
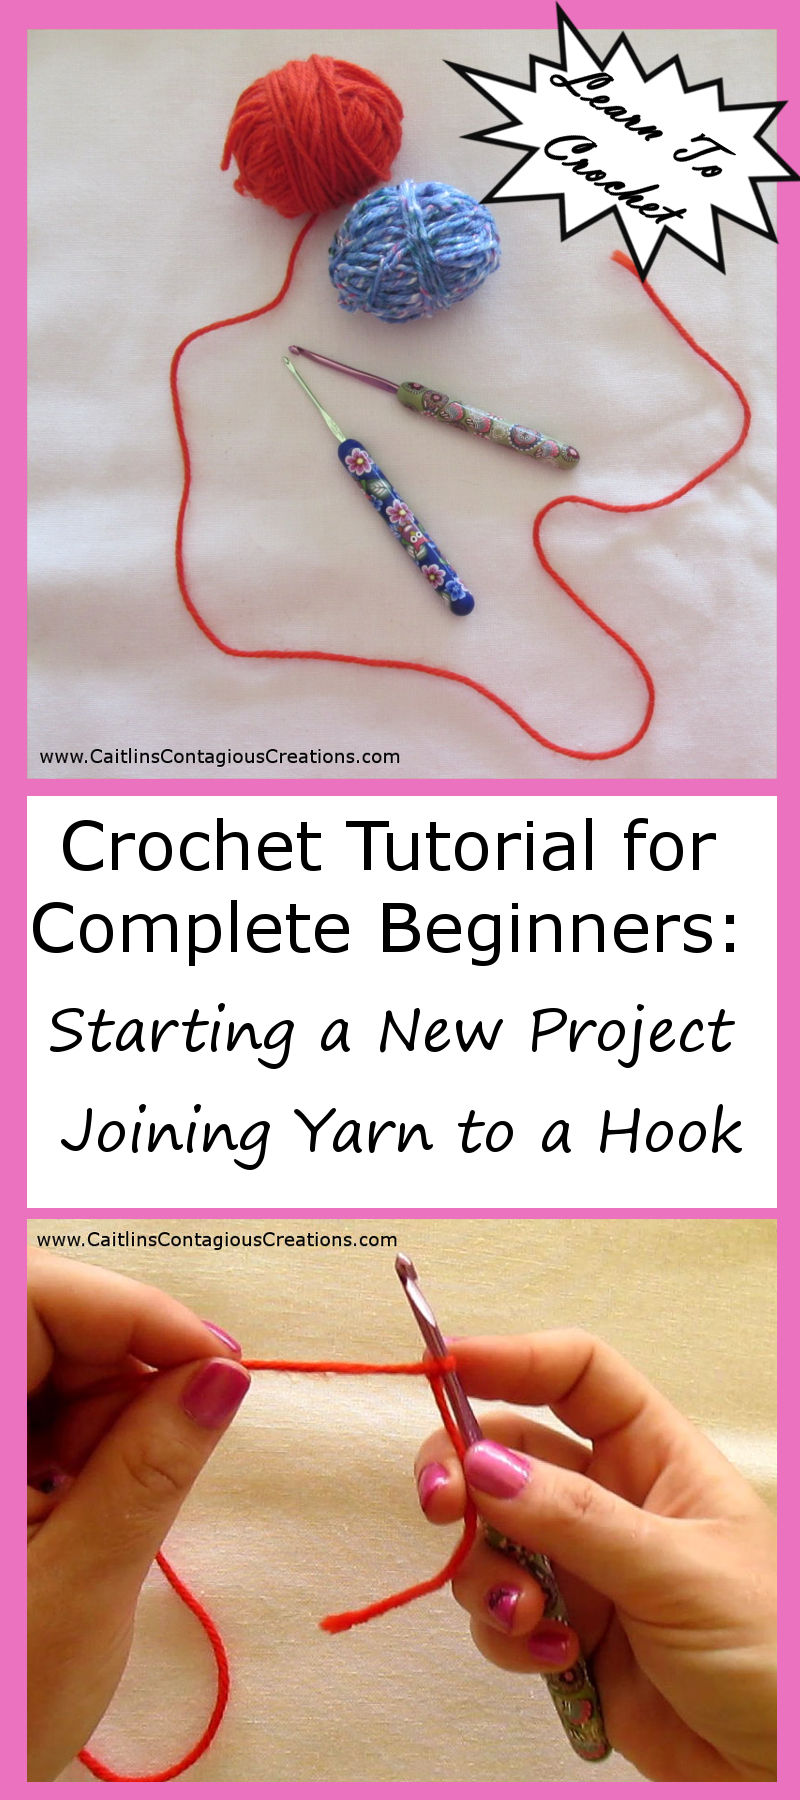
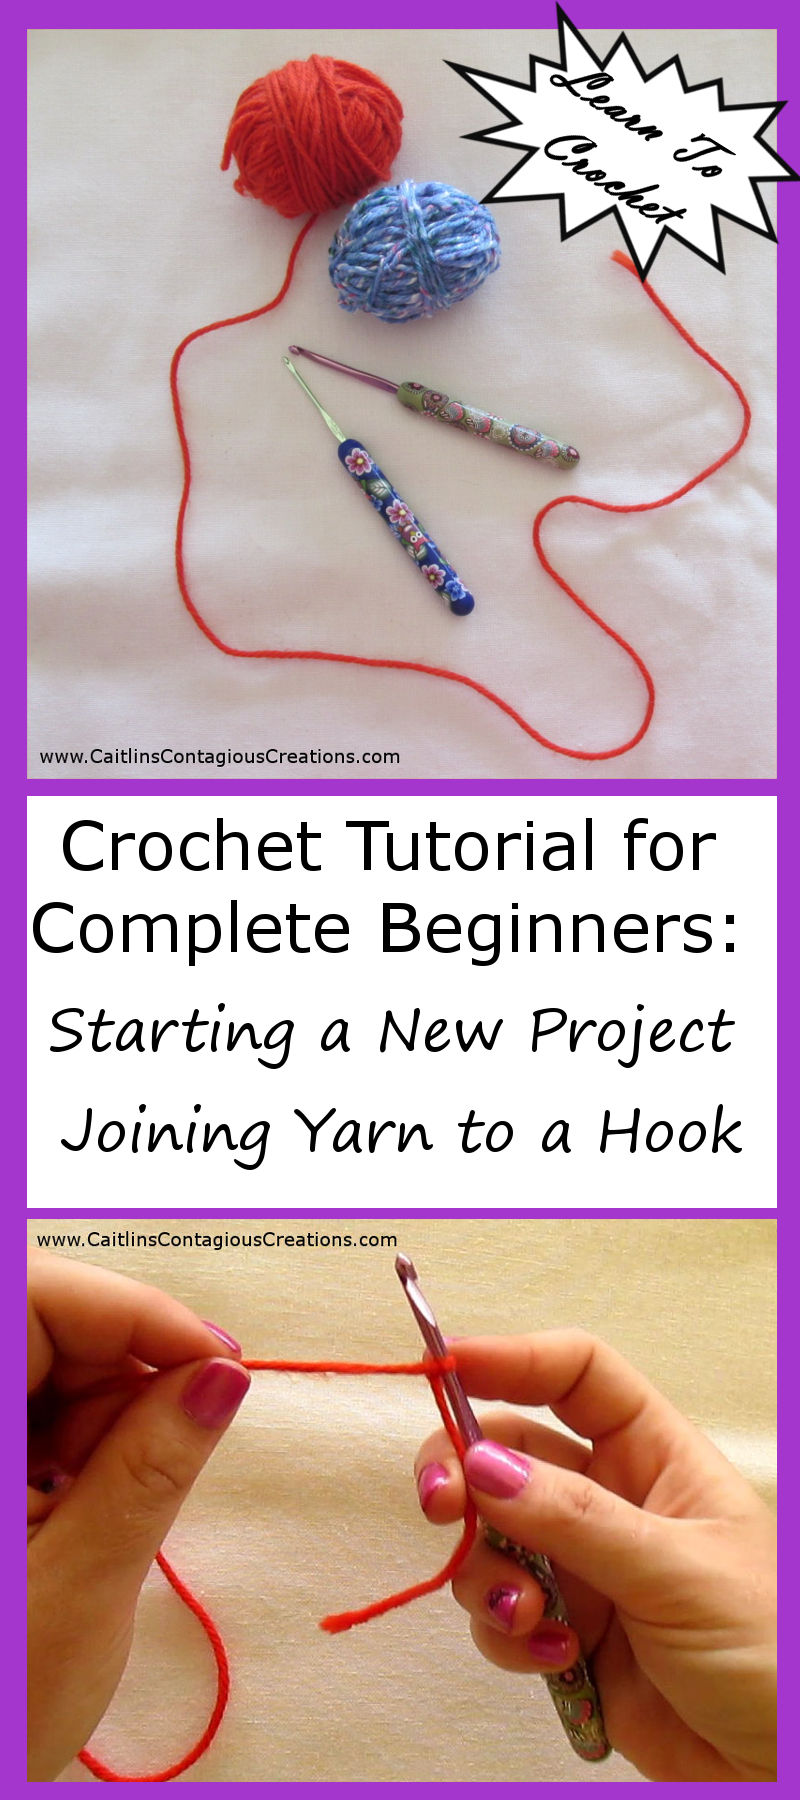
Hook Size: A slightly larger size hook will be easier to practice with, but don’t go over board, a hook can also be too big. The size I recommend for practice is between a G6/4.00 MM, a H8/5.00 MM, or an I9/5.50 MM hook. Larger hooks result in larger stitches, which is good to see clearly but there is such a thing as too big; larger hook stitches can be difficult to see. If you are starting out, I recommend this set of aluminum hook from Susan Bates; it has all the sizes you’ll need to get started and complete a variety of projects! They are relatively inexpensive and the aluminum is hard to bend and has a nice slide when working with the yarn.
If you like the Susan Bates Hooks with polymer clay handles I have in my pictures you can buy them here on Etsy. There are tons to choose from so you are sure to find a design that fits your style! I also love how the clay makes the handle wider and easier to hold, especially for long periods of time. They are not really ergonomic, but they are definitely better!
Yarn color: Try to choose a practice yarn that is lighter in color, but is not white. Darker browns, grays, and black can be difficult to see (even for the experienced hooker). Choose a bright color for the best visual. I love this worsted weight yarn, it is perfect for practice and lots of other things.
This tutorial is for a right handed crocheter. Sorry lefties, nothing personal I’m just so right-handed I can barely hold a pencil with my left, never mind a crochet hook. I’ll keep you posted if I can persuade Kurt (my left-handed husband) to learn to crochet (Ha!) BUT if you would like to learn from a right handed tutorial, you can sit so you are watching the screen through a mirror, it will flip the image so it makes more sense when you copy them.
Now that you know what to choose… Lets Get Started!!
Attaching Yarn to A Hook and Starting A Crochet Project
Below I have created a tutorial with 4 different methods to join the yarn to the hook. It might seem like 4 is a lot, but I gave so many because different people learn different ways and I want to accommodate as many people as I can with this post. If one doesn’t seem to work, just try another. One will feel right or click easier than the others.
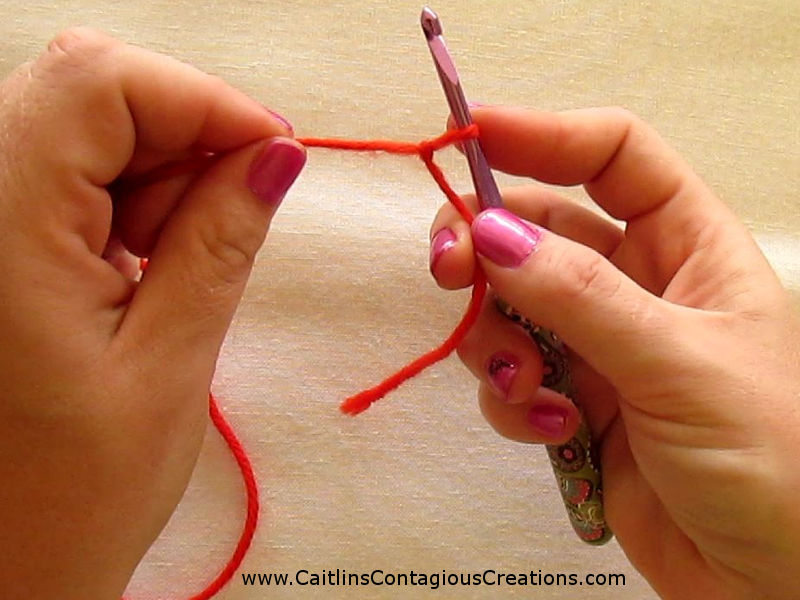
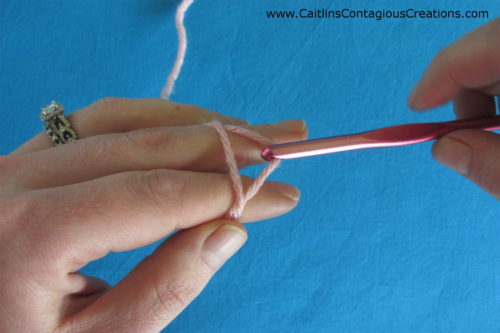
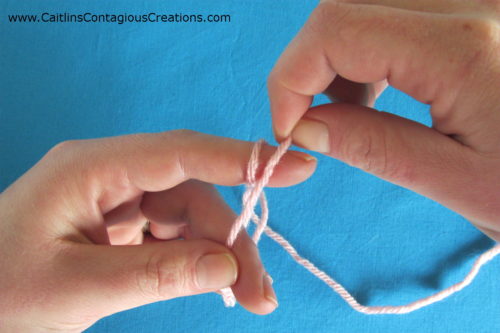
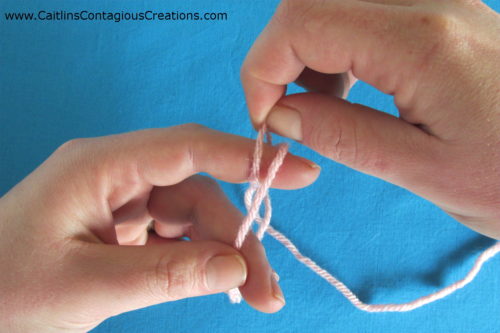
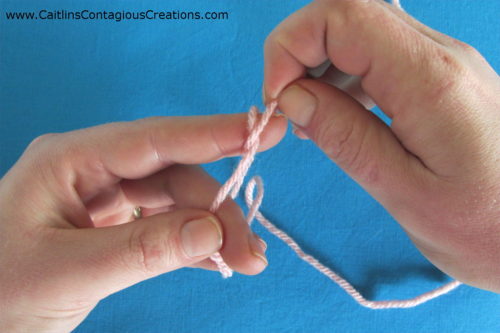
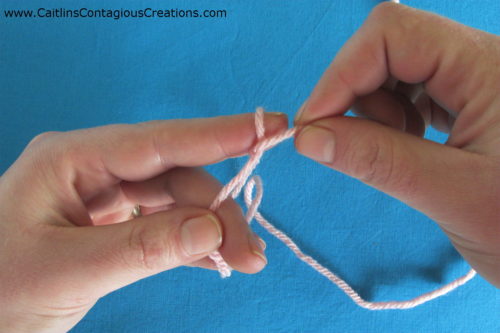
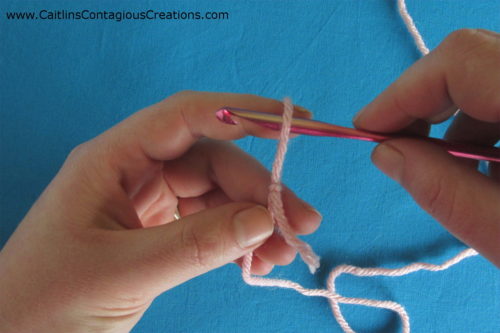
Method 1
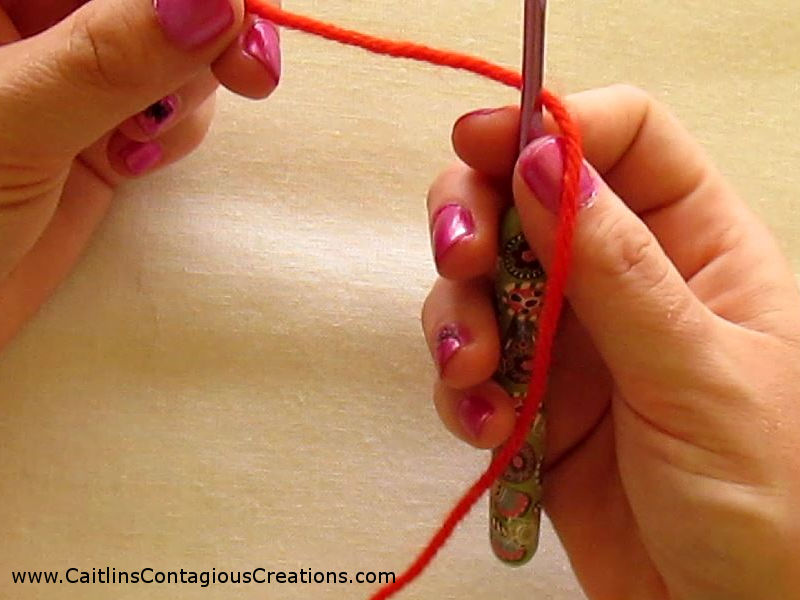
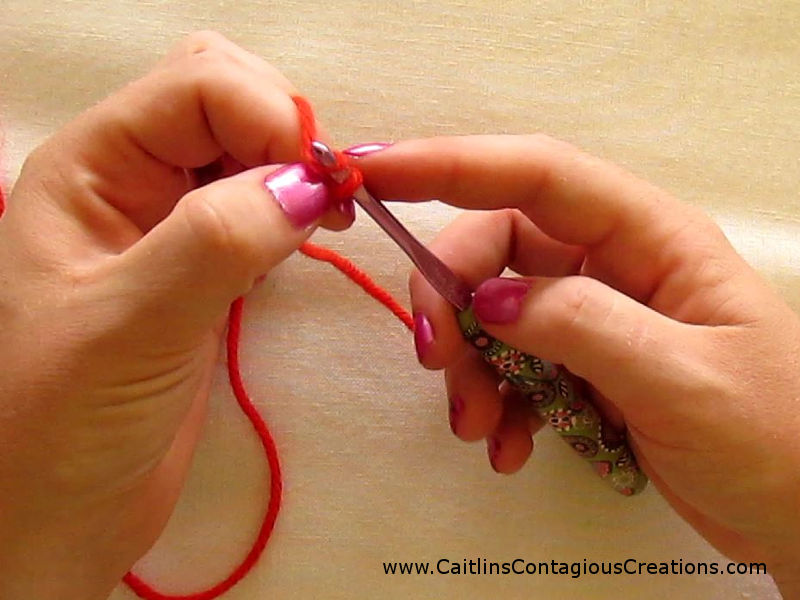
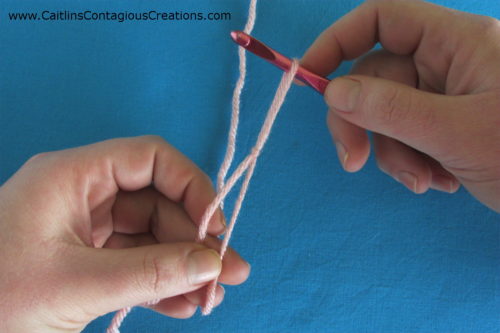
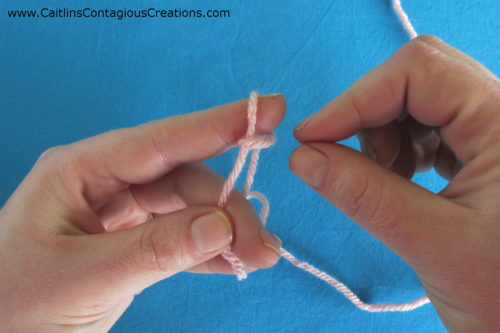
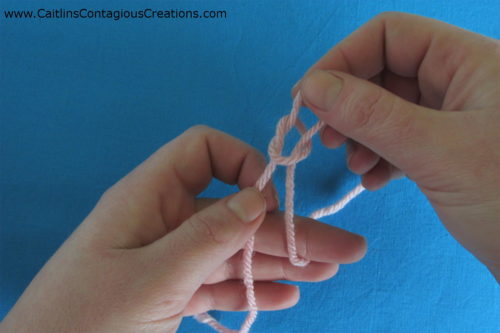
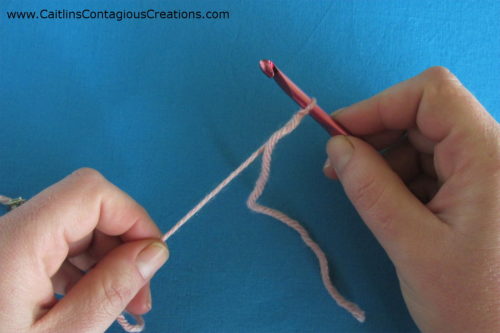
Step 1) Hold the hook in your hook hand. Hold the end of the yarn between your thumb and forefinger of your tension hand (your left if you are right handed). Wrap the yarn around the hook.
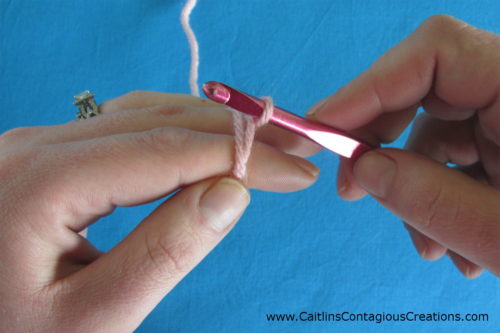
Step 2) Grab the working strand (that is the strand leading back your yarn skein or ball) with your ring and pinky fingers of your tension hand (your left hand if you are a righty).
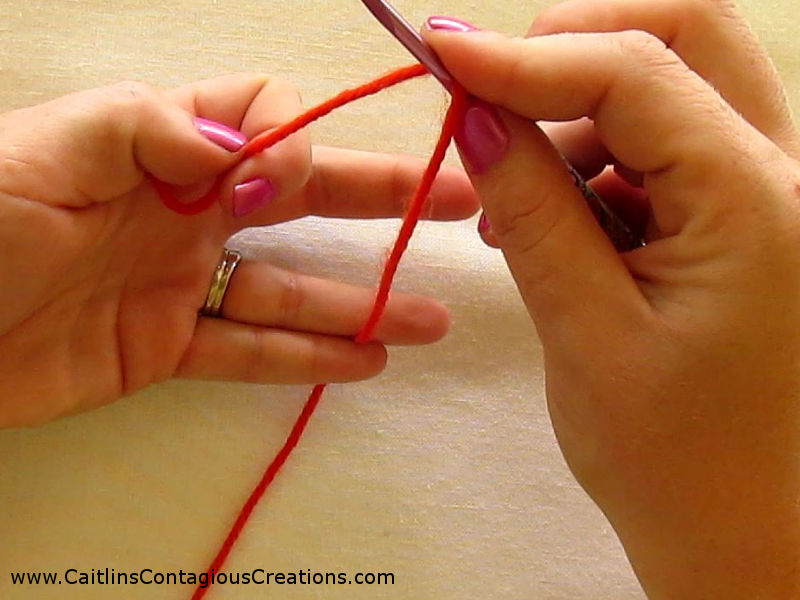
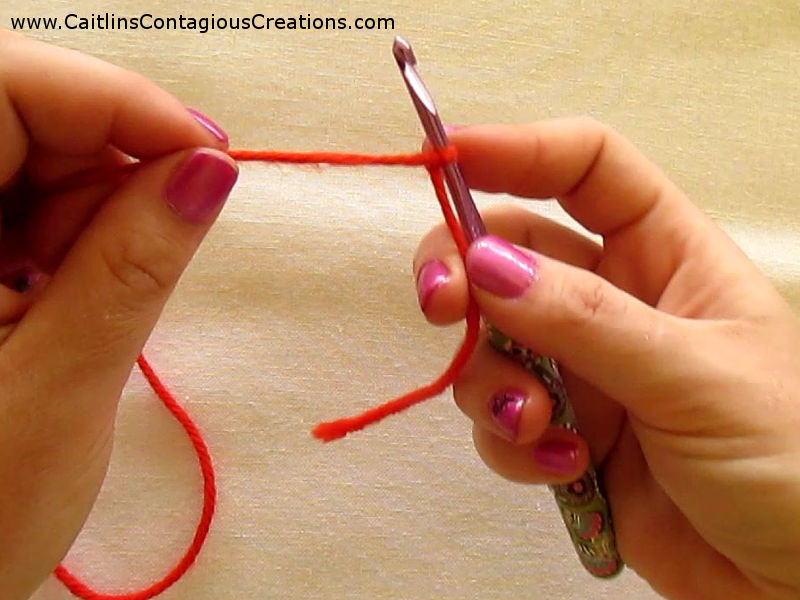
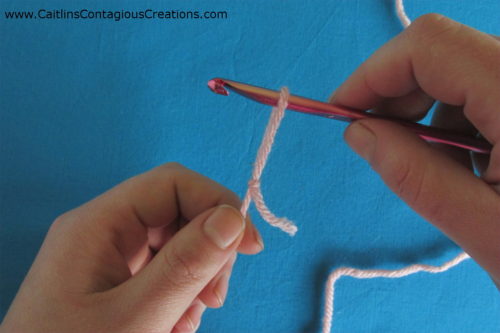
Step 3) Flip your hand over so the end of the strand is crossed on top of the working strand (which is still in your pinky and ring fingers’ grasp).

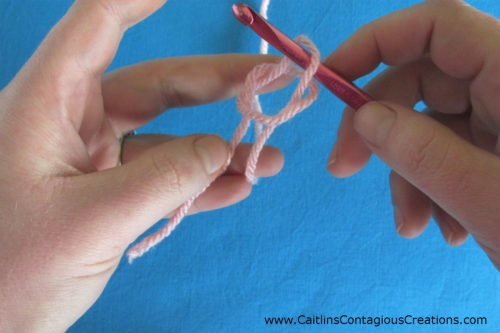
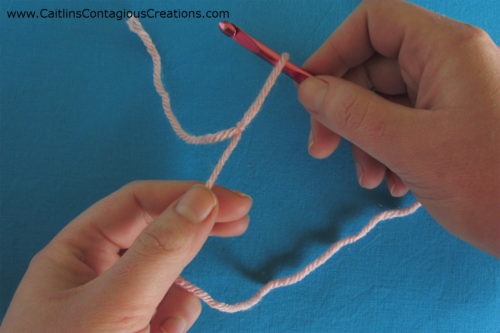
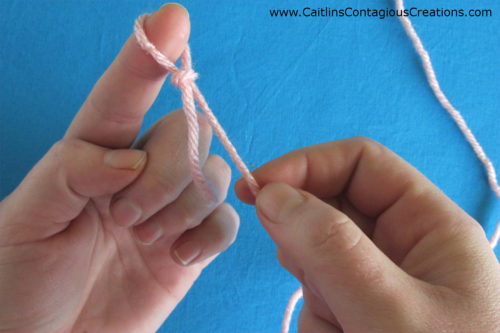
Step 4) Wrap the yarn around the hook (this is referred to as a yarn over, commonly abbreviated as YO in pattern language).
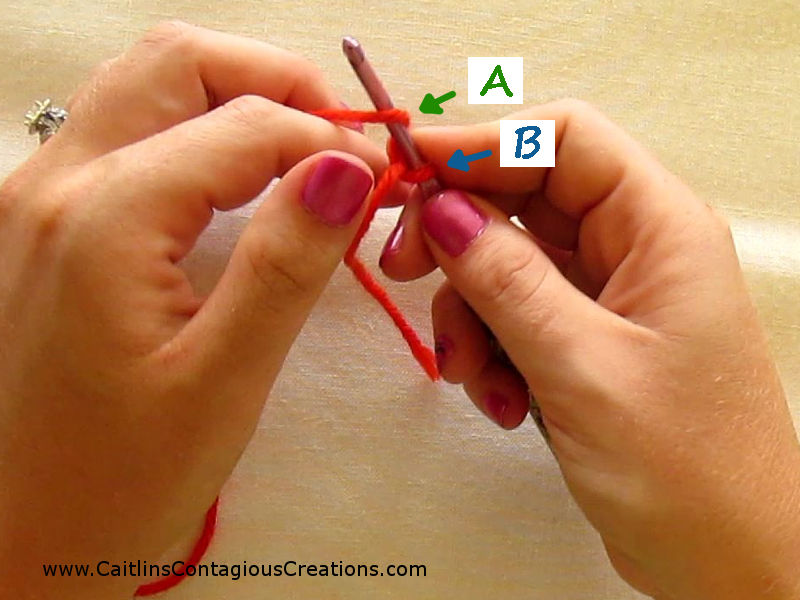
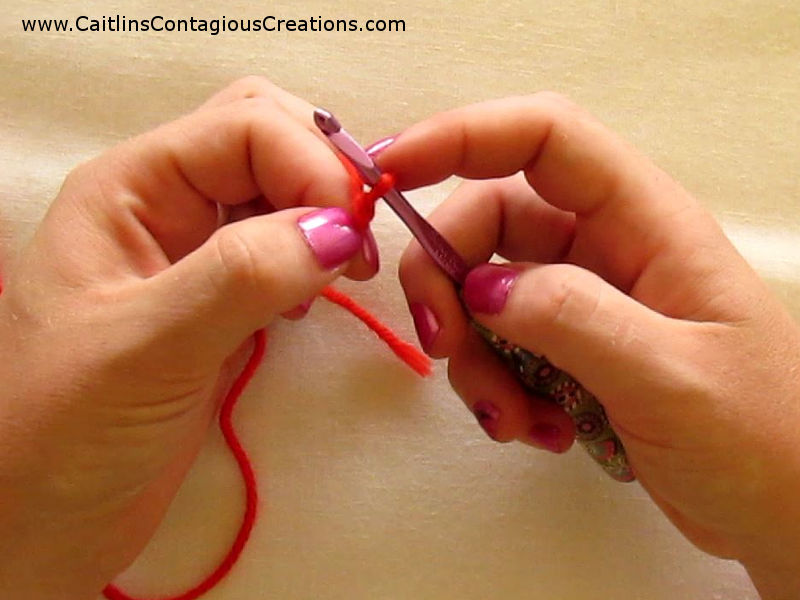
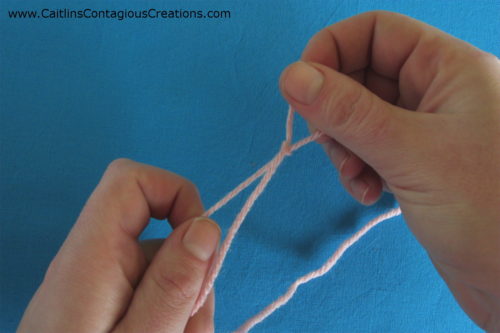
Step 5) Use the hook to pull the first loop (labeled A in the above photo) through the second loop (labeled B above) on the hook. Use your forefinger on your hook hand to guide the loops up the hook neck and over the strand you are pulling through. (See the photos below)
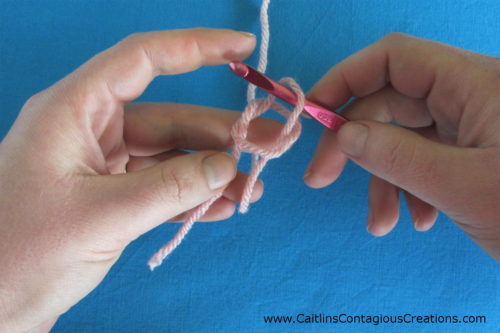
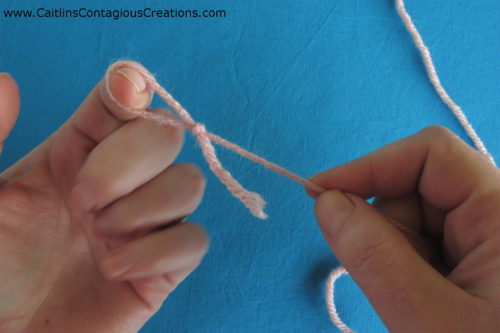
I find it helpful to also hold my work between my thumb and forefinger on my tension hand while I am pulling through the loops. This helps stabilize my work and keep my tension even.
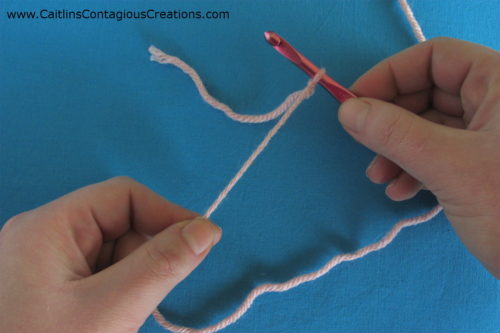
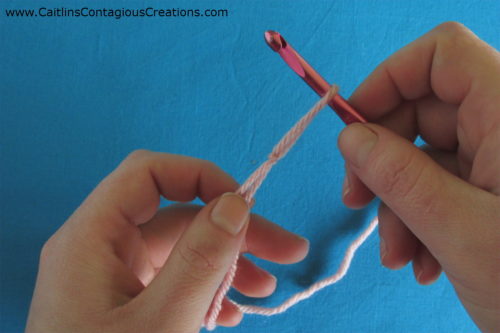
Step 6) Pull on the tail end of the yarn (the end not attached to the skein/ball) this should tighten your knot. If it does not, pull the hook out of the loop, unknot the strand, and try again – You Can Do It!
If the knot does tighten move to step 7.
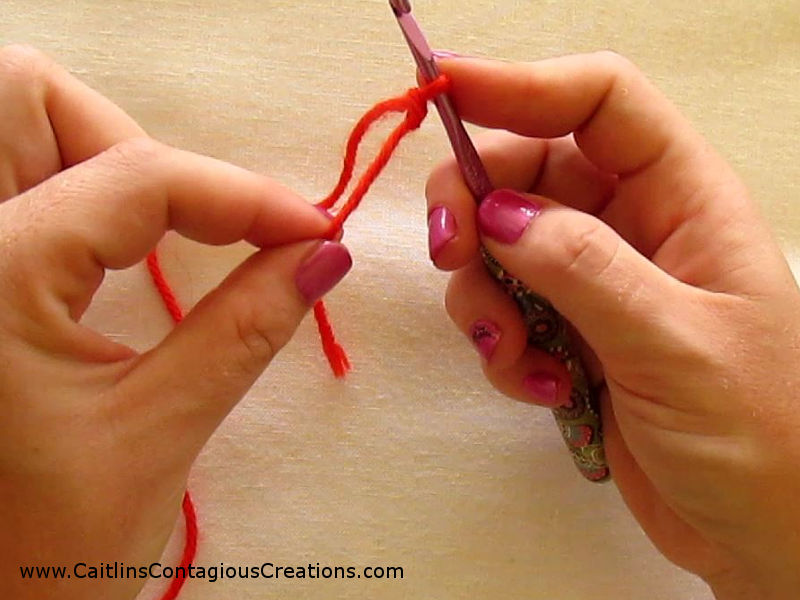
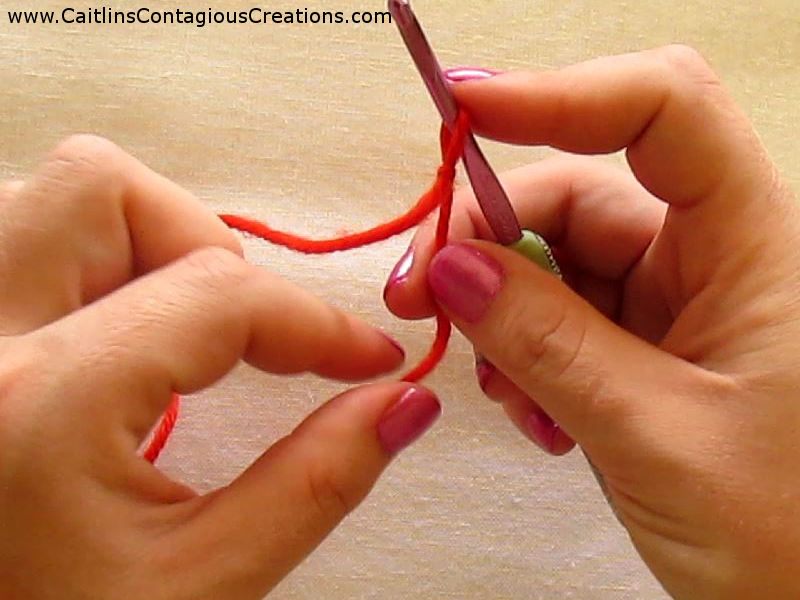
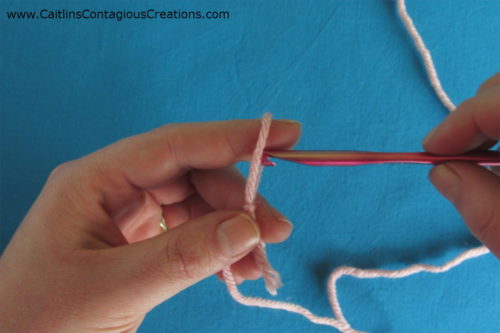
Step 7) Pull on the working strand (the end attached to the skein/ball), this should tighten the loop that is still around the neck of your hook. Don’t pull it too tight. You only want it to fit neatly around the throat of the hook.
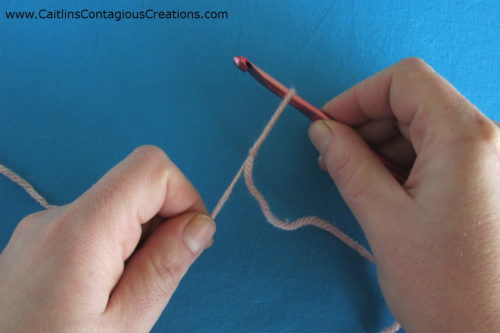
Congratulations! You have successful joined a strand of yarn to a crochet hook.
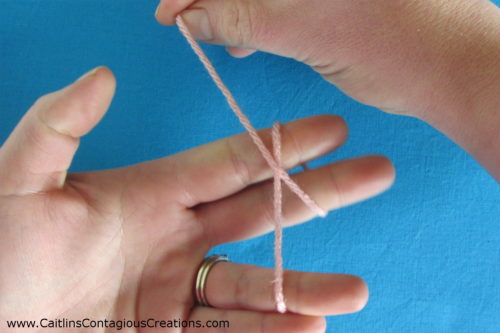
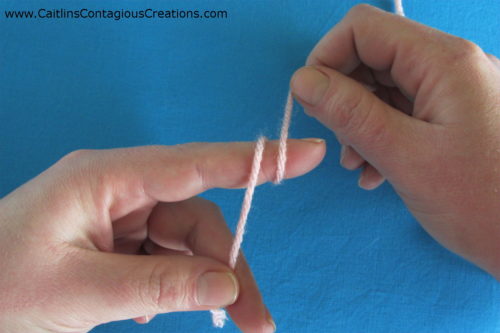
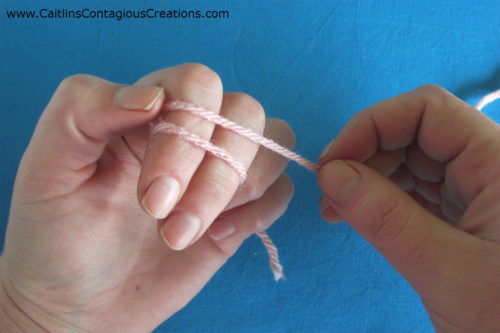
Method 2
Step 1) Hold the end of the yarn between your pink and ring fingers of your tension hand.
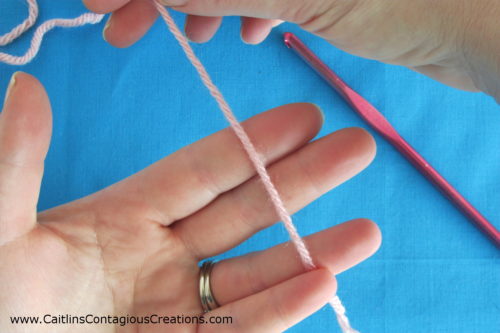
Step 2) Holding your index finger and middle finger together, wrap the yarn around those fingers.
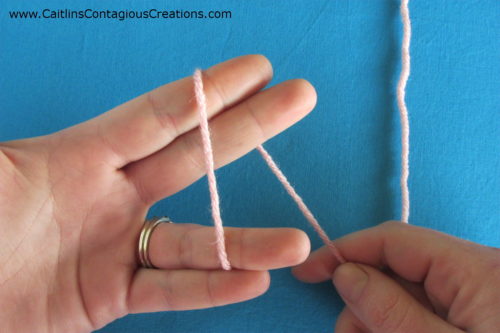
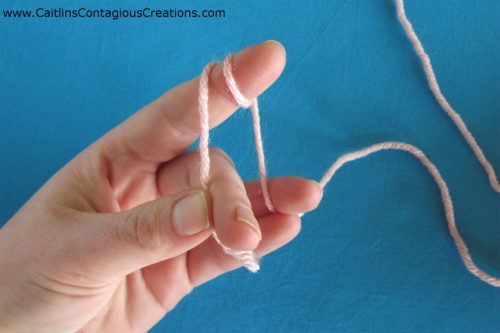
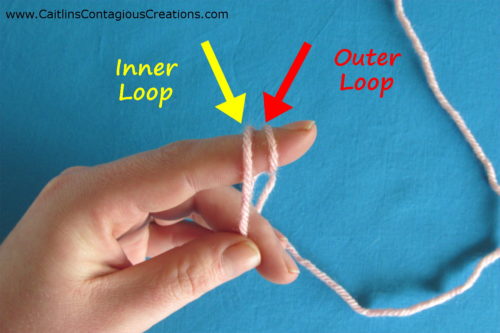
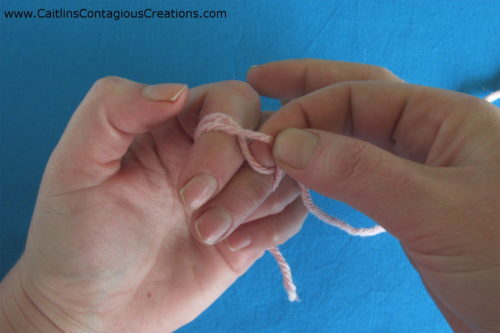
Step 3) Wrap the yarn a second time around your forefinger and middle finger, crossing the yarn and the wrapping it around the back of your fingers a second time.
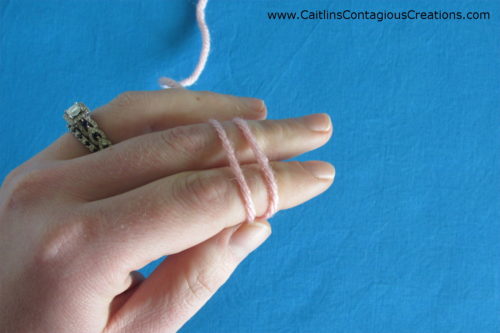
Step 4) Slide your hook over the outer loop and under the inner loop.
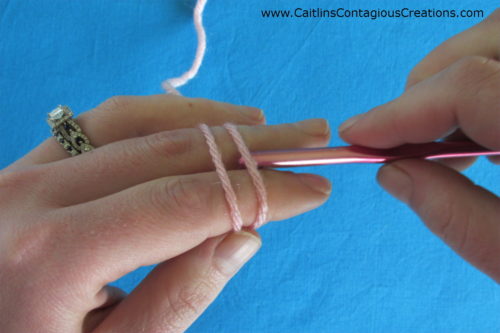
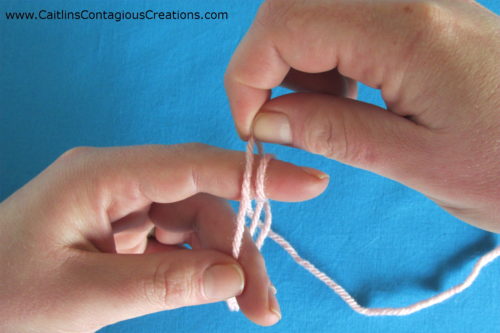
Step 5) Use the hook to grab the inner loop and pull it beneath the outer loop.
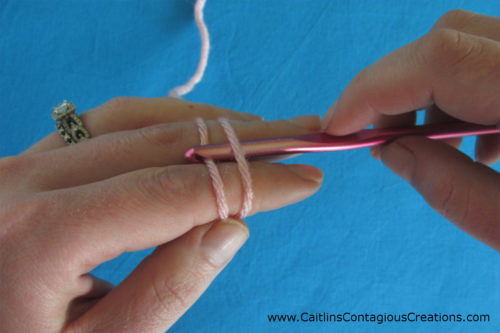
Step 6) Rotate the hook, catching the loop you pulled and keeping it on the throat of the hook.
Step 7) Release the yarn wraps from your tension hand.
Step 8) Pull on the tail end of the yarn to tighten up the knot.
Step 9) Pull on the working end (the end going to the yarn ball) to tighten the loop around the throat of your hook.
You’ve Done It!! Your yarn is now joined to your hook and ready to be worked!
Method 3
For this method you make the slip knot on your finger and then place it on the hook.
Step 1) Hold the tail end of the yarn between your middle finger and thumb of your tension hand. Use your other hand to wrap the yarn around your forefinger.
Step 2) After you have wrapped the yarn completely around your finger, hold it between the pinky and rung finger of your tension hand. You should have 2 loops on the top of your forefinger.
Step 3) Grab the inner loop with your hook hand (which doesn’t yet have the hook in it) and pull that loop over the outer loop on your finger.
Step 4) Grab the inner loop again and pull it over the outer loop and over the end of your finger.
Step 5) Pull on the working end of the yarn to tighten the knot.
Step 6) Insert your hook into the loop still on your finger. Pull on the tail end of the yarn to tighten the loop around the throat of the hook.
You are ready to work your stitches! Great job!!
Method 4
This last method is similar to the second method in that you start by wrapping the yarn around your index and middle finger, but then you complete the know differently before putting it on the hook
Step 1) Hold the end of the yarn between your pink and ring fingers of your tension hand.
Step 2) Holding your index finger and middle finger together, wrap the yarn around those fingers.
Step 3) Wrap the yarn a second time around your forefinger and middle finger, crossing the yarn and the wrapping it around the back of your fingers a second time.
Step 4) Use your index finger on your hook hand to push the working end of the yarn under the loop around your fingers.
Step 5) Pull the loop all the way under the yarn wrapped around your fingers.

Step 6) Release the yarn loops from your tension hand.
Step 7) Keeping a hold on the loop, pull on the tail end of the yarn to tighten the knot.
Step 8) Insert your hook into the loop.
Step 9) Pull on the working end of the yarn to tighten the loop around the throat of your hook.
You’ve just learned the final method to join your yarn to your hook. You are ready to start your project!
Just the beginning…
Now that you can attach a yarn to a hook, the next step is to learn the basic stitches so you can complete beginner level projects!
Learn the Chain Stitch Here (If you are a total beginner, this is the next one to learn!)
Learn the Half Double Crochet Here
Once you’ve got those skills down you are ready to try a simple pattern! Try this one, you can do it!
Happy Hooking!


I love it ! I think I’m going to try it. I used to crochet. Very informative .
So glad to hear that Maria! Check back for more tutorials to help you re-learn some stitches. 🙂 ~Caitlin