This post contains affiliate links. If you choose to purchase I will receive a small commission at no extra cost to you. I use the funds to buy yarn and make more free patterns! I greatly appreciate your support. For more info please see my Terms & Conditions. Thank You!
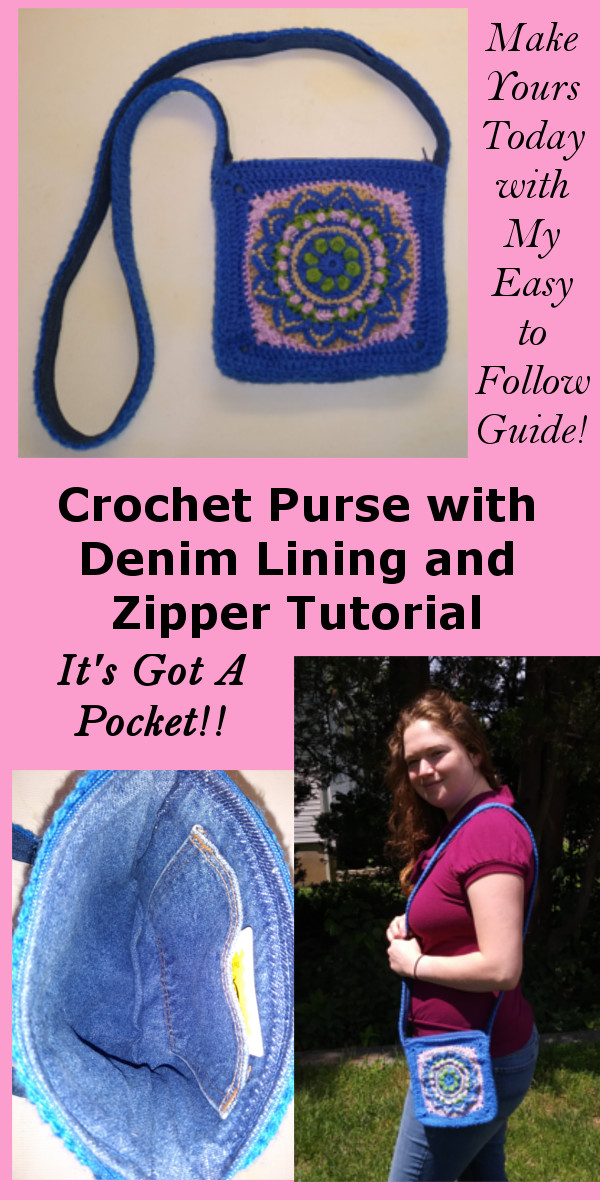
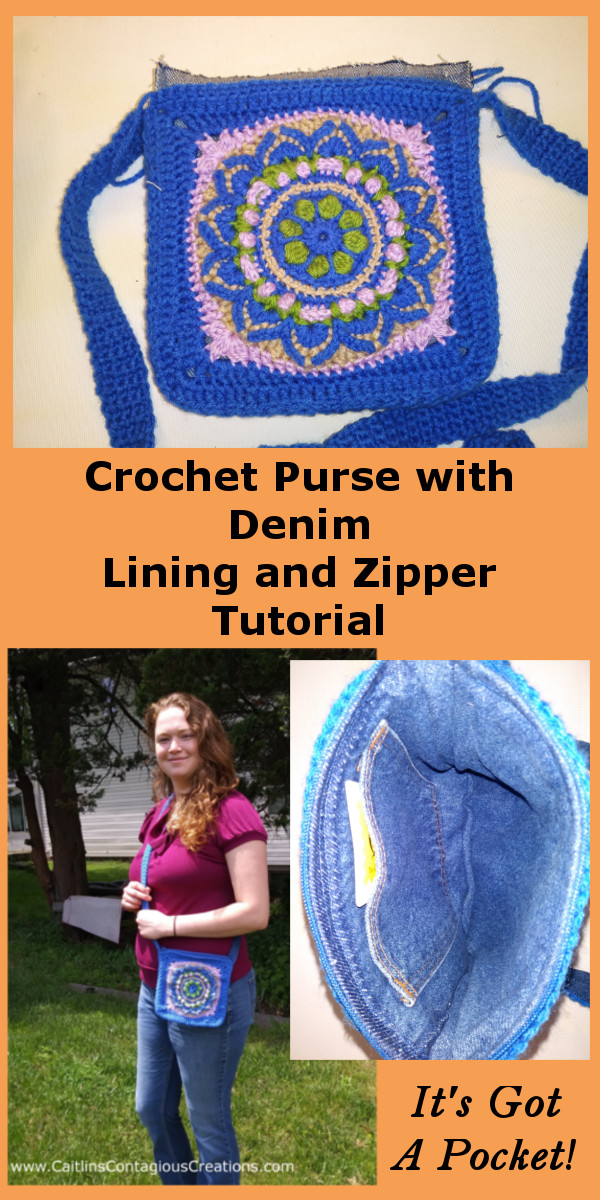
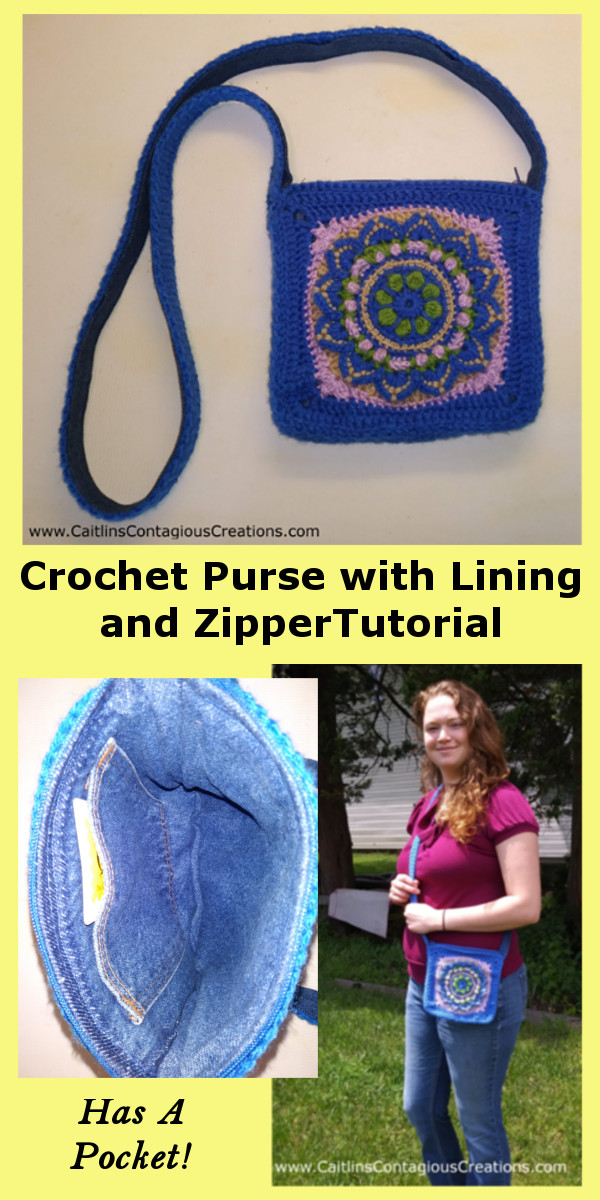
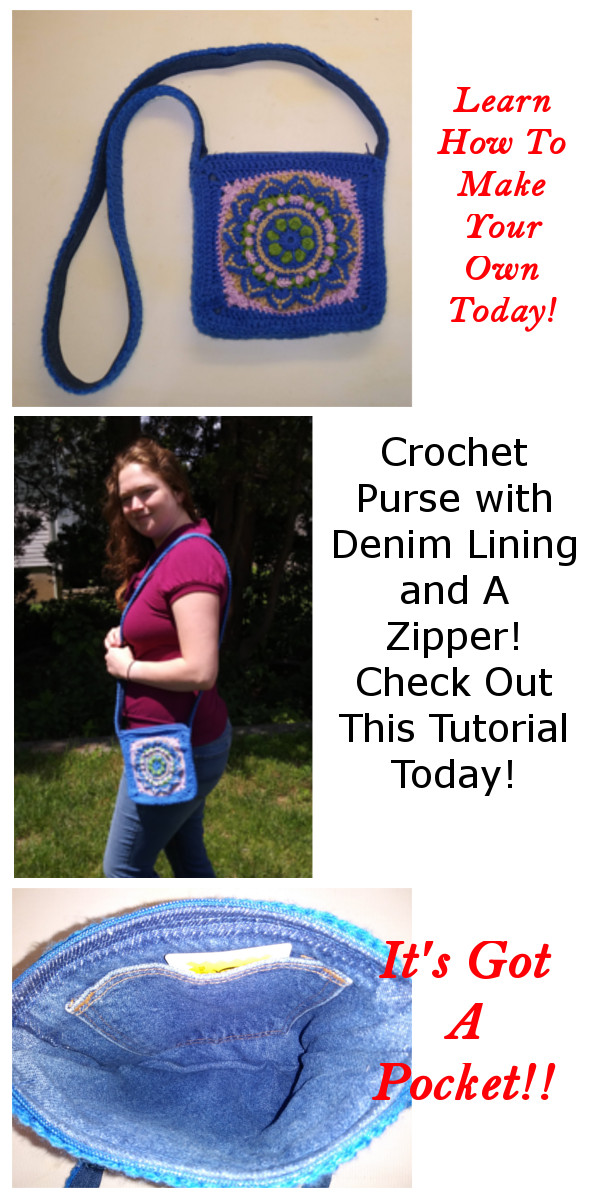
This fancy square crochet purse can be made with ANY crochet square pattern you’d like to use, and it uses up old denim jeans too!! I just love creations that use up something I have laying around, don’t you?!
The Perfect Square Pattern
I spent a few days looking for the perfect crochet square to try out this idea that was rattling around my brain for several months. I wanted to find a square pattern that resulted in a square that was at least 7 inches, and had some cool looking texture. I had some trouble finding exactly what I wanted (maybe I am too picky?), but ultimately decided that creating my own square pattern with the intricate design I was searching for just wasn’t an option.
After many hours spent searching (and finding lots of cool square patterns) on Pinterest, I finally found this beauty, the Marrakech Motif Square from Mobiusgirl Design
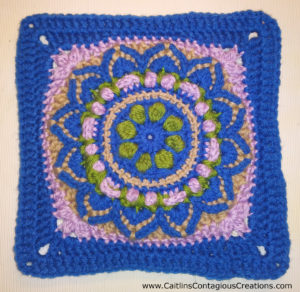
I purposefully chose to have the outer edge a nice rich blue because of the denim liner I planned for the purse. I could have gone with any color because you don’t really see the denim from the outside, but I like blue. I will definitely be trying this purse idea again with other squares and yarn colors!
Another consideration I had when choosing this particular square was how open the square was. There are A LOT of really gorgeous square designs out there, but many of them have an openness that I wanted to avoid for this project. (This time around anyway)
If you have found a square that you really love but it has lots of holes in the design, you can still use it, but you might want to sew an additional liner inside the purse facing outwards since you will see that fabric behind that crochet. Use a contrasting color for the liner to add a little extra pop of color to your project!!
I Made Some Small Changes…
This square pattern (if you followed the link above) calls for sport weight yarn, which was the one change I made to the pattern. I used worsted weight yarn, although I still used the recommended 4 mm hook.
The design as written results in a square that is about 7 inches, this was pretty much what I wanted, but I knew that doing the square in a heavier weight yarn would result in a slightly bigger square, which it did. My finished square was 7.5 inches.
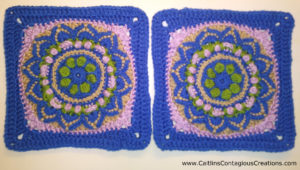
The Start of the Purse
I thought about doing a plain Jane granny square for the “back” of the purse, but I just couldn’t after seeing this beautiful square in all its color glory. I did a second right away.
In the future, when doing squares for purses, I will do both squares concurrently by row instead of completing a whole square and then starting the next. You get into a rhythm with the stitch for a row and it will be much easier to do all the rows requiring an individual stitch at once instead of having to go back and catch the rhythm again. I hope that makes sense to you…
Upon finishing the squares I started work on the gusset (the part of the purse that provides the thickness) for the sides and bottom of the bag. I used the same blue color yarn as the bag, but you could also use a contrasting color perhaps to bring out a little used color in the square pattern (such as the green or beige in mine)…
Figure out Gusset and Handle Length
To figure the length the crochet strip for the handle and gusset, I used a combination of stitch count and length. To attain the gusset length I added up the stitches along the outside of 3 sides of the square (the fourth side is for the opening). This square had 32 stitches per side, so I counted up 96 rows (32 stitches per side x 3 sides of the bag = 96 rows of gusset needed not including the handle length). I added about 45 inches for the handle to the length of the gusset.
Feel free to make the handle as long or short as you’d like for your purse… I prefer a purse that can be a single shoulder or a cross body, so this seemed like a good length for me. Don’t go too short though; make sure the purse still goes over your head!
Hint: To keep track, place a stitch marker in the row that is the last of the gusset so you can measure from the marker to the end to see what length of strap you will end up with.
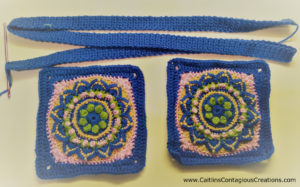
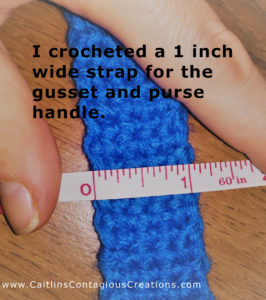
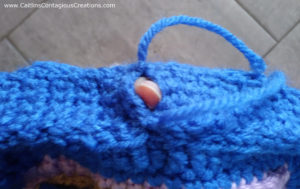
I foundation single crocheted 5 stitches to start the strap, I simply chained 1, turned, and continued single crochets until I reached the strap length I desired. (Can you find my stitch marker in the photo above?) This resulted in a strap about 1 inch wide.
The Sum of the Parts
After the individual pieces were made I used a yarn needle to sew them together. I wanted to start sewing the strap to the bag in the middle of the bottom so the seam of the strap ends would be hidden on the bottom of the bag instead of near the top.
I tied off the end of my crochet strap and left a long tail to do the sewing. Starting with 1 of the squares and the strap I counted to the middle of 1 side and started using a basic whip stitch to sew the strap to the square. I sewed to the first corner, turned and sewed until reaching the second corner. This is also the top of the bag, where the gusset side turns into the strap.
When you start to sew the second side of the strap make sure you have not twisted the strap as you will not be able to easily fix that issue once it’s done.
I then grabbed the other end of the strap and (making sure it’s not twisted), I started in the middle of the bottom, right next to where I started the first side and again whip stitched the strap to the square.
Attach the second square in the same manner, making sure you are even on the strap so the opening at the top is even. Once you have the second square sewn onto the strap you will notice a small hole in the bottom of the bag where the ends of the strap meet up… Make sure you sew it shut!
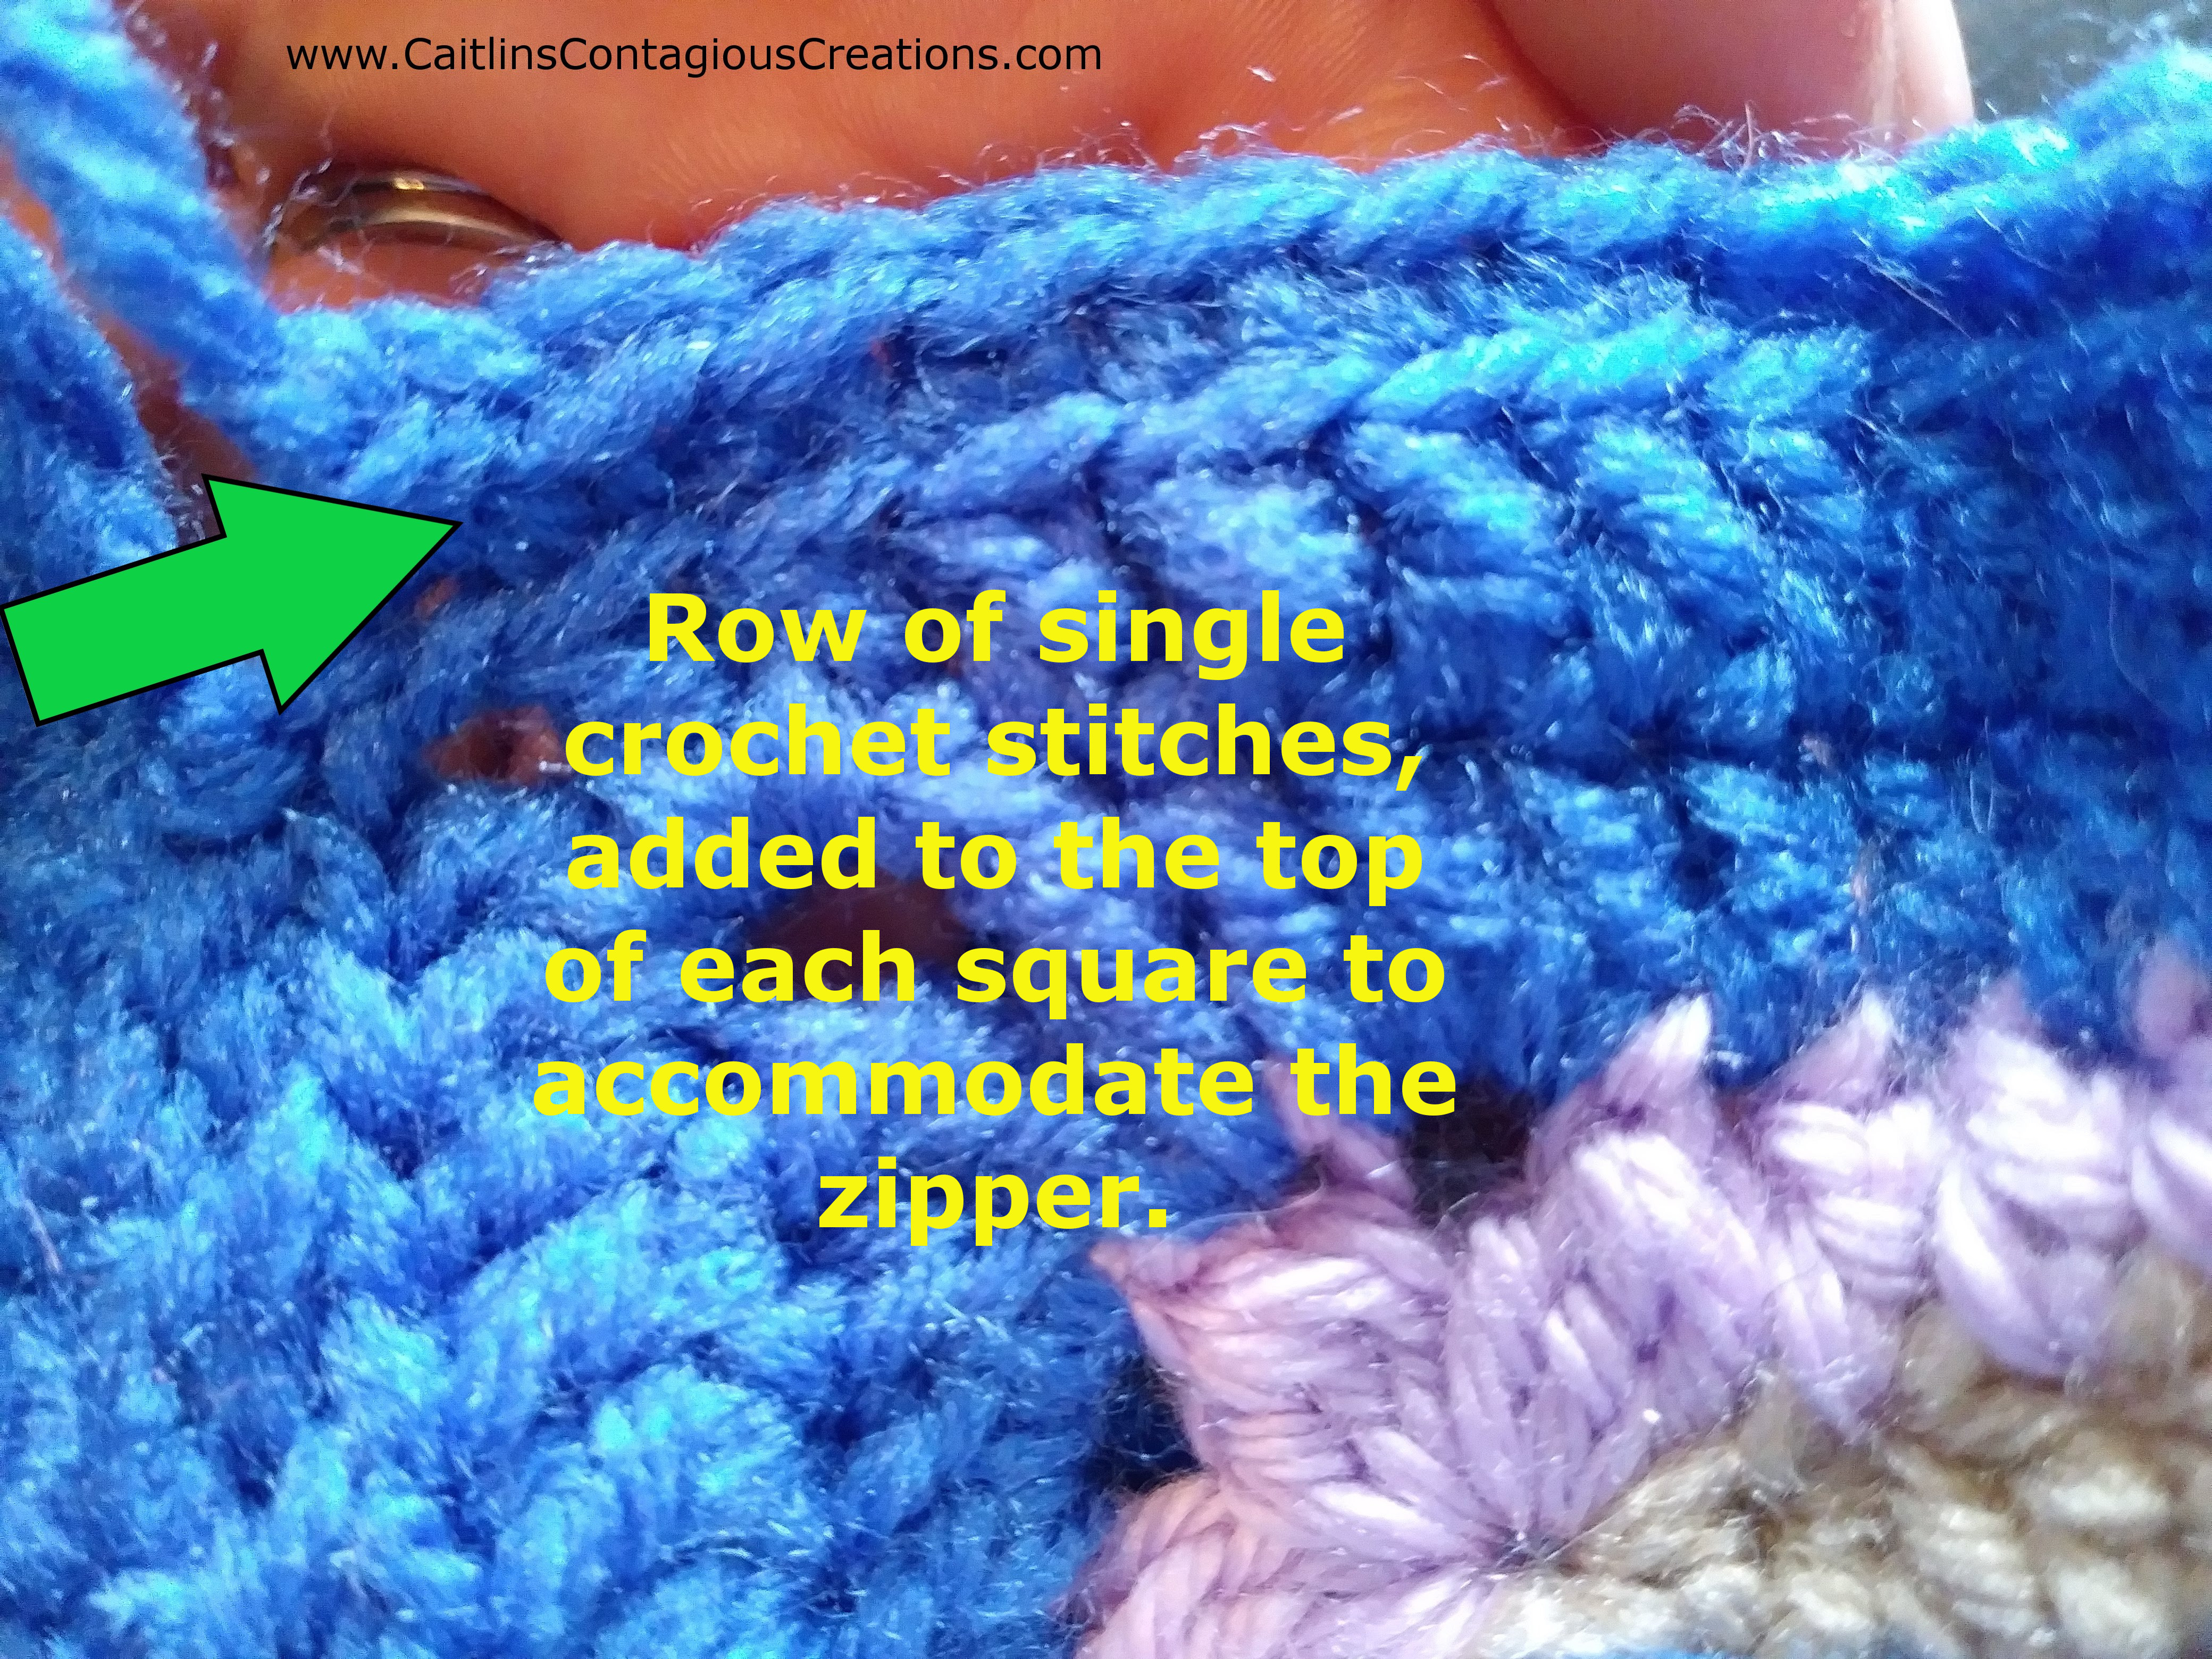
Once the purse was mostly together, I added a row of single crochets to each square on the top. Leave a long tail at each end of the single crochet row so you can sew it into the strap later to give a nicer finished look. I did this to compensate for the extra width the gusset added to the purse (even though it was only 1 inch!). This way once the zipper was sewn on the purse wouldn’t scrunch together at the top.
Cuttin’ up those Blue Jeans
Now that you have a crochet purse, it’s time to add the zipper and the lining! I recently received a gift of a bunch of almost brand new denim jeans, but most of them are for kids. Since I don’t have any kids (yet!) and have no other use for the jeans, I’m going to cut them up and use them in my sewing!
I chose a nice darkish blue pair to become the lining for this purse, and I had a particular eye on one back pocket to use as a pocket for the inside of the purse.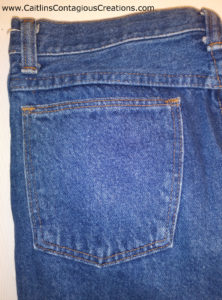
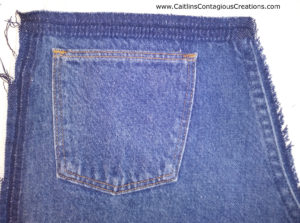
Unfortunately, since these were kids jeans they did not have enough solid material directly around the pocket for me to just cut the seam in the jeans away and use the remainder. My pocket would have been very off center (if I was able to squeeze it in at all).
So I ripped the seams of the jeans and got the extra seam material to work with too! After ripping up the seams, I had to iron the material to get it flat enough to work with. As you can see it is slightly discolored from being in the seam of the jeans, but since it is going inside the purse, I’m not sweating it.
Once I had my desired material piece, I flipped it over and used my omnigrid and a fabric chalk to mark up the back of the jeans so I could cut the proper sized piece. Since my square was 7.5 inches (both length and width, its a square after all!) I cut out pieces that were also 7.5 inches square. I wanted to have a 3/8 inch seam and the lining needs to be a little smaller so it will fit inside the crocheted purse shell.
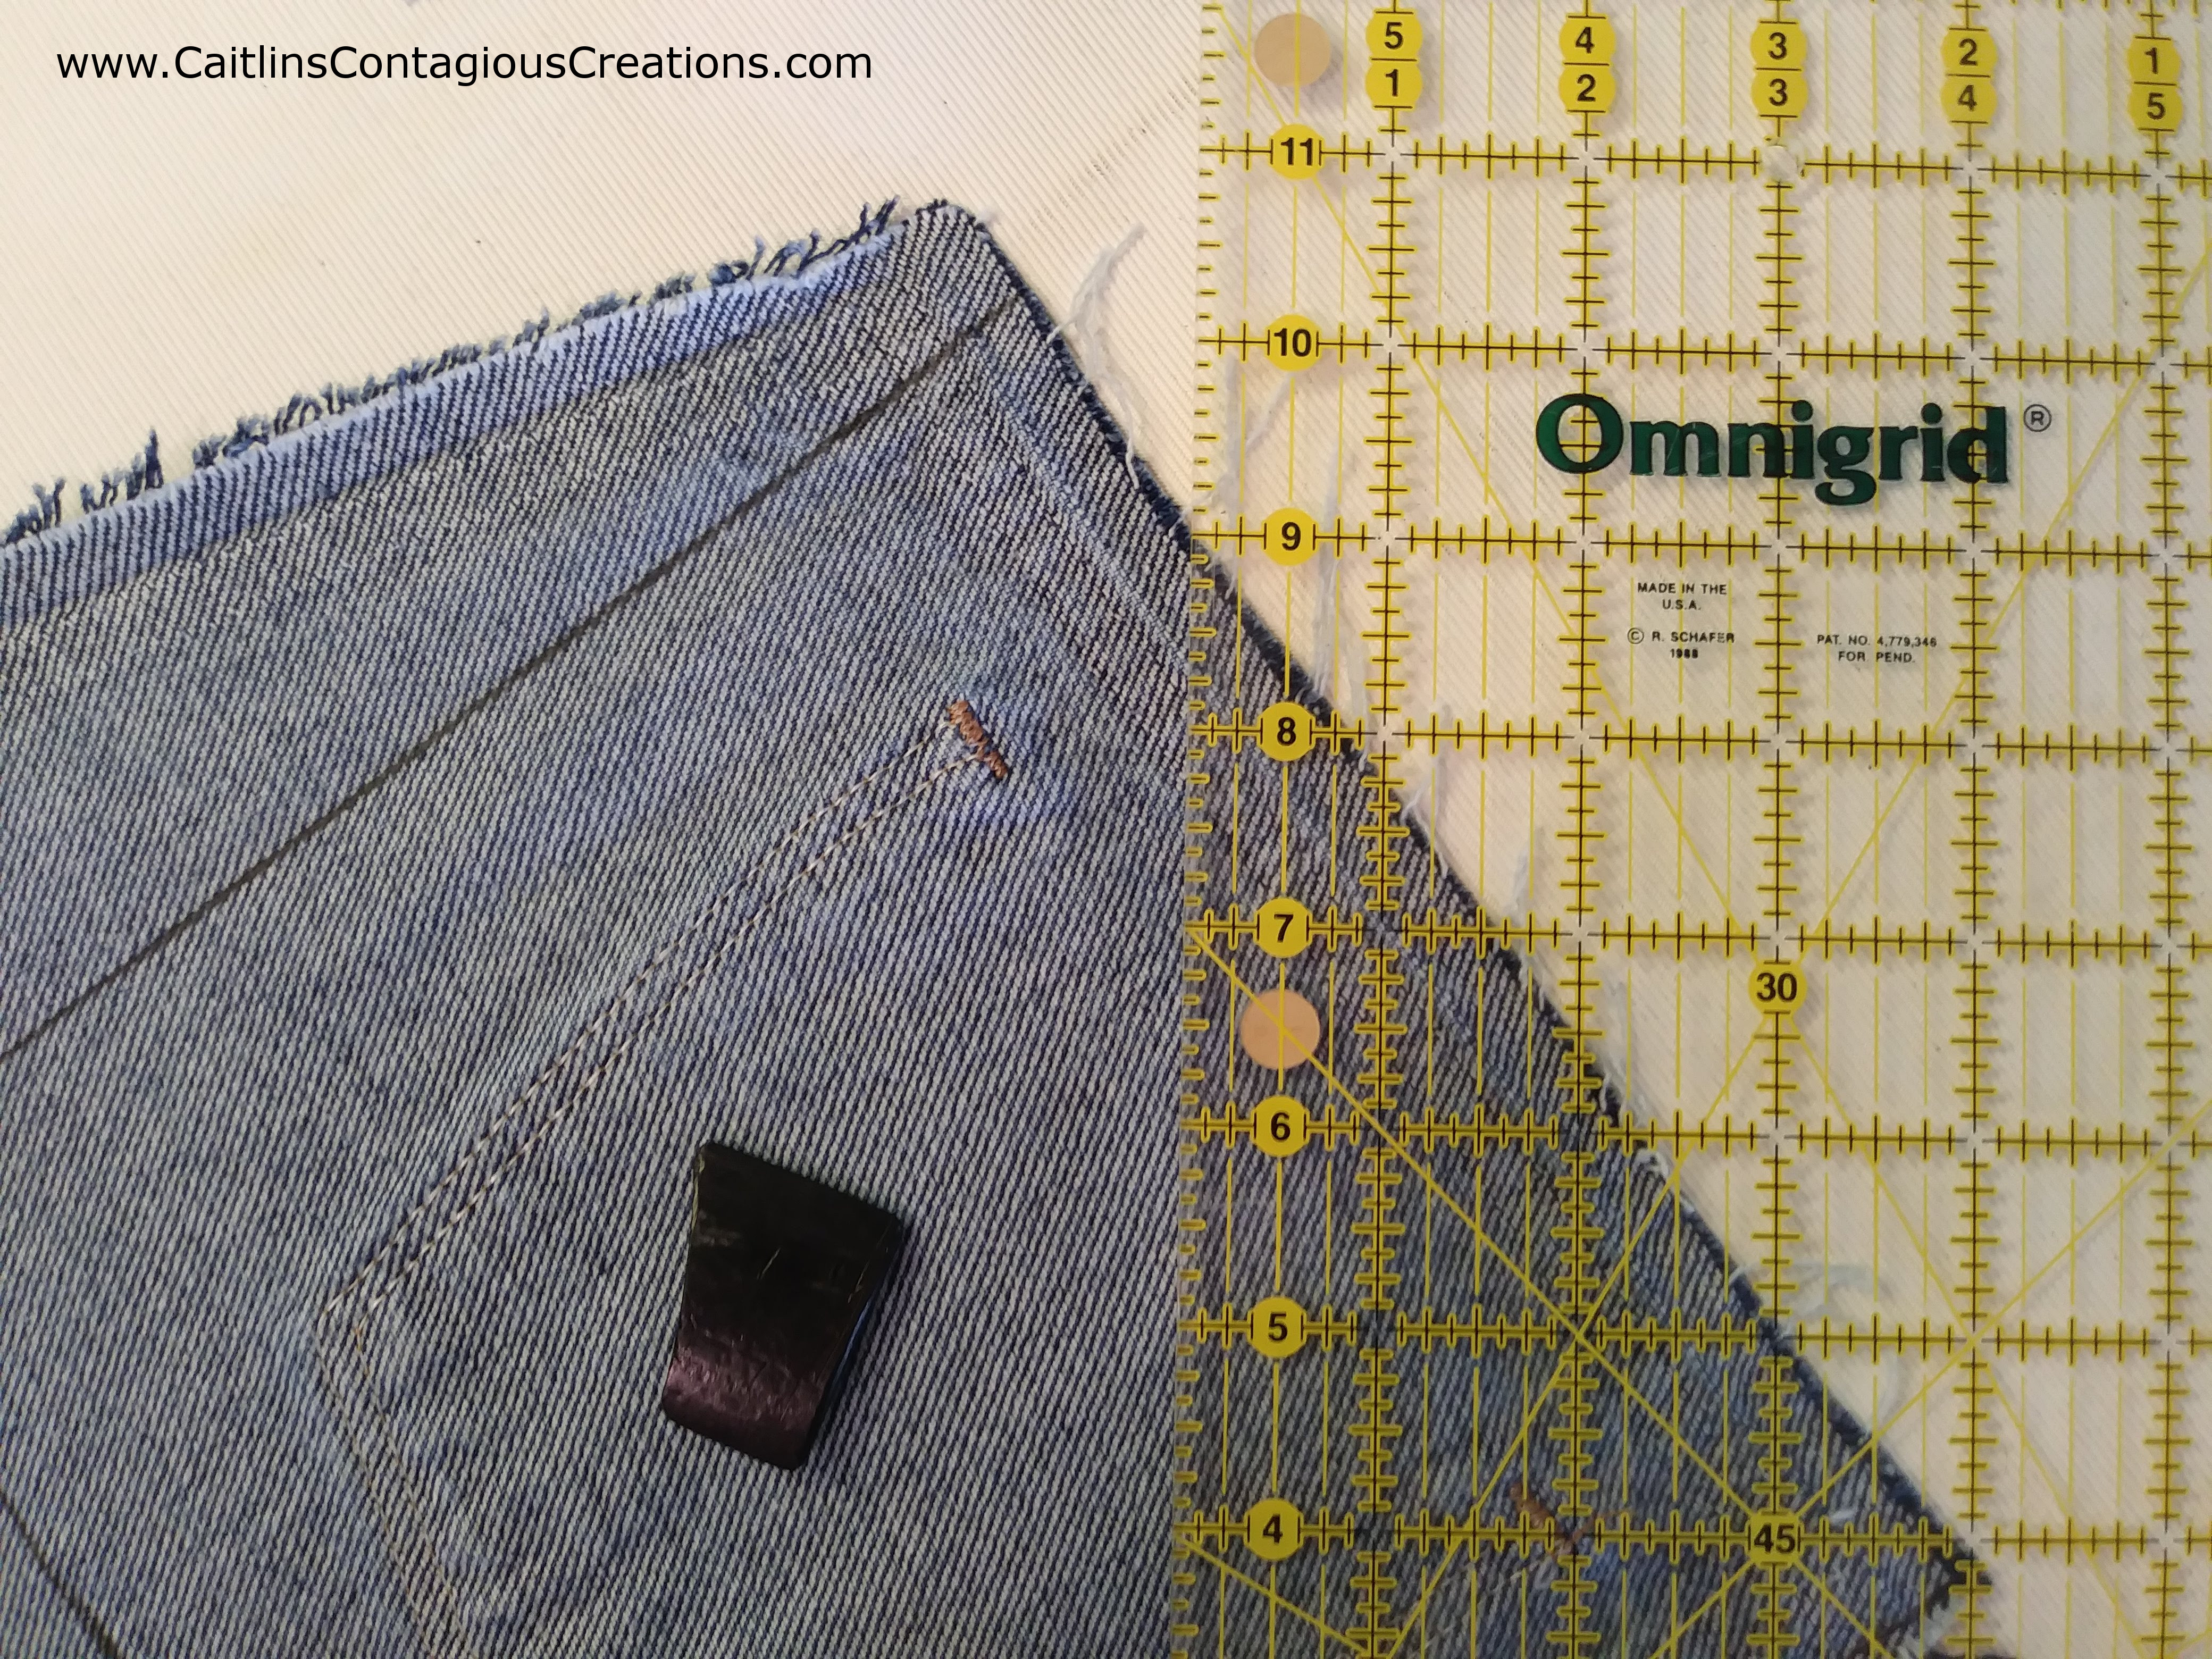
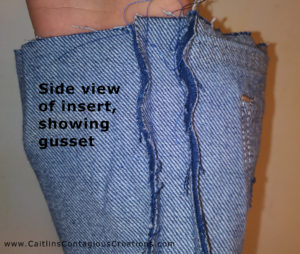
In addition to the pieces for the front and back, I cut out three strips for the gusset of the purse. These were cut out to be 1 and 3/8 inches wide by 7.5 inches long, remember to cut out three of them!
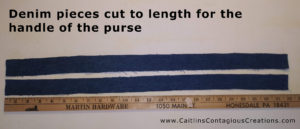
The last bit of jeans needing to be cut for the lining of this crochet purse is for the handle. I decided to line not only the inside, but the handle also so that it wouldn’t stretch. Over time, most crochet tends to stretch a little, and I didn’t want my 45 inch handle to become a 60 inch handle… so I lined it!
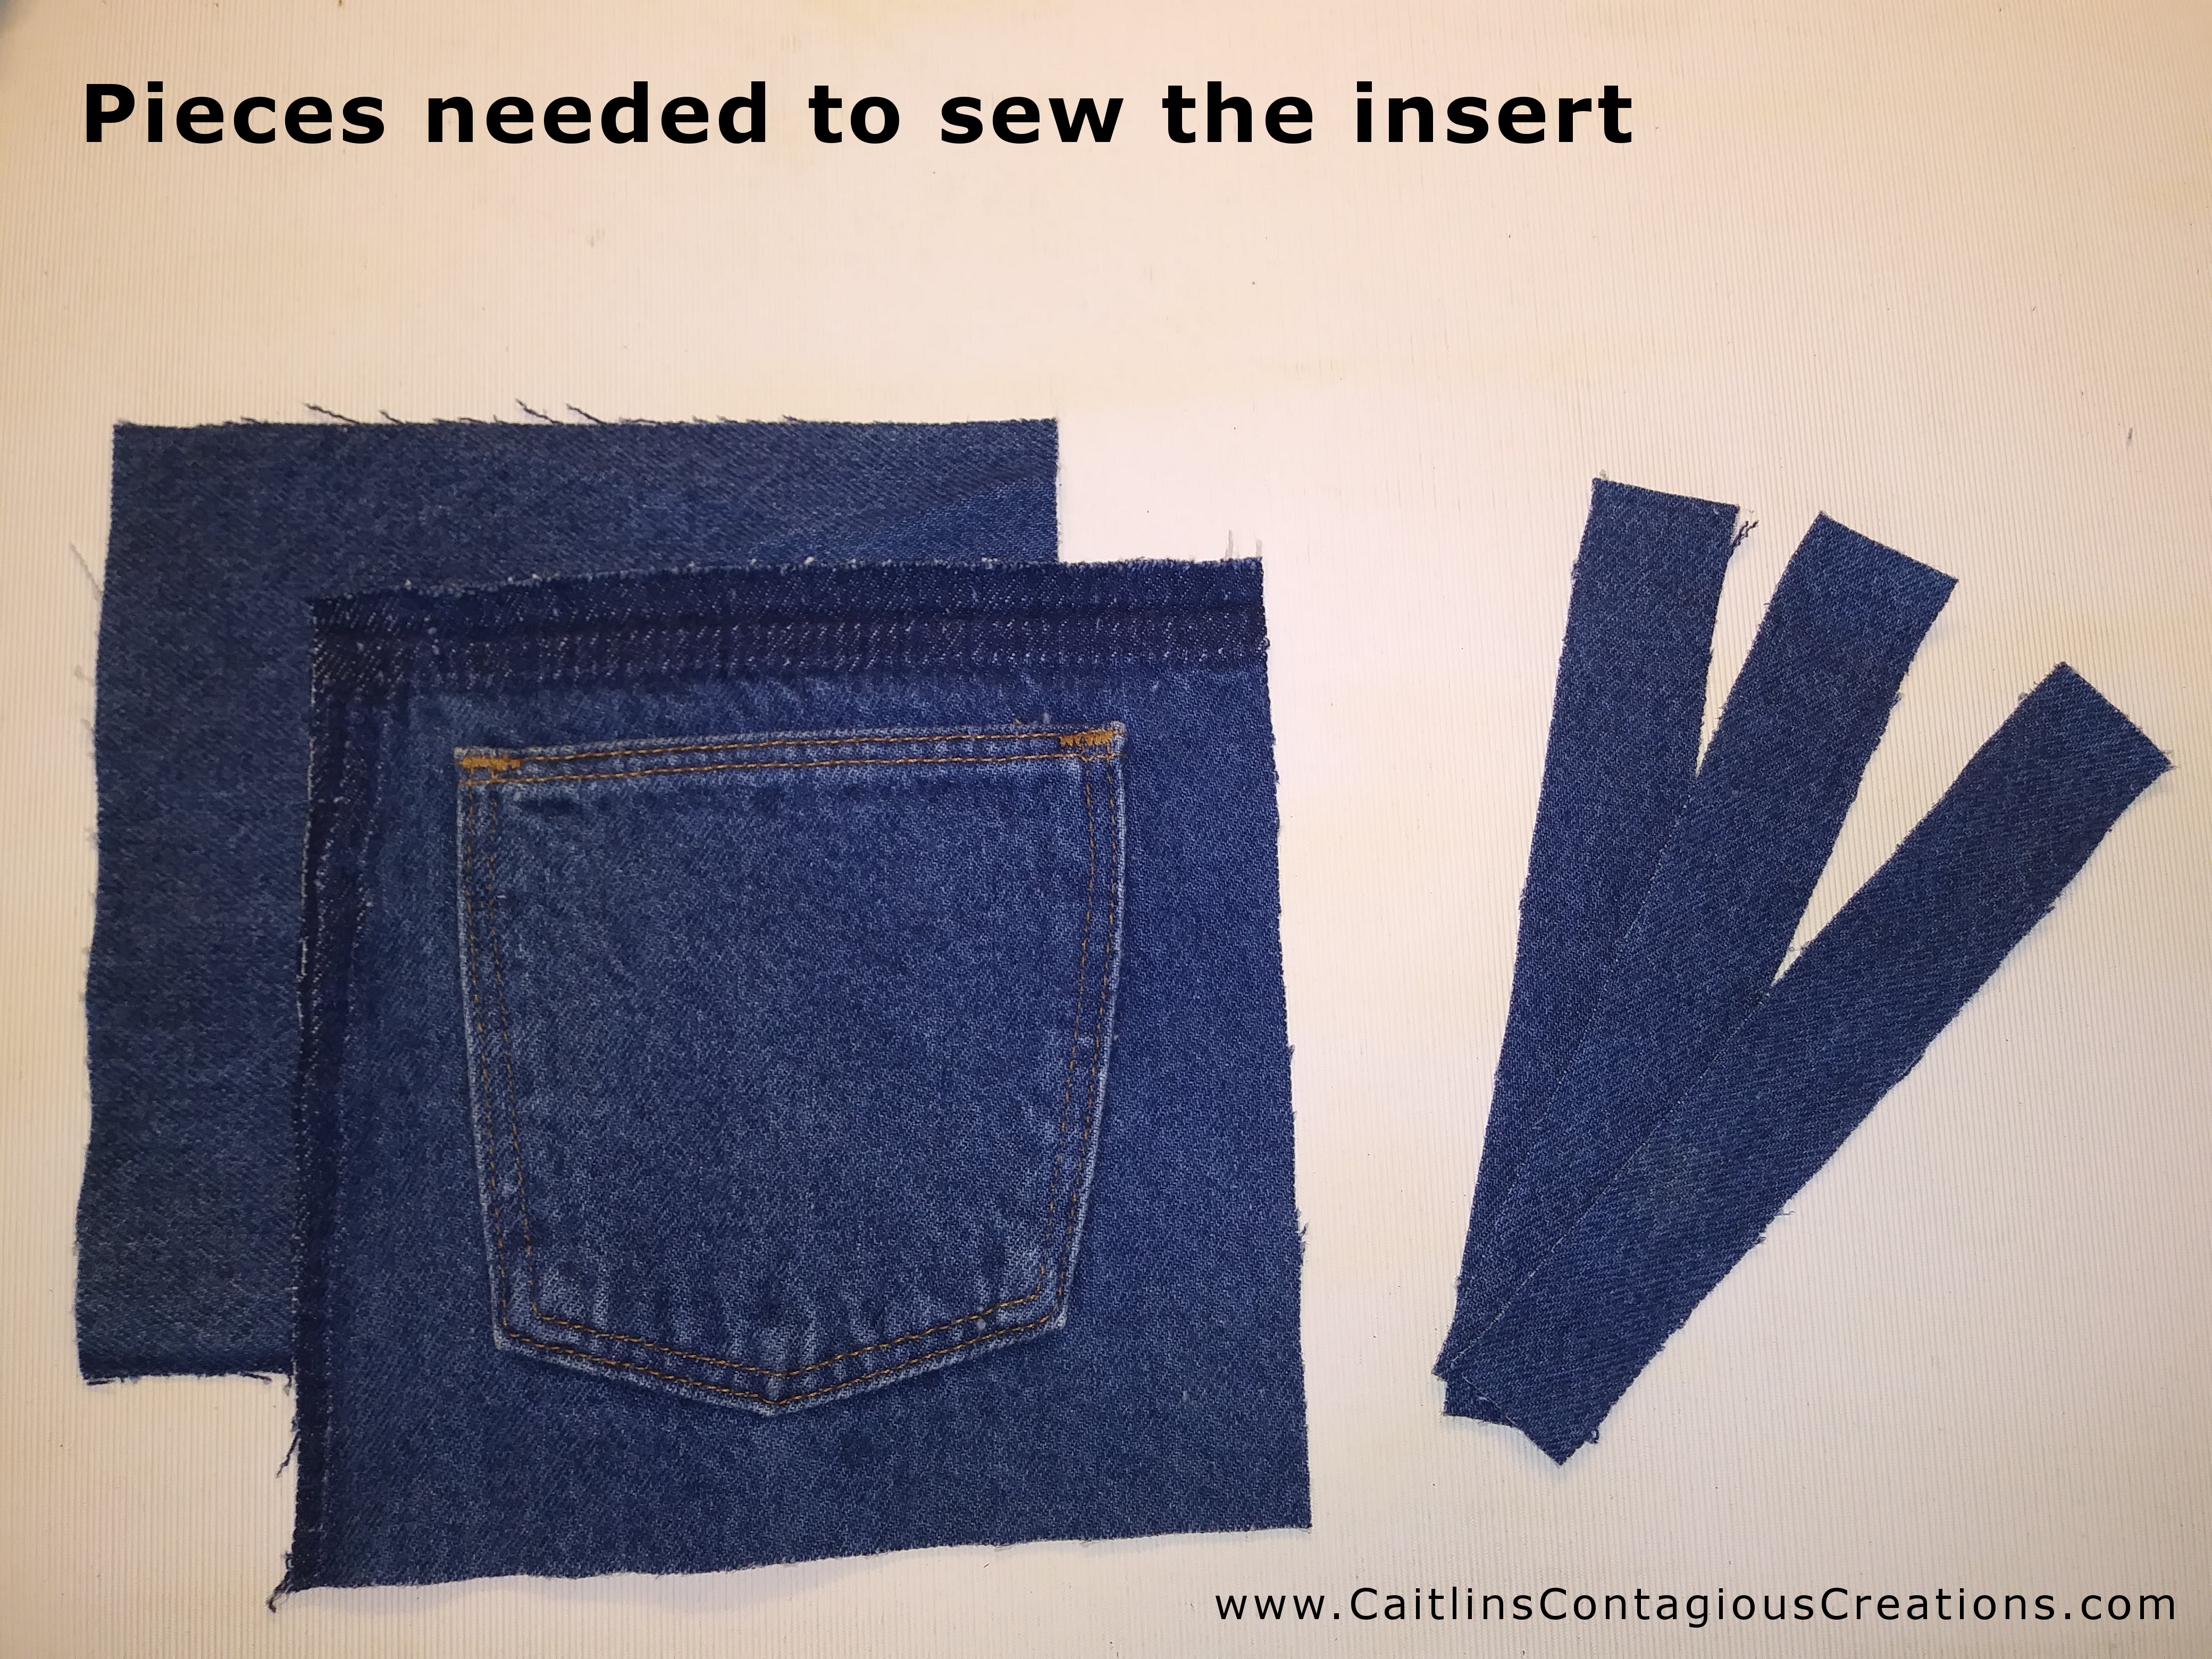
Got all the pieces… Now for the fun part!
Once I had all the pieces of the inside lining, it was time to start sewing them together! The first thing I did was attach the three strips that make up the gusset of the purse together, end to end. Then I sewed one of the sides along the whole length of the 3 strips. One side should take up about the whole length of a strip. Then I sewed the other side on as well. Make sure you put the pieces face sides together before sewing so the inside of the purse will look nice.
I placed the lining inside the crochet shell to ensure I would have room for seams at the top and had made the lining insert small enough to not bunch up once inside the crocheted portion of the purse.
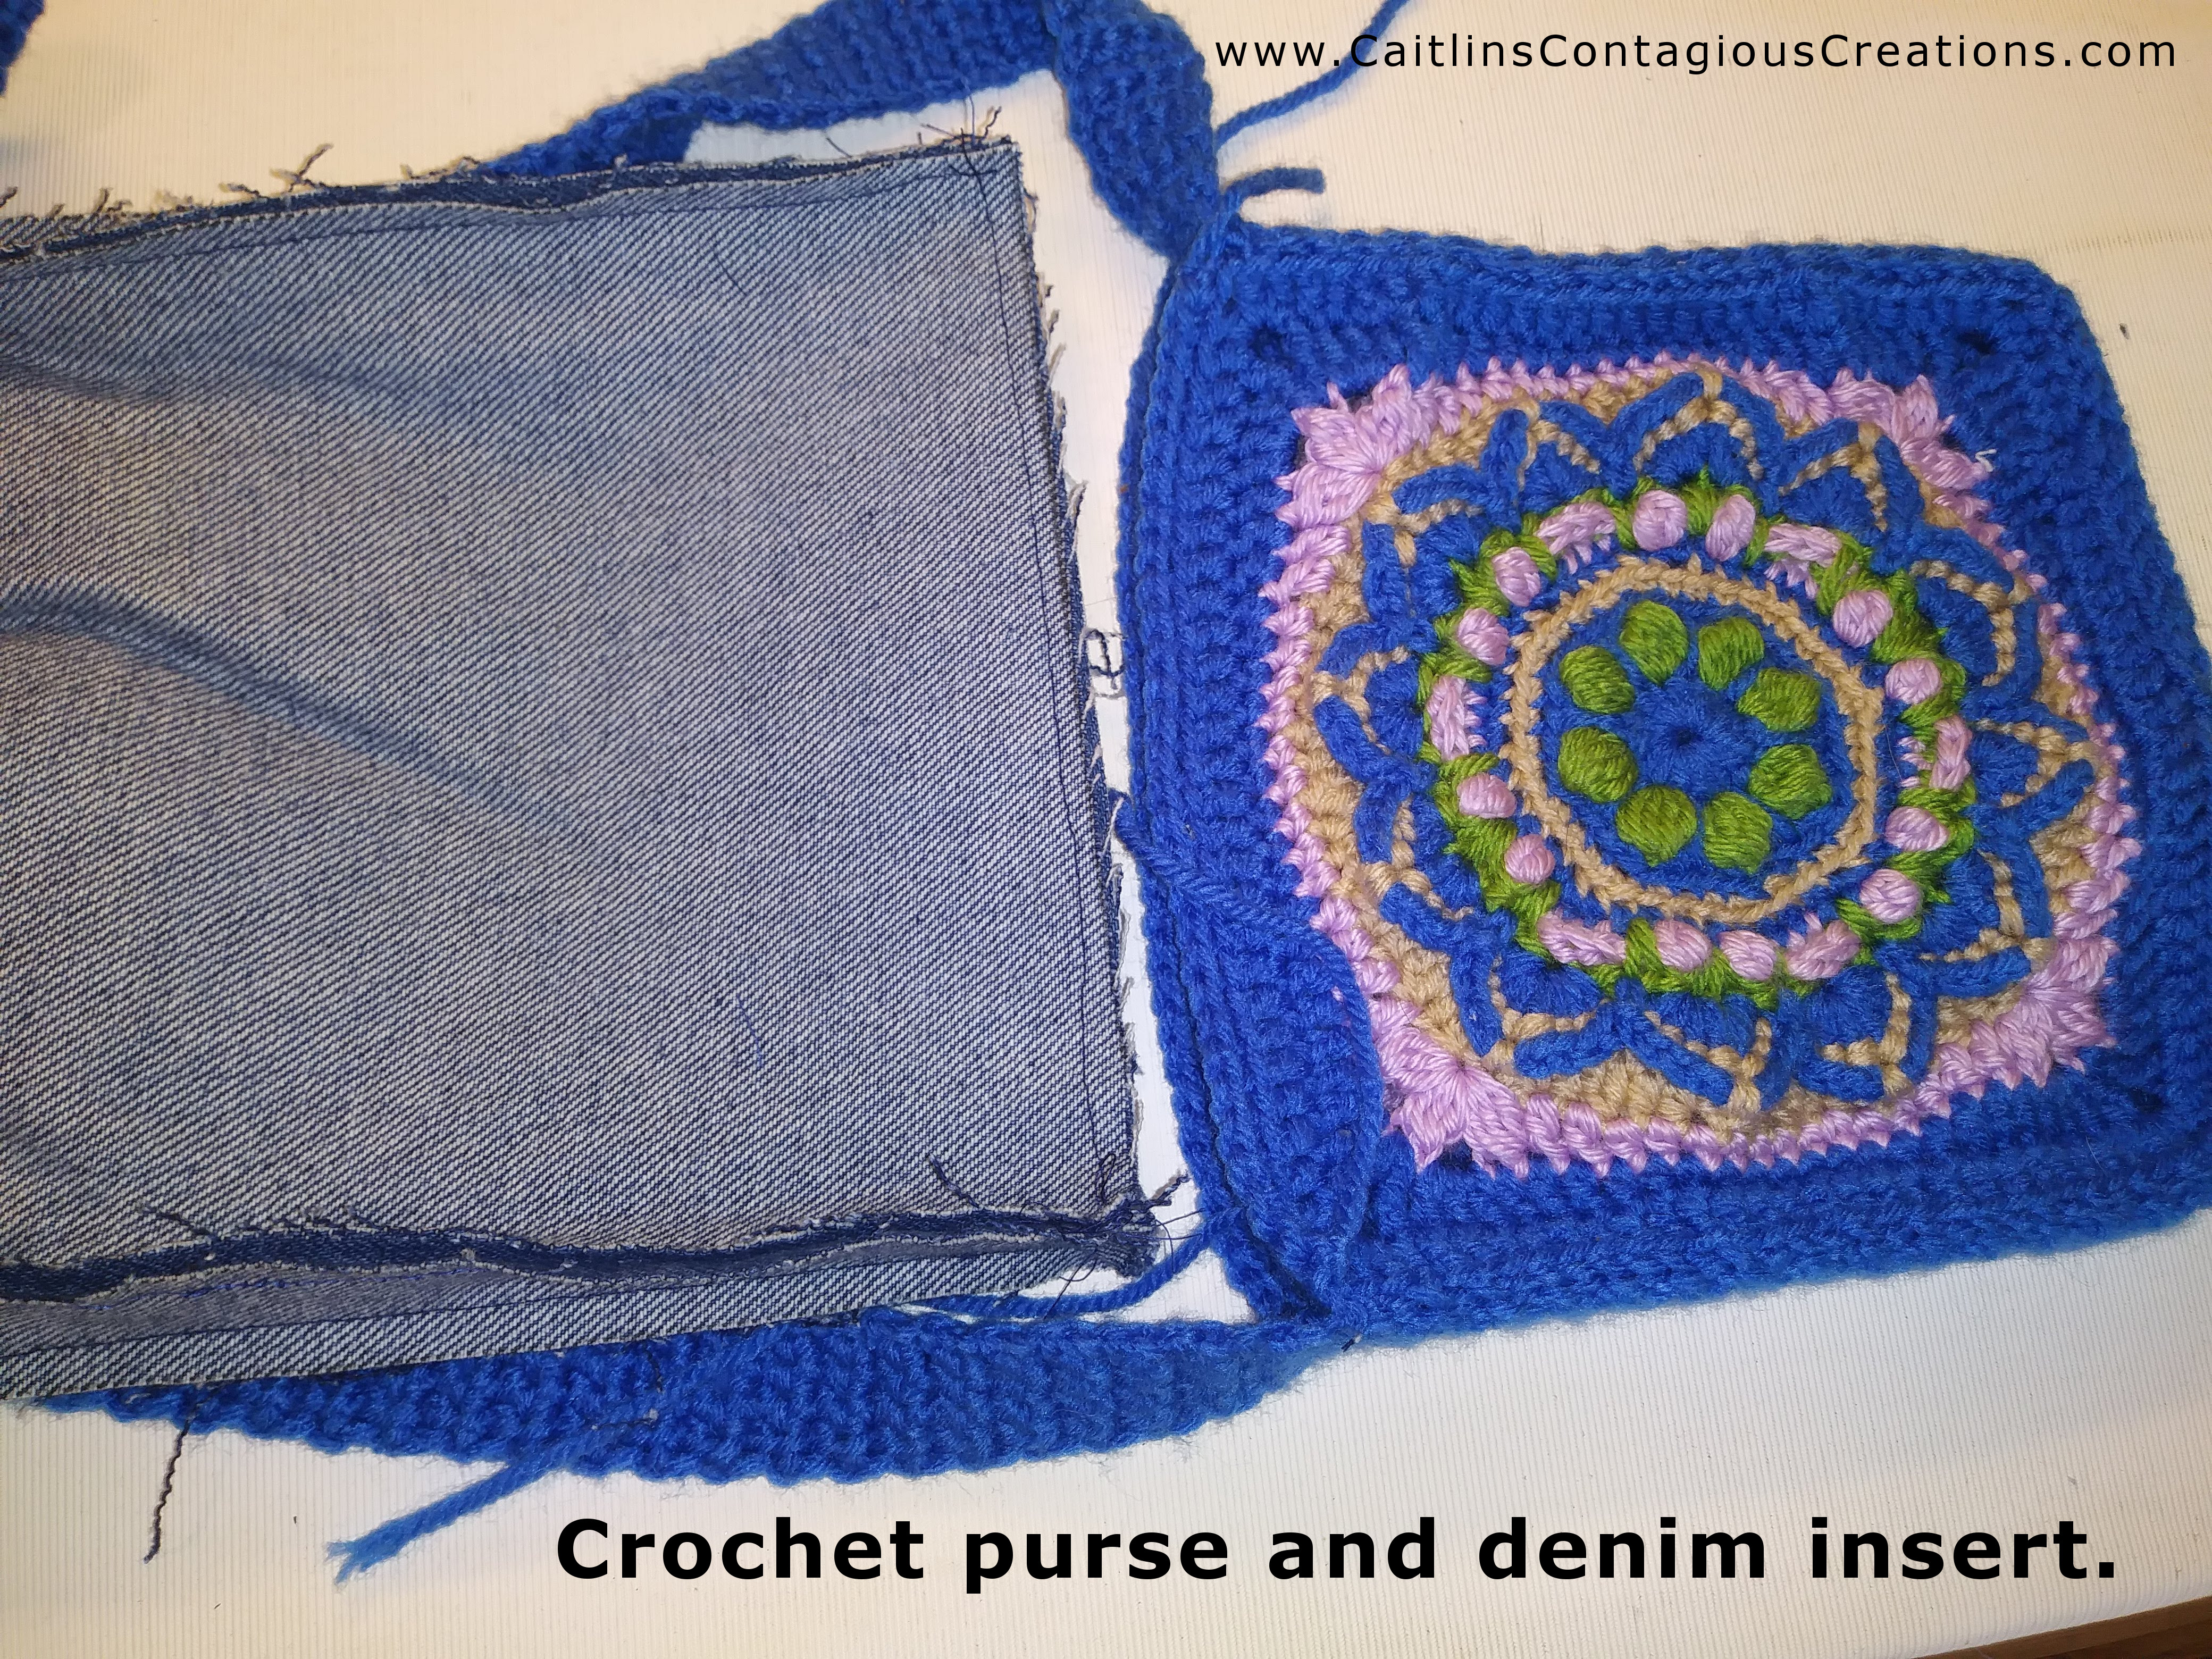
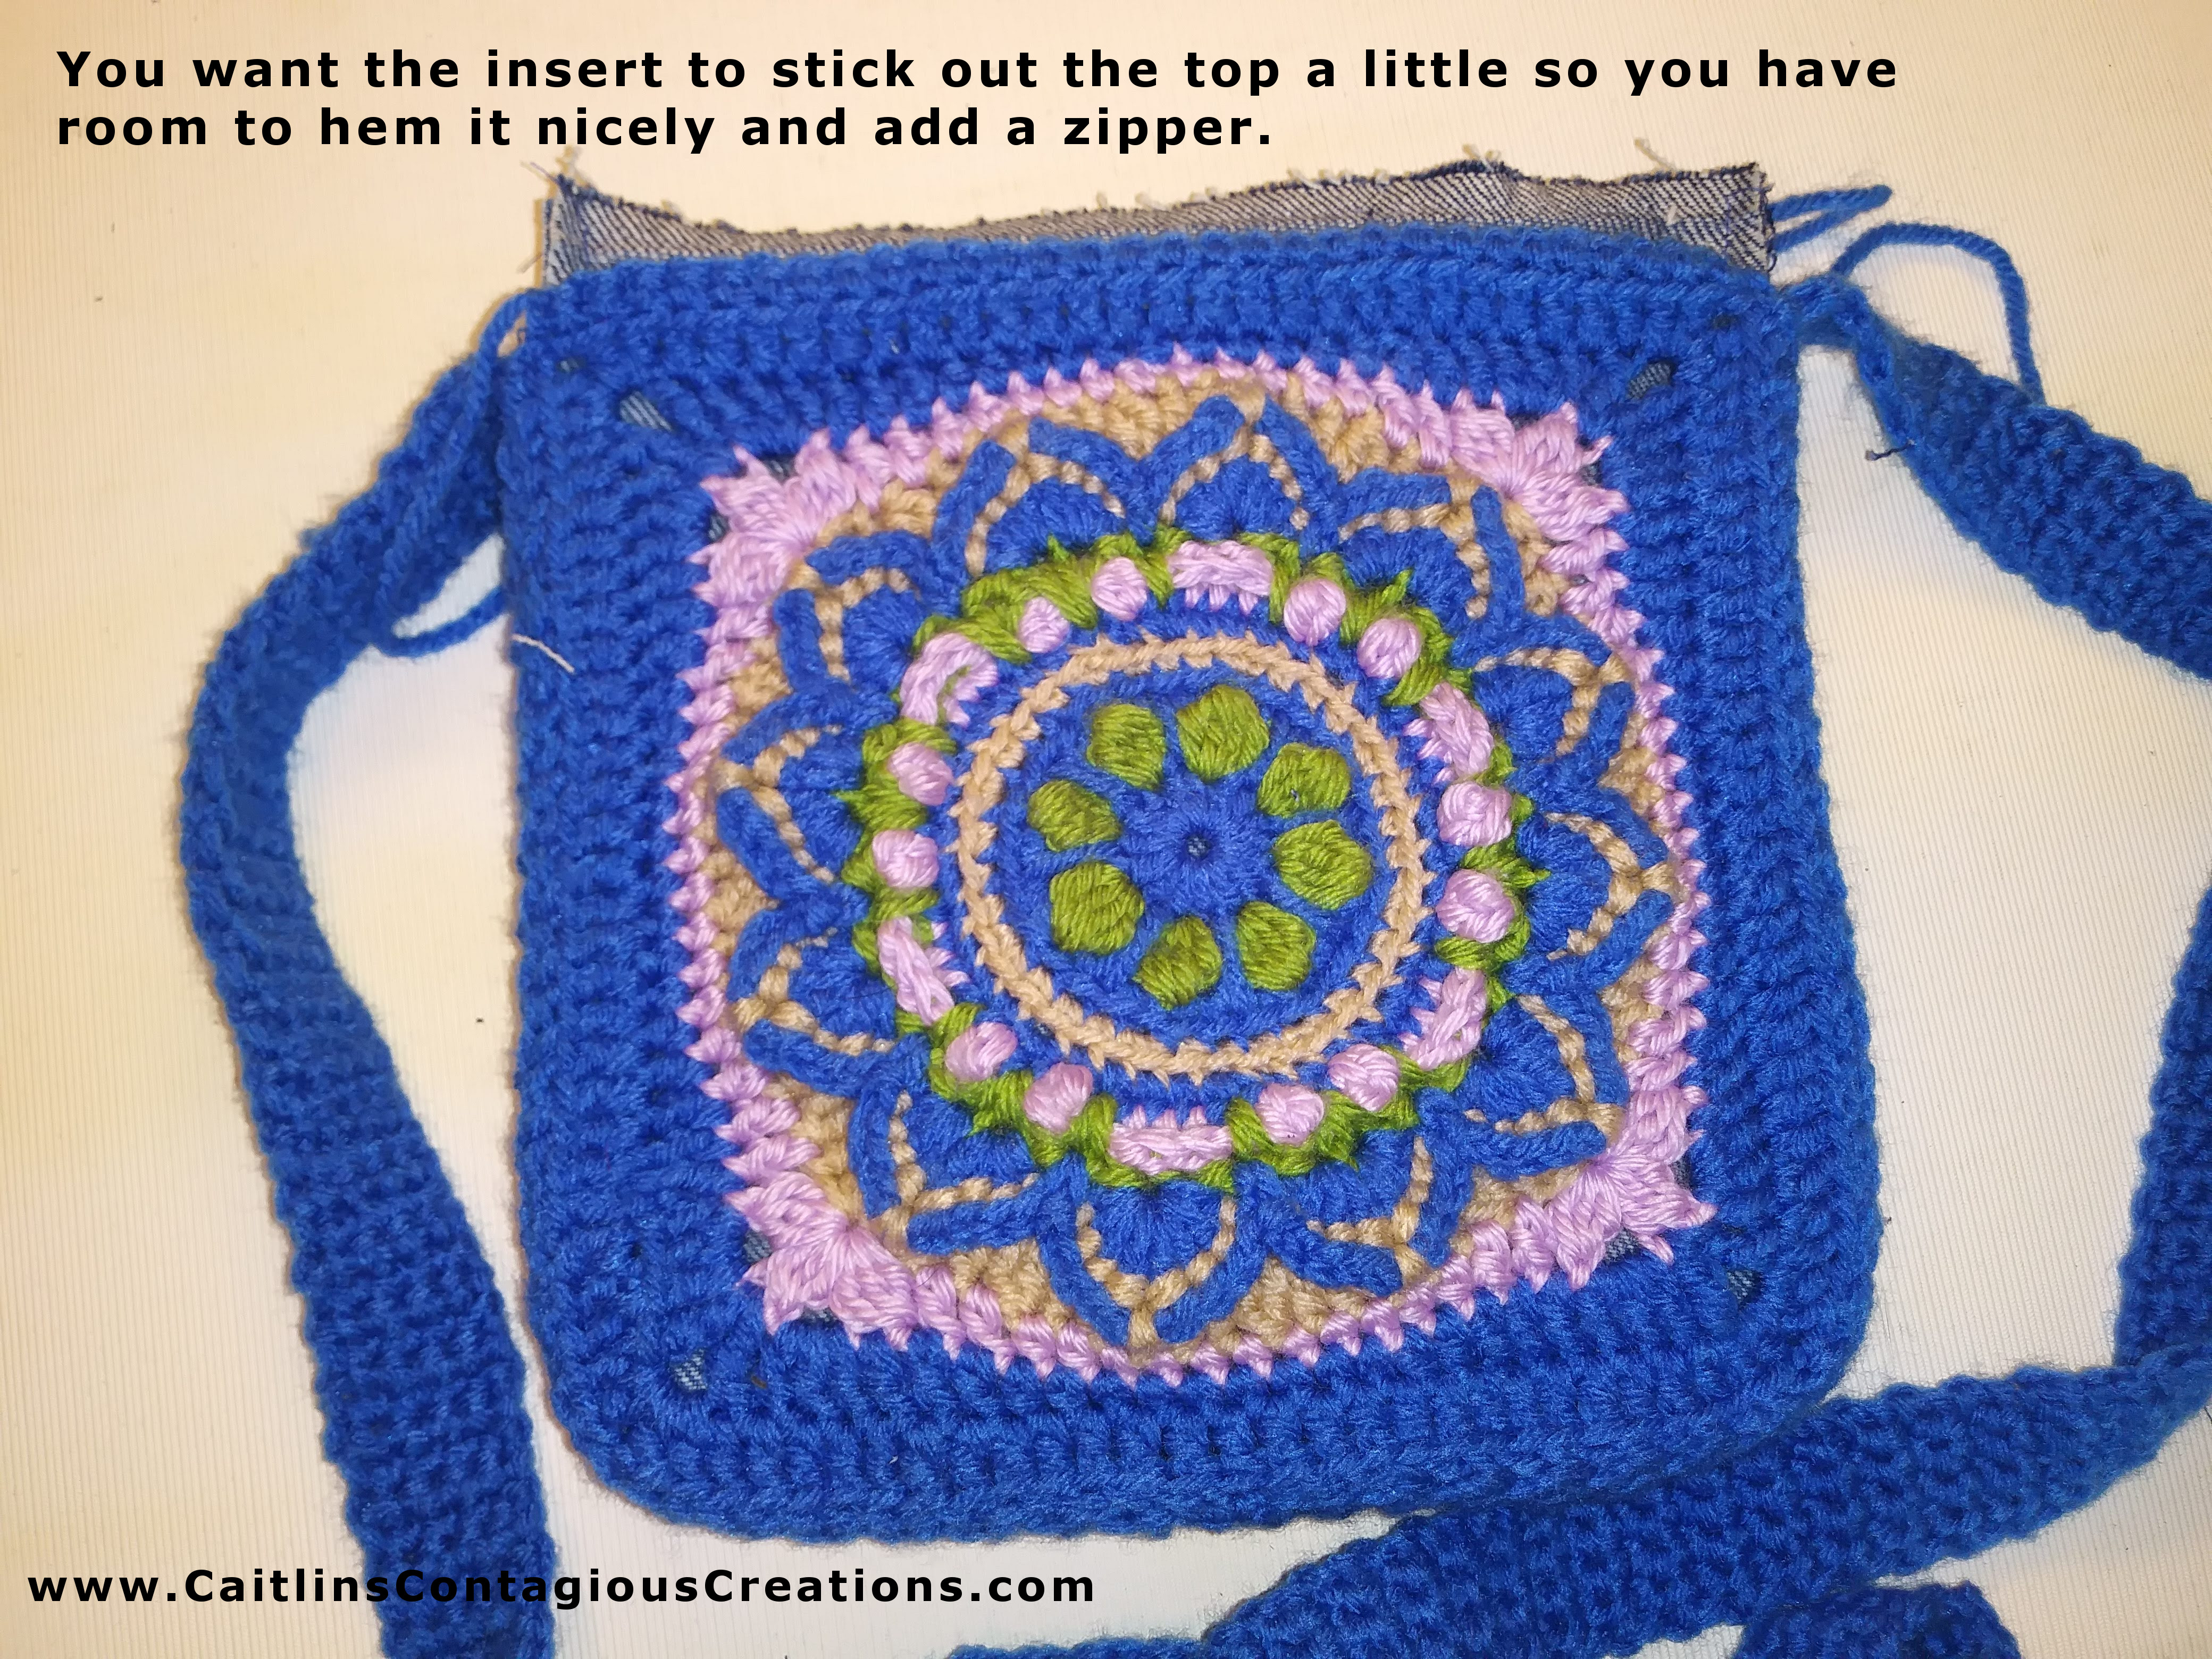
Success! That little bit of fabric sticking out the top of the crochet purse is perfect because you want to have a little extra fabric to be able to fold the fabric to make a nice seam along the zipper.
Adding the Zipper
Once the lining was ready to go inside the purse the next thing is to add the zipper to the lining. I chose a blue zipper that closely matched the color of the yarn, and got lucky enough to find an 8 inch one, so I didn’t have to alter it at all to have it fit nicely inside the purse… You don’t want one that is too long, but better to get a long one and shorten it than to have one that is too short!
The first thing I did was fold the top of the lining over to create a nice outside edge of the fabric and then I used my machine to stitch it to the zipper. Once I had both sides of the top of the lining attached to a side of the zipper I then stitched the crochet shell to the zipper and attached lining. I focused on the long sides, and left the short sides un-sewn. This is because we still have to add the handle!
Lining the Purse Handle
The first thing I did when preparing to line the handle is sew the two handle lining denim pieces together, along the short side. This will result in one REALLY long piece of denim (feel free to use 1 piece if you can find a spot on your chosen jeans that is long enough to accommodate the full length of the handle, plus an inch or two for seams.
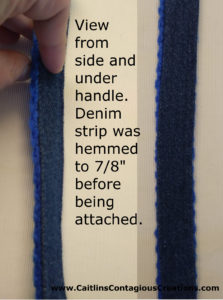
Once the handle pieces were sewn together, it was necessary to hem the pieces to make them fit inside the strap’s 1 inch length. I folded the pieces so they were 7/8 inch wide and hemmed both sides up the strap so the edges of my strap were nice and even. I then used my Brother sewing machine (a brand I absolutely love!!!) to sew the denim strip to the crochet handle.
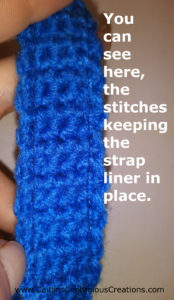
When you are sewing the denim strip to the handle of the purse make sure you don’t stretch the crochet handle as you are sewing (it is very easy to do, and you won’t realize that you don’t have enough denim strip before it is too late (then you have to go back and rip out all those stitches!! Ugh!!)
Make sure you sew both outer edges so your strap doesn’t flap around!
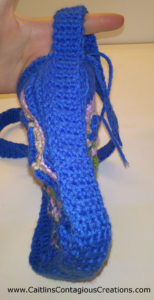
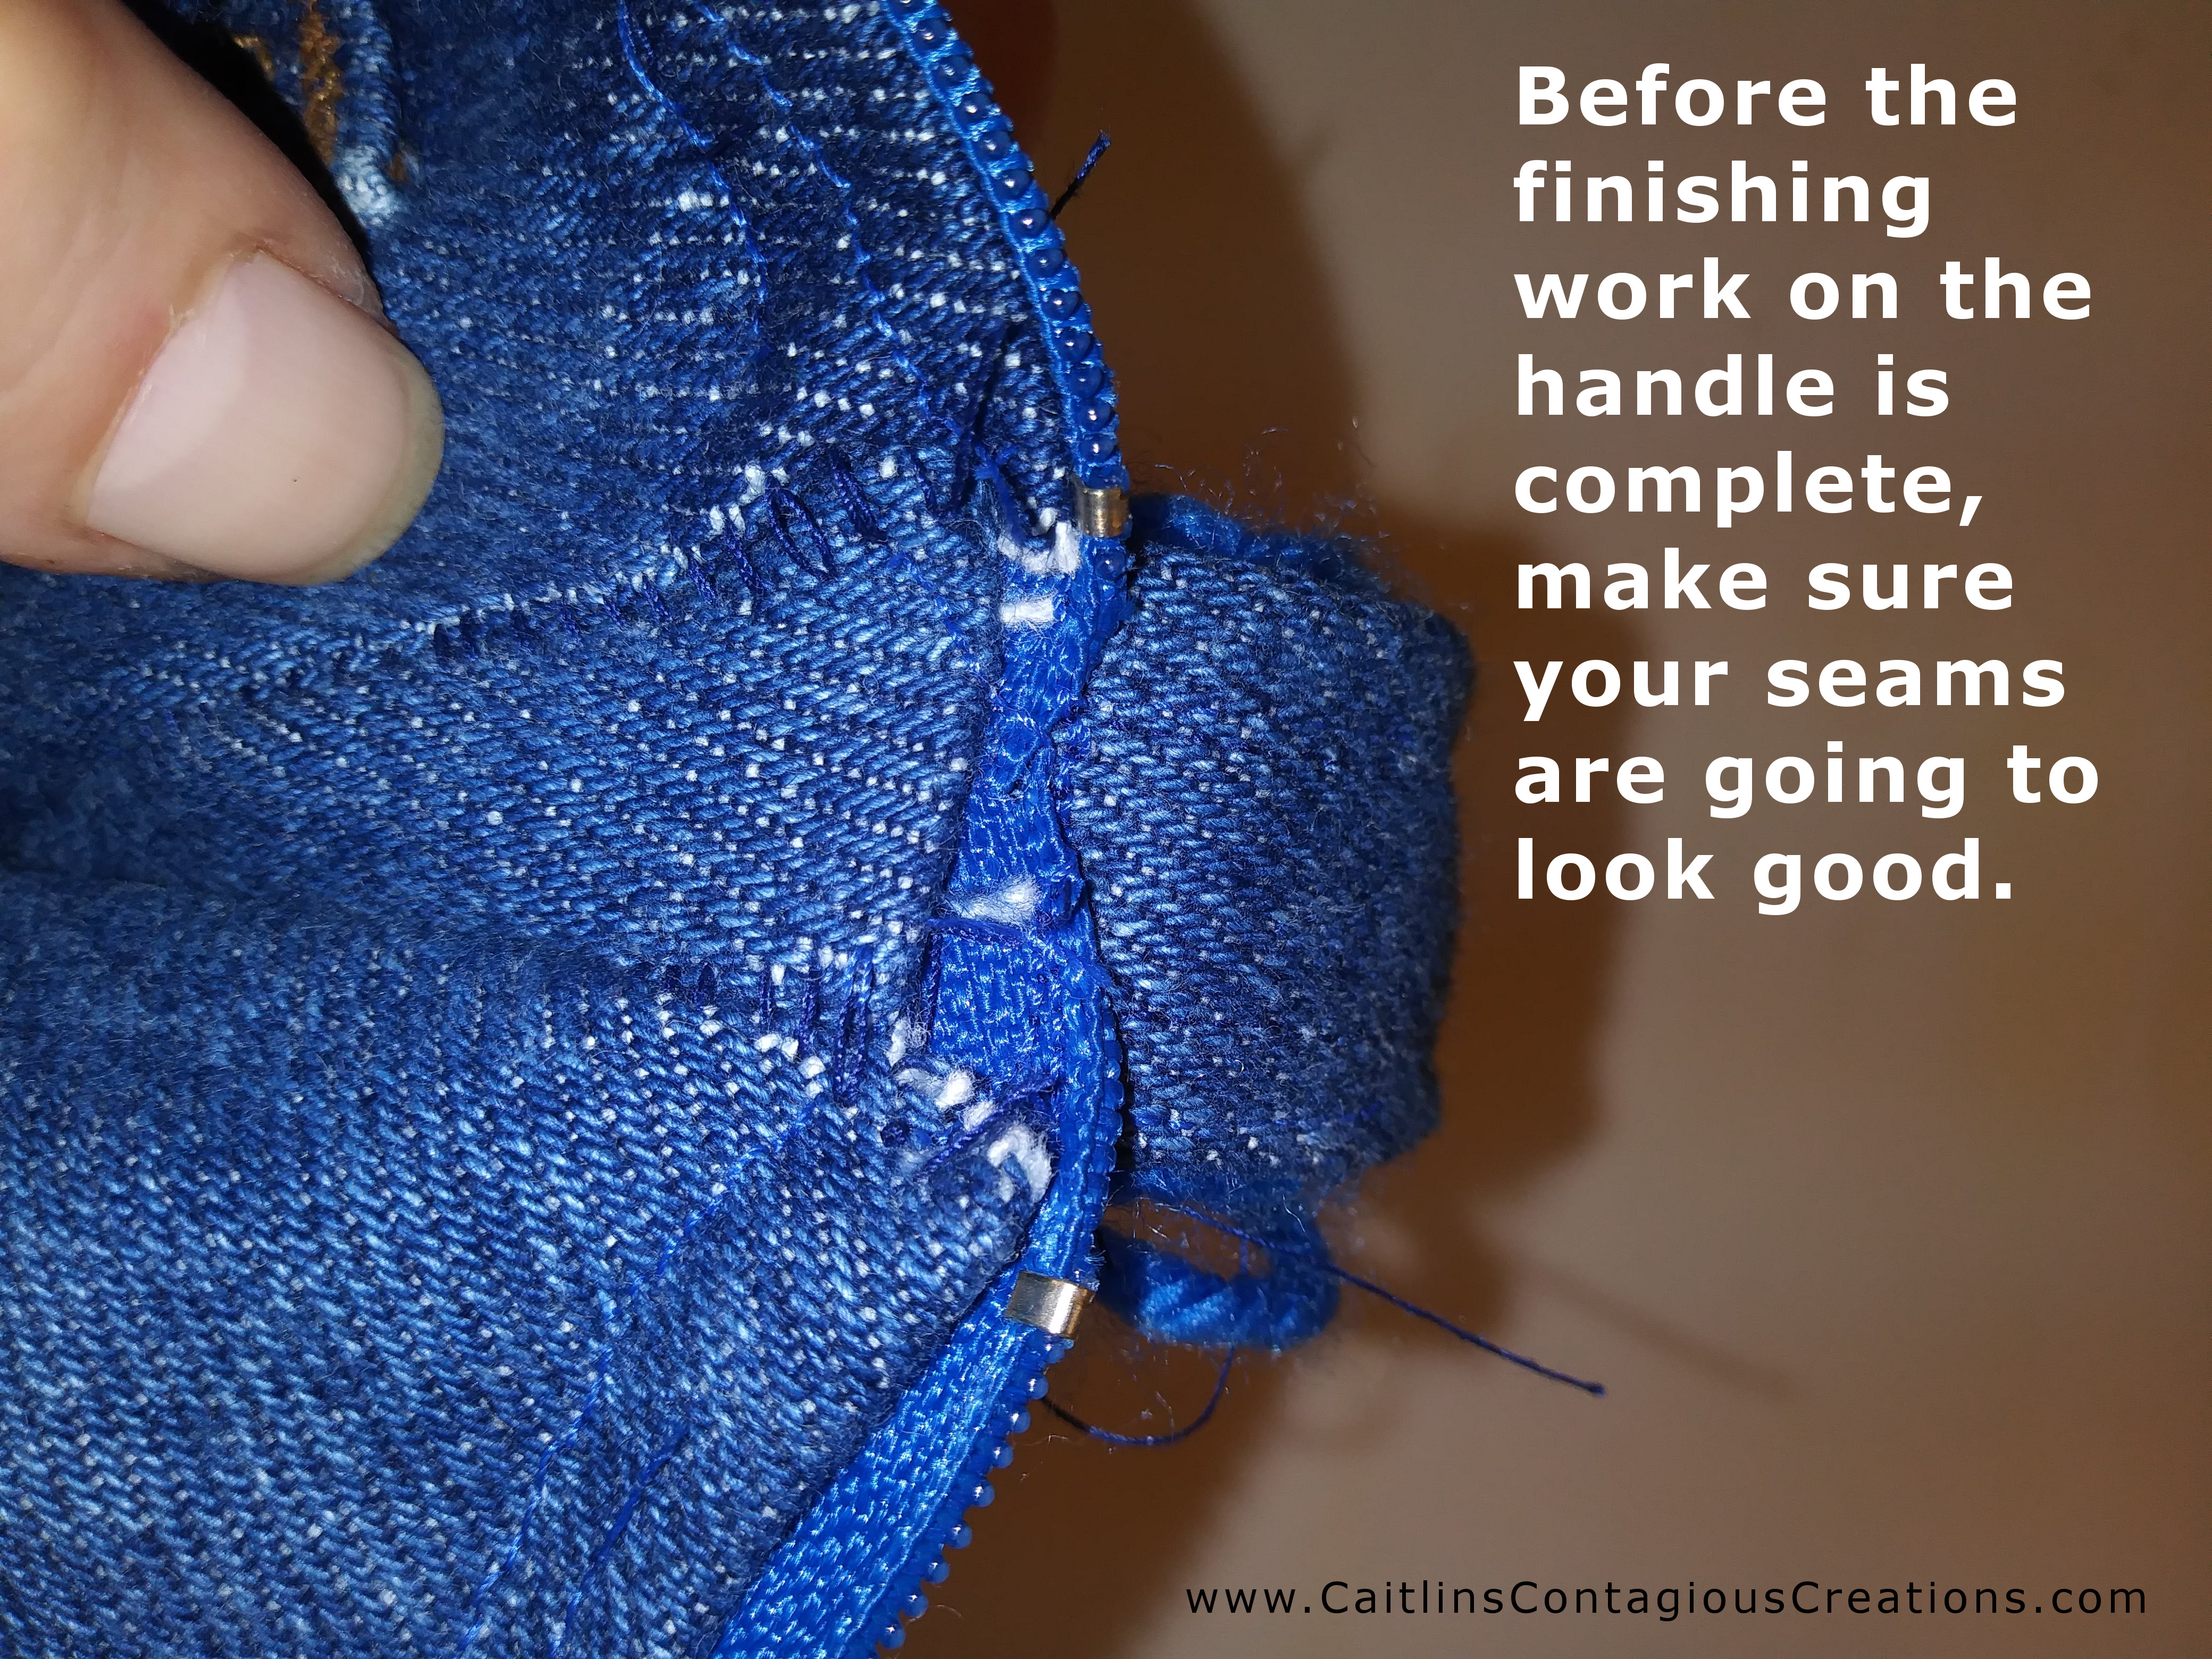
You want to sew the handle lining in place until you get ALMOST to the end of the strap. Before you sew up the short ends inside the purse (as pictured below) you want to make sure the ends of the zipper are tucked down inside and everything is folded so it will seam nicely when you do sew it up.
Finishing Touches
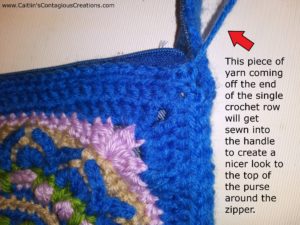
One of the last things to be done is to sew those long pieces left on each end of the added row of single crochets into the strap. You will notice after doing so that the edges look more finished.
After all your sewing is done and the lining is in place take a look to make sure there are no stray threads or yarn pieces that are coming off your project. I also had to make a few hand stitches to completely close up everything between the lining and the crochet shell.
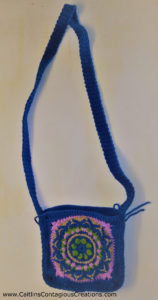
And Then… Viola! A Beautiful Purse
This purse is the perfect size (I’m not really a fan of huge purses… too much room to loose stuff in them) for going out and not needing everything you own to be with you.
I love this purse idea because it is so versatile and can really be made to whatever you desire. Use whatever square pattern you like, and whatever jeans or other material you have laying around… I have a striped pair of kid’s shorts that I cannot wait to use for another of these with even more color in it!
Let me know what you think of this (very involved but worth it) project! I’d love to hear all the different ways you can think to alter this purse and come up with your own unique creations! Please tell me all about it in the comments section below!
Please share and pin this post so others can enjoy it too and you can easily find it again 🙂
Keep Creating!


Speak Your Mind